Do you want fresh greenery in your home but don’t have green fingers? No problem! Modern, easy-care houseplants are the perfect solution for anyone who has little time but doesn’t want to do without stylish decoration. With the right plants, you can create a cozy, feel-good atmosphere in no time at all – without the stress of watering or complicated care.
Sansevieria
The Sansevieriaalso known as mother-in-law’s tongue, is one of the absolutely indestructible plants. You can even forget about it for two weeks – it will still look great. Its modern, upright growth fits perfectly into minimalist interiors.
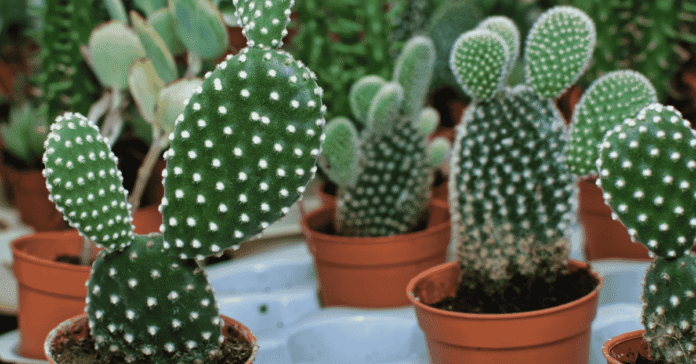
Mickey Mouse Cactus
The spherical plant bodies are strongly reminiscent of the face and ears of the famous cartoon mouse. The Goldopuntia looks funny with its up to ten centimeter long limbs and can even produce yellow flowers in a pot. Give it a nutrient-rich substrate and an airy environment and, above all, don’t be too strict with watering.
Goldopuntia, also known as Mickey Mouse cactus, loves dry warmth. Photo: IMAGO / Depositphotos
Ferns
Ferns are real miracle plants because they do a lot for the indoor climate. Just give them a shady, preferably moist spot and they will thank you with bushy growth and beautiful greenery – a place in the bathroom would be ideal. Spray and water your fern regularly, but avoid waterlogging at all costs, otherwise there is a risk of mold.
Schefflera
The Schefflera is one of the Rays Aralia and is also known as the umbrella plant. It prefers a bright location without direct sunlight and mild to warm temperatures. Make sure that it never gets cooler than 10° Celsius in its location.
Zamioculcas
The Zamioculcas zamiifolia (short: lucky feather) shines with glossy, dark green leaves. It gets by with little light and only needs water every few weeks. Perfect for you if you are often on the move or don’t always have your plants in view.
You may also be interested in these articles:
Monstera
If you want a bit more of a statement, then get a Monstera. It grows quickly, is forgiving of care mistakes and really brings your home to life with its large leaves. Combined with a simple pot, it looks particularly modern.
Violin fig
The Ficus lyrata is right at the top of the popularity scale. Beautiful, large leaves are combined with absolute unpretentiousness. Give it a bright location, little water and occasionally remove dust from the leaves.
Pilea – the green trendsetter
The Pileaalso Ufoplant is a real eye-catcher. Its round leaves and compact growth make it a favorite on Instagram. It is also frugal and only needs a little water regularly.
Money tree
The money tree had a somewhat dusty image for a long time, but is right at the forefront when it comes to trendy plants. Undemanding to care for – water it as little as possible – it loves light and warm conditions without direct sunlight.
With modern, easy-care houseplants, you can bring a relaxed urban jungle feeling into your home. Not only do they look good, they are also forgiving of minor care mistakes. Whether you travel a lot, have little light or simply don’t feel like watering every day – you’re guaranteed to make the right choice with these plants.
In addition to care and attention, plants need plenty of water. There is a simple trick for forgetful and busy hobby gardeners: watering plants with a plastic bottle. It’s child’s play and the perfect solution when you’re on vacation and don’t have time to water your plants.
Water dispenser for plants made from a PET bottle
Immediately after planting, flowers, vegetable plants and kitchen herbs are particularly thirsty. To water the plants evenly without drowning them, the following trick with a plastic bottle has proven to be effective.
Material list for the water dispenser
Plastic bottle (1 or 1.5 liters)
Cutter knife
Screwdriver or ice pick
Lighter
How to build the water dispenser
Watering plants with a plastic bottle: Some skill is required. Photo: FUNKE Digital
The choice of plastic bottle is not entirely unimportant: it’s best to use a PET bottle made of soft plastic – that way you can cut it to size more easily.
Cut off the bottom of the plastic bottle with the cutter knife. To avoid cutting yourself, you should warm the cut edge with a lighter afterwards.
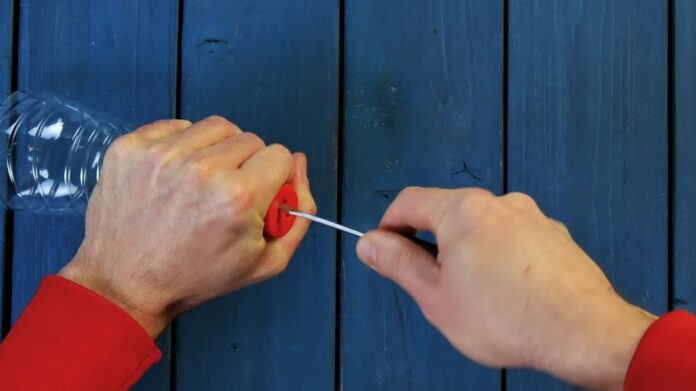
Heat the tip of the screwdriver with a lighter and poke a few holes in the plastic lid. Alternatively, you can use an ice pick.
Screw the lid onto the bottle and place it upside down in the potting soil. Fill it with water – and you’re done!
The advantage of this trick is that the plant only draws as much water as it needs. This prevents drying out and overwatering. This trick is ideal for plants with a high water requirement such as tomatoes or zucchinis.
Hot tipEven if you want to water your lawn, a plastic bottle is a cheap alternative to expensive sprinklers. All you need is a PET bottle, some insulating tape and a garden hose.
Did you know that you can easily make old soil fertile again – without any chemicals? Instead of throwing it away, we’ll show you an ingenious trick for turning depleted soil back into nutrient-rich soil with home remedies and little effort. Whether for balconies, gardens or potted plants: These tips will save you money and do something good for the environment. How to make old soil fertile again and ready for new plant growth!
If you try the following trick and recycle old potting soil, there are two things you should bear in mind:
You should only reuse soil from healthy plants so that the new plants are not damaged.
Of course, the soil must not be moldy.
Photo: Cahya – stock.adobe.com
Reuse old potting soil with a trick
Preparation
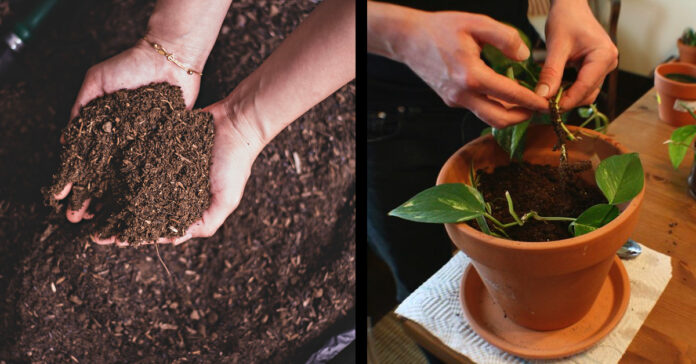
Before you can get started, you need to loosen up the old soil and remove any root fragments. Then it’s time to tackle the main problem: used potting soil is depleted. To make it nutrient-rich again, the first thing you need is biochar as a nutrient reservoir.
Make your own biochar
You can make charcoal yourself by charring dry logs, branches, sticks and leaves, for example. A fire bowl, a fireproof barrel, a kiln (a type of funnel) or an earth con-tiki (a special pit) are suitable for this.
To get the fire going, first light a few small pieces of wood or branches. Then gradually add the material you want to char. Each time, wait until a white layer of ash has formed before adding new fuel. Finally, douse everything with water and leave to cool. If you want to save time, you can of course also buy ready-to-use charcoal.
Other ingredients: Parts of plants or compost
The biochar is an ideal nutrient store, but without nutrients it won’t do you any good. You therefore need another source of nutrients: Shredded plant parts or compost, for example, are suitable for this.
Sauerkraut juice to activate
The last important ingredient you need is sauerkraut juice. It contains microorganisms that decompose the plants or compost and convert them into nutrients.
Homemade fertilizer
Mix the three ingredients (biochar – plant residues or compost – sauerkraut juice) into the first third of the old soil. Finally, moisten your homemade fertilizer and spread it over the remaining two thirds of the old soil.
Here you will find external content from Flickr that is recommended by our editorial team. It complements the article and can be displayed and hidden again with one click.
I agree that this external content may be displayed to me. Personal data may be transmitted to the provider of the content and third-party services.
Another tip: To make the most of the potential of potting soil, you should use new potting soil primarily for high-yielding plants (e.g. potatoes and tomatoes), which extract a lot of nutrients from the soil. You can use old soil preferably for medium- and low-yielding plants (e.g. carrots, radishes, lettuce).
The parrot plant, also known as Asclepias syriacawith its eye-catching flowers not only looks attractive, but also has a reputation as a particularly robust garden plant. Nevertheless, it has been banned in Germany for some time. You can find out why this is the case and what you should know about it here.
What exactly is the parrot plant?
The parrot plant is originally from North America and is often used as an ornamental plant due to its eye-catching, colorful flowers. It is undemanding and hardy, which makes it popular with amateur gardeners.
You may also be interested in these articles:
The ban on the parrot plant in Germany is due to its highly invasive nature. It spreads rapidly and displaces native plant species. This endangers the natural ecological balance. Due to its extreme resilience, it is difficult to combat.
A threat to biodiversity
The parrot plant grows extremely quickly and forms dense stands. This prevents other plants from getting enough light, nutrients and water, which leads to a decline in biodiversity. Native plant species, insects and animals that depend on these plants suffer from the spread of the parrot plant.
That’s why the parrot plant is banned. Photo: IMAGO / Karina Hessland
Consequences of disregarding the ban
Anyone who cultivates or distributes parrot plants in Germany must expect severe penalties. The fines vary depending on the federal state, but can be up to 50,000 euros in serious cases. It is therefore essential that you find out about the applicable regional regulations.
Alternatives to the parrot plant
If you are looking for beautiful and ecologically harmless plants for your garden, there are many attractive alternatives. Native plant species such as yarrow, lupins or coneflowers also provide a variety of colors and support native wildlife.
What to do if you already have parrot plants?
If you already have parrot plants in your garden, you should remove them as quickly as possible and dispose of them properly. It is important that all parts of the plant are carefully removed, as even small remnants can lead to them spreading again.
The parrot plant is rightly banned in Germany due to its invasive properties. By consciously choosing native alternatives, you can still enjoy a colorful and diverse garden that also supports native flora and fauna.
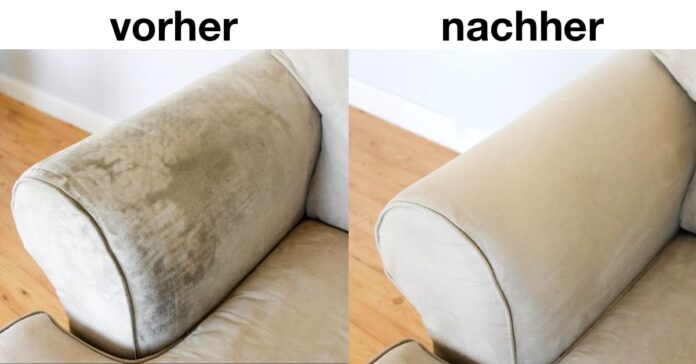
There’s nothing better than lounging on the sofa after a long day at work, switching on your favorite TV series and indulging in sweets without a guilty conscience. But no sooner have you made yourself really comfortable than the chocolate slips out of your hand and leaves an unsightly stain on the upholstery. Over the years, your couch has to put up with a lot – including all kinds of stains. But don’t worry, find out tips and tricks here on how to clean your sofa easily!
To keep your favorite spot in the living room looking pretty for as long as possible, you should clean the sofa regularly. In most cases, this does not require expensive, professional cleaning. Both home remedies and inexpensive care tips will help you keep your sofa clean. Steam cleaners or vacuum cleaners are suitable for larger areas or a general refreshing of the upholstery.
Cleaning the sofa – all tips at a glance
Here you will find external content from Pinterest that is recommended by our editorial team. It complements the article and can be displayed and hidden again with one click.
I agree to this external content being displayed to me. Personal data may be transmitted to the provider of the content and third-party services.
Sofa vacuum regularly or wipe off
Baking soda: good against stains and odors
Washing powder: simple stain remover
Spirit: against grease and waterproof ink
Shaving foam: cleans the fibers
Vinegar: provides a fresh scent
Imitation leather with washing-up liquid clean
Smooth leather with baby oil care
Animal hair with Window squeegee remove
Steam cleaner Only use on a low setting
Basic cleaning
Vacuum your sofa at least once a week on the lowest setting. This prevents dust from settling. Use a soft cloth to remove dust from leather and artificial leather sofas.
Smaller stains that have not yet been absorbed should be dabbed off as quickly as possible. Never rub fresh stains! Then wipe the stain away with lukewarm water and a soft cloth.
Cleaning the sofa with home remedies
Many stains on upholstered furniture can be easily removed with household remedies that everyone has at home. The most popular home remedies for cleaning the sofa are
Baking soda or baking powder
Washing powder
Spirit or window cleaner
Shaving foam
Clean sofa with baking soda
You can easily remove stains from your upholstered sofa with baking soda or baking powder. Best of all, this popular household remedy also absorbs unpleasant odors, leaving your sofa smelling fresh again.
This is how it works: For damp stains, spread the baking soda directly on the spot and leave it to work for a few hours. Then vacuum it off. If the stain has dried or is particularly stubborn, work the baking soda in with a soft sponge and lukewarm water.
Refresh the couch with washing powder
Washing powder not only cleans your laundry, but also your sofa. Perfumed washing powder provides a pleasant fragrance.
How it works: Rub the washing powder in carefully with a damp sponge. Do not press too hard, otherwise white residue will form. Then rinse the sponge well and dab the affected area until the washing powder has been completely removed.
For difficult cases: white spirit
Spirit and window cleaner are great household remedies, both for cleaning greasy upholstery and for removing Edding or ballpoint pen ink.
How it works: Spray a thin layer of the spirit or window cleaner and dab with a soft cloth. Repeat several times if necessary. As spirit is volatile, no residue remains.
Caution: Spirit and window cleaners are not suitable for every material!
Clean sofa with shaving foam
Shaving foam without dye is a quick and effective way to remove stains and greasy spots from textile or microfiber sofas. And shaving foam is always cheaper than professional cleaning.
How it works: Spray shaving foam onto the stain and leave to work for several minutes. For deep-seated stains, work the shaving foam in with a soft brush. Then simply vacuum.
You may also be interested in these articles:
Remove odors
Sofas can smell musty over time. You already know a household remedy for the odor: baking soda or baking powder. Sprinkle it generously over the upholstery and leave it to work overnight. Then vacuum on a low setting.
Another household remedy to remove odors from the sofa is a mixture of water and vinegar. Mix distilled water with clear vinegar in a ratio of 2:1. Pour the mixture into a spray bottle and spray your couch with a damp mist.
Cleaning artificial leather with washing-up liquid
You only need normal washing-up liquid to clean artificial leather covers. One or two drops of washing-up liquid in 5 liters of water is enough. Then wipe the stain away with a soft cloth and the artificial leather will shine like new again.
You can carefully remove stains on rough artificial leather with a dirt eraser. Don’t have one at home? No problem, you can easily make your own eraser!
Cleaning a leather sofa
Rough leather types such as nubuck or suede should be cleaned as much as possible. not with water. To remove stains, it’s better to use a stain eraser. It’s also worth taking a look in the shoe care department!
Impregnated smooth leather, on the other hand, is easier to care for. A soft cloth, distilled water and a splash of washing-up liquid are usually enough to clean smooth leather sofas. A diluted vinegar solution also helps to remove grease stains from the leather sofa.
Tip: To make dull leather shine again, rub it gently with a little low-acid baby oil – this will also fade minor scratches.
Window squeegee against animal hair
Pet hair on the sofa can be removed with a window squeegee. The rubber lip magically attracts the hair. You can also use a damp rubber glove to get rid of pet hair from the sofa.
Cleaning the couch with a steam cleaner
In some cases, it may be worth buying a steam cleaner or washing vacuum cleaner. For example, if you are allergic to house dust. Steam cleaners and washing vacuums clean the sofa really thoroughly and deep into the upholstery. However, leather and microfiber sofas are often too sensitive for this.
This is how it works:
First vacuum the sofa with the vacuum cleaner on the lowest setting.
Set the steam cleaner or washing vacuum cleaner to the lowest setting so that only a small amount of moisture is created.
If necessary, help with a microfiber cloth to work the steam in well.
Finally, wipe the sofa dry with a soft cloth.
These tips will make you want to lie down on the sofa and enjoy your evening, won’t they?
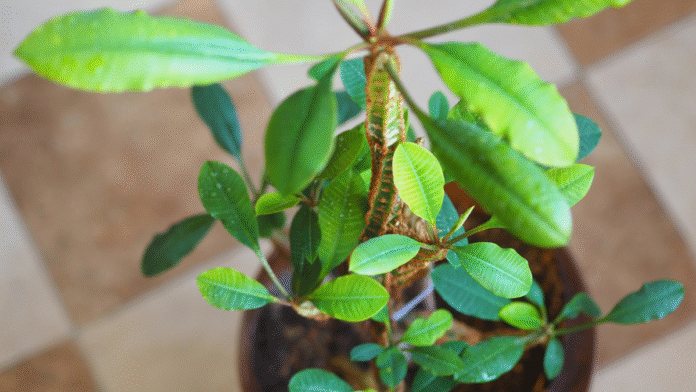
The Spitting palm (Euphorbia leuconeura)also known as Madagascar Jewel is an exotic houseplant that impresses with its unusual appearance and easy-care properties. But beware: the plant is poisonous and requires special attention. Find out here how to plant, care for and propagate it properly.
1. planting the spit palm – the right substrate and the ideal location
As the spit palm comes from the tropics, it prefers warm, bright locations. If you organize a window location with plenty of light, it will thank you with rapid growth. If you want to keep it small and compact, choose a north-facing window!
Use a well-drained substrate to avoid waterlogging. A mixture of Cactus soil and sand is particularly suitable. The plant pot should have a drainage hole to drain off excess water.
Perfect plant for beginners: spit palms are very frugal and easy to care for. Photo: Stephan_x86 – stock.adobe.com
2. care of the spit palm – water, fertilizer and overwintering
The spit palm needs very little water – if you water it, it’s fine, if you forget, it won’t give it to you because it stores the water in its fleshy trunk. Moderate watering is sufficient in summer, while it should be kept almost dry in winter. Waterlogging should be avoided at all costs, otherwise the roots will rot.
During the growth phase from spring to fall, water your Madagascar jewel every two to four weeks with a cactus-specific fertilizer. It does not require fertilization in winter.
3. propagation of the spit palm – seeds or cuttings?
You’ve probably already wondered about the unusual name, which comes from the special way in which it propagates. The spit palm propagates mainly via the seeds it throws out. The seeds can germinate in slightly moist soil at temperatures of around 25 °C. High humidity is important, which can be improved with a plastic cover.
4. caution: the spit palm is poisonous!
All parts of the spurge plant contain a poisonous, whitish sap that can cause skin irritation. So if you have children or pets or even both, be careful – keep the plant out of reach!
The spit palm is an easy-care and decorative houseplant that loves warmth and thrives with minimal effort. With the right care, it can provide years of exotic flair in your own home. Those who cultivate it successfully will be rewarded with eye-catching flowers and a unique appearance.
Do you know someone for whom no houseplant survives? Then share this article with them now!
Cleaning the oven – just the thought of it puts most people in a bad mood. So much so that many people spend a lot of money on self-cleaning ovens that burn off the dirt or work with steam. However, the latter method can also be carried out with any normal oven.
Cleaning the oven with steam
Cleaning the oven regularly is unavoidable. Because even if you are careful when cooking and baking, grease vapors settle in cracks and hard-to-reach places. Added to this are splashes of sauce, blobs of dough and other stubborn incrustations.
Scrubbing by hand, however, is laborious and often frustrating. Chemical oven cleaners are expensive and harmful to health. A trick with steam can help here: it makes cleaning the oven much easier and prevents stubborn stains from forming in the first place.
In self-cleaning ovens, this process is called hydrolysis. However, it is very easy to carry out yourself.
Photo: Media Partisans/FUNKE Digital
For this you need:
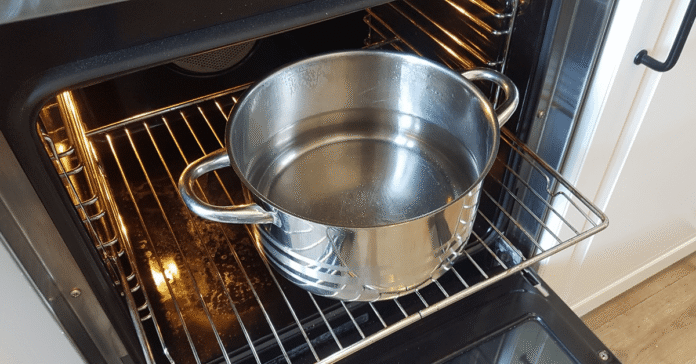
Pot (suitable for oven), casserole dish or deep baking tray
hot water
Vinegar (alternatively: washing-up liquid)
This is how it works:
Preheat the oven to 230 °C. Even better: use the residual heat from the oven immediately after cooking and baking.
Boil the water in the kettle. Fill the pan (or baking dish or baking tray) with the hot water.
Add a little vinegar to the water. This prevents the steam from leaving behind limescale residue. It also increases the cleaning effect of the steam. Don’t worry: you will hardly smell the vinegar afterwards. Alternative: For heavier grease residues, add two squirts of washing-up liquid to the water. However, you should then air out the oven thoroughly.
Place the pan on the lowest shelf of the oven. Let the steam do its work for 30 to 60 minutes. Do not open the oven door.
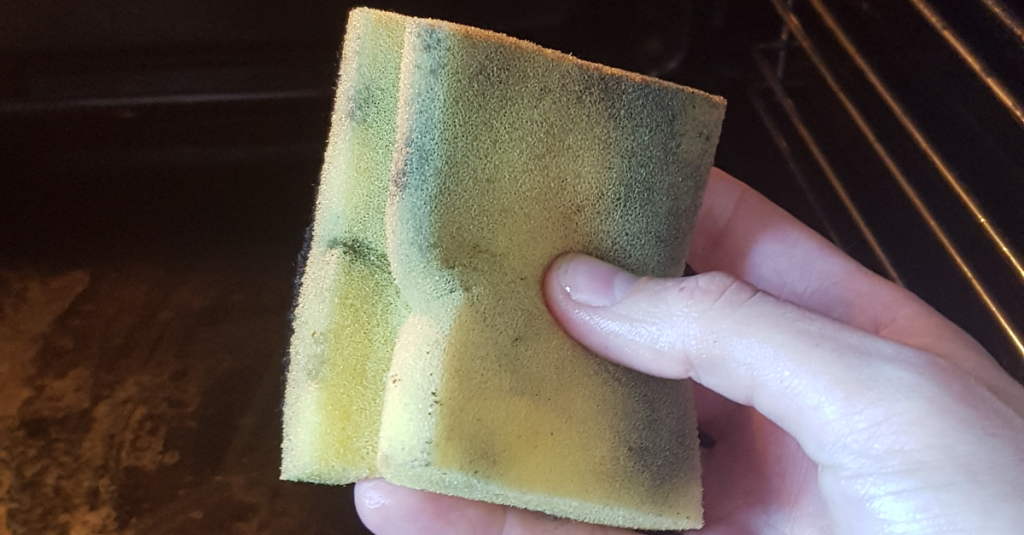
Switch off the oven and let it cool down so that it is only lukewarm. Now you can wipe out the oven with a sponge or kitchen towel.
Photo: Media Partisans/FUNKE Digital
Cleaning the oven with steam: advantages and disadvantages
The method of cleaning the oven with steam is particularly suitable for regular use and for minor soiling. The steam helps to loosen grease and dirt more easily or prevent them from sticking in the first place. This keeps the oven clean down to the last crevice. The best way to do this is to use the residual heat immediately after cooking or baking. This prevents vapors, splashes and stains from burning in and also saves energy.
The Advantages of the steam trick lie in its simple and cost-effective application. Wiping out the oven afterwards is much easier.
The DisadvantageEven with this method, you cannot completely do without wiping. In addition, steam reaches its limits with old and heavy encrustations. In this case, it is better to use one of the home remedies for oven cleaning that we have already presented.
Practical, helpful, easy to use – the trick of cleaning the oven with steam has everything that makes a good life hack.
Surely you know the “Kallax” shelf 🛒 from IKEA (previously it was called “Expedit”). You have to see what this family did with it! On the blog “iron & twine” they have shown how to cleverly save space.
This is the corner of the living room in question. This space is just crying out for a shelf, isn’t it? That’s exactly what the family thought.
The perfect place for a new shelf. Photo: ironandtwine.blogspot.com
With a rough plan and a few measurements in the bag, we went to IKEA. The family opted for three individual Kallax shelves because they are inexpensive and can be used flexibly.
The family has opted for three individual Kallax shelves. Photo: ironandtwine.blogspot.com
But as soon as everything was assembled and placed on the wall for testing, they noticed the mishap: they must have mismeasured. The three pieces next to each other are almost exactly 3 cm too wide and the shelf protrudes beyond the door frame. We can’t leave it like this, everyone agreed.
The shelf is too wide – a solution is needed. Photo: ironandtwine.blogspot.com
You can see how ingeniously the family solved the problem on the next page.
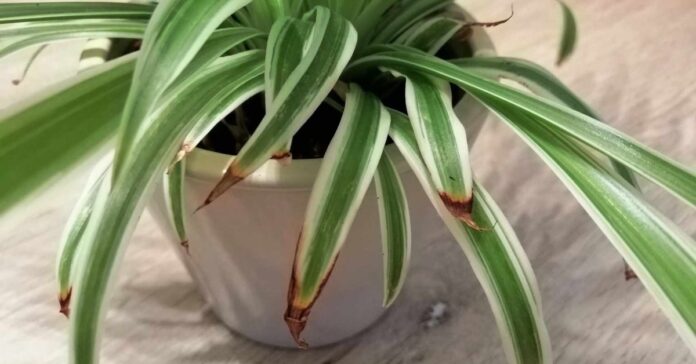
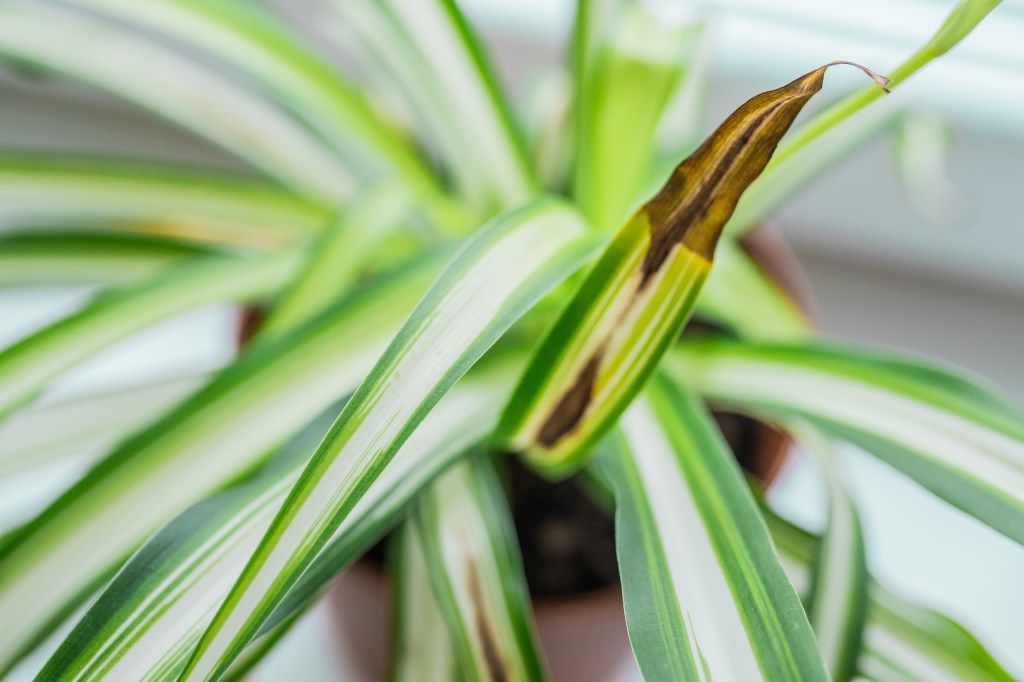
Green lilies are actually easy to care for – because the “Chlorophytum comosum” has few requirements and is therefore also suitable for beginners without green fingers. However, green lilies can occasionally develop brown tips. This detracts considerably from the appearance of this otherwise easy-care houseplant. You can find out what you can do about this and how to care for green lilies properly here.
If the leaf tips of your green lily have turned brown, you have probably done something wrong when caring for it. Here are 5 things to look out for:
The green lily is in the wrong location
Place the green lily in a bright spot near a window, but without direct sunlight. The sun could burn the leaves and cause brown tips.
The leaves of the plant do not hang freely
Make sure that the leaves can hang freely over the plant pot. If the leaves of the green lily hit the ground or the windowsill, this will also cause brown tips. Green lilies should either be grown in a hanging basket or on a shelf where their leaves can hang down freely.
Make sure that the leaves of the green lily can hang freely. Photo: bozhena_melnyk – stock.adobe.com
The temperature is too low
This frugal houseplant feels most at home at a room temperature of 20 °C. If the temperature in the home drops below 10 °C, the green lily will stop growing. During the warm season, the green lily can also be taken outside for a warm summer shower.
Watering mistakes
Make sure that you only water the plant when the top layer of soil is already slightly dry. Excessive watering quickly leads to waterlogging, which the green lily cannot tolerate. This could cause its roots to rot, resulting in the otherwise robust houseplant dying. As a rule of thumb, a sip of water twice a week is enough to prevent the green lily from drying out. It stores enough water in its fleshy roots to survive longer periods of drought.
Tip: If the soil in the flower pot is noticeably dry, this could also be a reason for the brown tips. In this case, give your green lily a lukewarm immersion bath. When no more air bubbles emerge from the root ball, remove the plant from the bath and allow it to drain well before placing it back in the planter.
Errors in watering can lead to brown tips. Photo: Victoria – stock.adobe.com
The air is too dry
You have followed all the care instructions and your green lily still has brown tips? This could be due to the humidity. The brown tips of the shoots indicate that the air is too dry. You can easily solve this problem by spraying the green lily regularly with water.
Reading tip – The best tips for houseplants: Curious pine cone trick saves your houseplants These 7 houseplants survive even in dark rooms These 3 houseplants protect your home from mold
WD-40 penetrating oil has a wide range of household uses and is part of the “standard equipment” in many hobby cellars and workshops. You can use the multifunctional product to remove burnt-on dirt, prevent rust or remove small scratches from car paintwork, for example. However, there are some things that you should never use WD-40 for.
What should you not use WD-40 penetrating oil for?
You always thought WD-40 was an absolute all-rounder? Not quite. You should avoid using the popular penetrating oil in the following areas.
What you should not use WD-40 for. Photo: Wikimedia/ajay_suresh/CC-BY-2.0 (edited)
1. clean toilet or shower
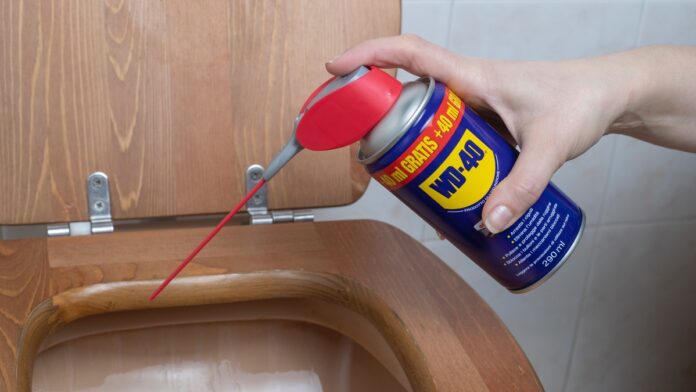
Avoid cleaning your toilet or shower with WD-40 at all costs. The penetrating oil would enter the waste water via the drain and harm the environment. To clean the toilet, it is better to use classic cleaning agents or household products.
2. clean the rubber
The penetrating oil can dissolve or damage rubber. It should therefore not be sprayed onto tires, rubber mats or other rubber parts. Instead, use a special rubber care product.
3. do not use WD-40 as a lubricant
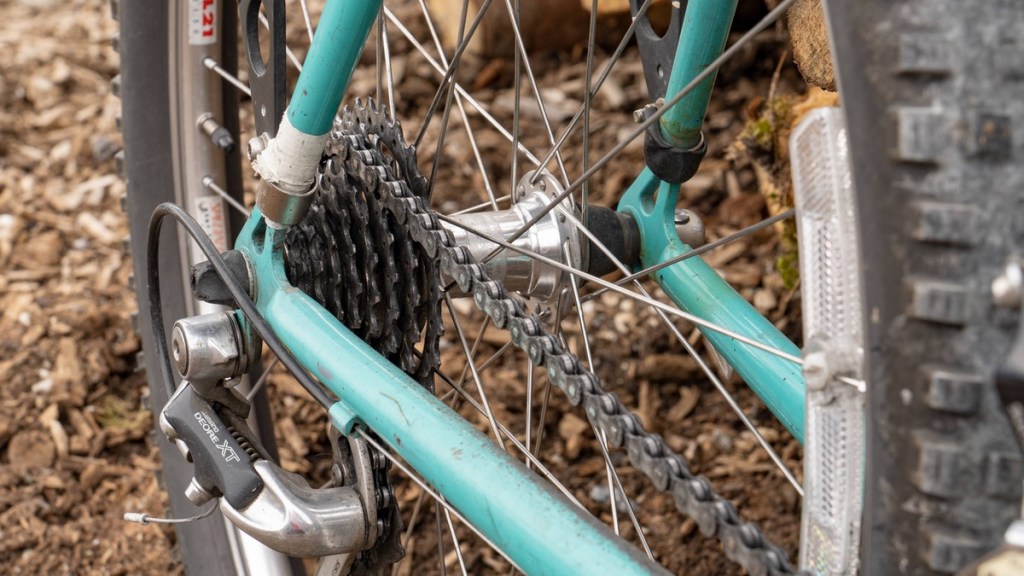
Many people use penetrating oil to make hooked locks, grinding hinges or bicycle chains work again. However, WD-40 is not a lubricant and should not be used for these purposes. You can clean such objects with the penetrating oil, but they still need to be greased afterwards.
It is better not to use penetrating oil as a lubricant for bicycle chains. Photo: IMAGO / Michael Kristen
4. do not use WD-40 on plastic
WD-40 removes the plasticizer from plastic surfaces or plastic parts. The material becomes porous through the use of penetrating oil and can break off. It is better to use a solvent-free silicone spray to lubricate and clean plastic. The same applies to wood – the penetrating oil can dry out and damage the wood.
5. cleaning textiles with penetrating oil
If you treat textiles with penetrating oil, e.g. to remove stains, discoloration may remain on the material. Therefore, check beforehand on an inconspicuous area how the material reacts on contact with the penetrating oil.
This otherwise versatile product is also not suitable for use on sports equipment (e.g. skis or snowboards), musical instruments or electronic devices. If you are unsure, you should do more research to find out whether the supposed miracle oil is suitable for your project. For these 11 household problems, however, you can use the penetrating oil without hesitation.