Home Blog Page 1540

Ugly decorations: these things are ruining your home

0

A cozy home doesn’t just include a table, chair and bed, but also individual decorations. Curtains, picture frames, candlesticks and flower arrangements are what make a home feel homely. But not all of us are lucky when it comes to choosing these things. To avoid ruining the cozy atmosphere of your home with ugly decorations, it’s better to get rid of the following decorative items.

Ugly decorations for the garbage can

To save money, people sometimes try to conjure up something beautiful from the things they have at their disposal. Unfortunately, this often backfires and the ugly decorations disfigure the living space. You should remove the following decorations as soon as possible:

Postcards on the shelf

Postcards may be loved by family and friends, but let’s be honest: you never look at them more than once. Instead of displaying them on a shelf, it’s a good idea to keep them in a box as a memento. After all, they often don’t fit in with the color scheme of the rest of the decor in the home, so they fall out of the pattern and create clutter.

Unusual picture frames

Unusual picture frames draw attention to themselves in a room – away from the actual photo. However, if you want to highlight the photo itself, you should opt for neutral frame colors such as black or white. Not only do they look more elegant, but they also match the rest of the decor in your home.

Bookcase with glass doors

Bookcases with glass doors were all the rage in the 1980s. Nowadays, however, they are more than impractical. Either you have open shelves so that you can reach the contents directly, or you have closed shelves to hide any clutter. Bookshelves with glass doors have neither of these advantages and have an additional disadvantage: fingerprints are much more visible on them, making cleaning much more difficult.

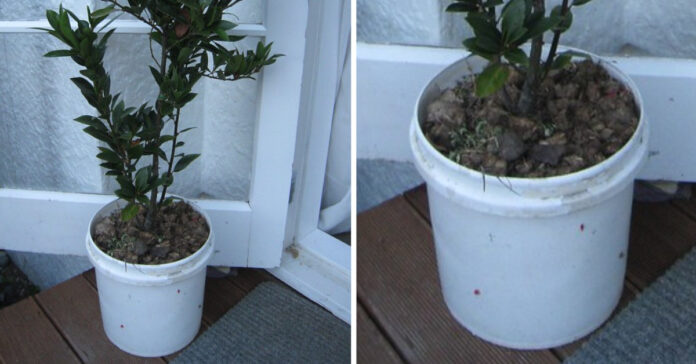
Plants in food containers

Here you will find external content from Flickr that is recommended by our editorial team. It complements the article and can be displayed and hidden again with one click.

I agree that this external content may be displayed to me. Personal data may be transmitted to the provider of the content and third-party services.

Plants bring a lot of life into the home and immediately create a cozy atmosphere. However, what ruins the atmosphere at the same time are food containers or buckets instead of flower pots. That looks anything but harmonious. It’s worth investing money in beautiful flower pots to display your plants. This will immediately enhance your home with little effort.

Fluffy tiger on the sofa

Back then they were on every sofa: cuddly tigers. But not for cuddling or playing with, no. Their sole purpose was to decorate the living room and make it look exotic. Nowadays, such plush tigers are completely outdated. Perhaps it’s time to sort them out or finally release them for children to cuddle. At least they still serve a good purpose.

Figures that don’t fit together

Whether it’s souvenirs that you receive as gifts or small figurines that you find beautiful and therefore buy: Figurines that are wildly thrown together in your home don’t leave a feeling of coziness, but instead make your home look messy. For this reason, the following always applies to figurines: less is more.

Wind chimes

Small metal wind chimes were popular for a long time. But they never had a useful function. On the contrary. They just attract attention with their clanking noises and cause tense nerves in your home.

Plastic fruit

Away with the plastic fruit! In almost every case, you can tell at first glance that it is fake. So it’s better to put real fruit in your home. Not only does it make your home look better, but it’s also good for your health as an incentive to eat it.

If you’re wondering what’s missing in your home to give it that certain something, you should first ask yourself what there might be too much of. Because less of this ugly decoration already creates a harmonious picture and a cozier atmosphere in your home.

Source: brightside
Thumbnail: © flickr/Dan Randow
Green lily care: 5 tricks against brown leaf tips on houseplants

0

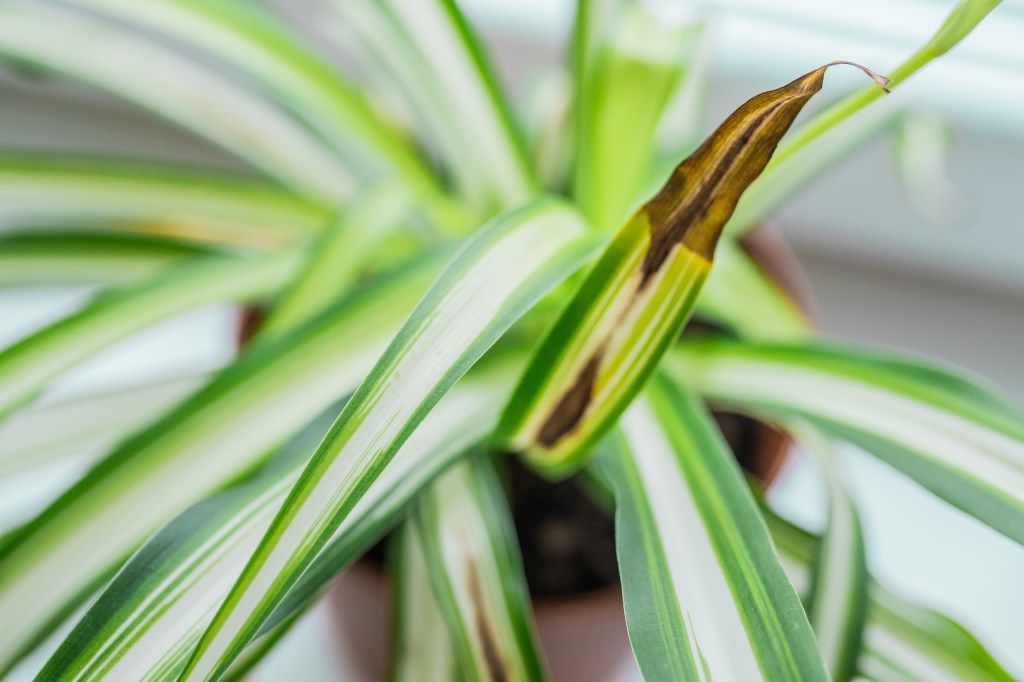
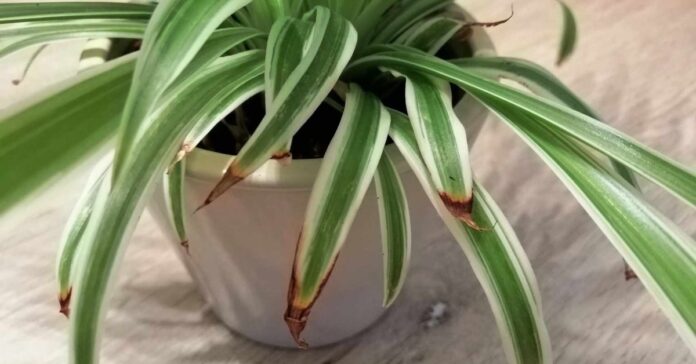
Green lilies are actually easy to care for – because the “Chlorophytum comosum” makes few demands and is therefore also suitable for beginners without green fingers. From time to time, however, green lilies can develop brown tips. This detracts considerably from the appearance of this otherwise easy-care houseplant. Find out what you can do about this and how to care for green lilies properly here.

If the leaf tips of your green lily have turned brown, you have probably done something wrong when caring for it. Here are 5 things to look out for:

The green lily is in the wrong location

Place the green lily in a bright spot near a window, but without direct sunlight. The sun could burn the leaves and cause brown tips.

The leaves of the plant do not hang freely

Make sure that the leaves can hang freely over the plant pot. If the leaves of the green lily hit the floor or window sill, this will also cause brown tips. Green lilies should either be grown in a hanging basket or on a shelf where their leaves can hang down freely.

Make sure that the leaves of the green lily can hang freely. Photo: bozhena_melnyk – stock.adobe.com

The temperature is too low

This frugal houseplant feels most at home at a room temperature of 20 °C. If the temperature in the home falls below 10 °C, the green lily will stop growing. During the warm season, the green lily can also be taken outside for a warm summer shower.

Watering mistakes

Make sure that you only water the plant when the top layer of soil is already slightly dry. Excessive watering quickly leads to waterlogging, which the green lily cannot tolerate. This could cause its roots to rot, resulting in the otherwise robust houseplant dying. As a rule of thumb, a sip of water twice a week is enough to prevent the green lily from drying out. It stores enough water in its fleshy roots to survive longer periods of drought.

Tip: If the soil in the flower pot is noticeably dry, this could also be a reason for the brown tips. In this case, give your green lily a lukewarm immersion bath. When no more air bubbles rise from the root ball, remove the plant from the bath and allow it to drain well before placing it back in the planter.

Green lily with brown tips.
Errors in watering can lead to brown tips. Photo: Victoria – stock.adobe.com

The air is too dry

You have followed all the care instructions and your green lily still has brown tips? This could be due to the humidity. The brown tips of the shoots indicate that the air is too dry. You can easily solve this problem by spraying the green lily regularly with water.

Reading tip – The best tips for houseplants:
Curious pine cone trick saves your houseplants
These 7 houseplants survive even in dark rooms
These 3 houseplants protect your home from mold

1080x1080 whatsapp

Source: yourself

If your oven window is dirty, you can easily clean it with these household remedies

0

You have already thoroughly cleaned the inside of your oven and then realize with horror that you have forgotten one thing: the oven window. Over time, grease residues and other dirt accumulate here. Find out how to clean the oven window quickly and easily in this article.

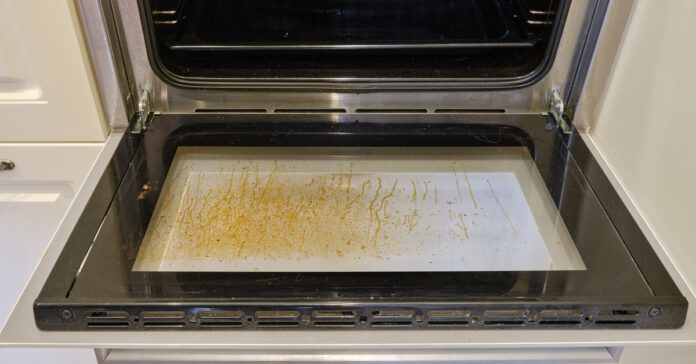
The yellow-brown streaks and stains on the glass are caused by cooking and baking food that contains fats or oils. These evaporate when heated in the oven and eventually settle on the oven window.

The steam or smoke produced during cooking can also settle on the window and lead to unsightly deposits or discoloration. If leftover food ends up on the window from time to time, it could burn over time and leave further, particularly stubborn stains.

Don’t forget the oven window when cleaning your kitchen. Photo: stock.adobe.com – Андрей Журавлев

Easily remove the oven window

Did you know that you can remove the oven window in a few simple steps and then clean it very easily? Removing the window makes cleaning much easier. This is the only way to easily reach nooks and crannies as well as the edges of the door and window.

To remove the oven door, first open the oven and look underneath the hinges for the safety catch. This can usually be released by lifting the metal hooks attached to the hinge, pushing them to the side or pulling them slightly – depending on the oven model. Always hold the oven door firmly with one hand, support it with a chair or ask another person for help. Then close the door halfway and carefully pull it upwards or unhinge it. If possible, hold the door by the sides and not by the handle.

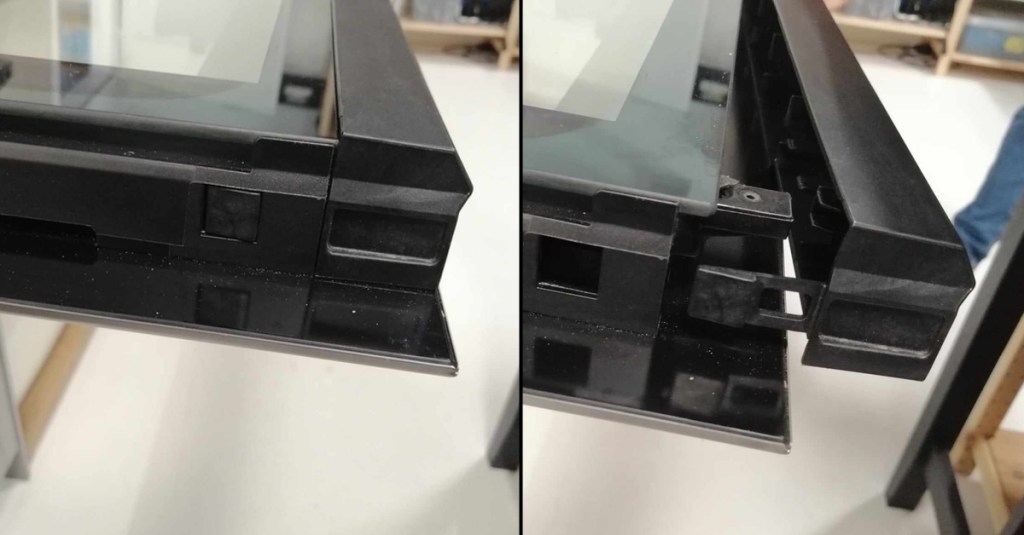
To remove the oven window from the door, first press the buttons on the sides of the door. You can then remove the strip on the top and lift out the oven window. For models without knobs, you must first loosen the screws on the strip with a screwdriver.

Remove the oven window.
You should remove the oven window for thorough cleaning. Photo: FUNKE Digital

Hnote: Depending on the oven model, the procedure for unhinging the door and removing the window may vary. If in doubt, you should read the operating instructions for the appliance beforehand.

These household remedies are suitable for cleaning the oven window

Place the glass pane on a suitable surface for cleaning. When cleaning the oven window, also take care not to scratch the glass pane. A soft sponge, lukewarm water and a little washing-up liquid are usually sufficient to remove light stains. For stubborn stains, you should avoid using a knife, scraper or scouring cream to prevent scratches. It is best to try tried-and-tested household remedies that are also recommended for cleaning the rest of the oven. These include

  • Baking soda or baking powder
  • Vinegar
  • Lemon or citric acid
  • Salt
  • Shaving foam

To clean the oven window, either apply the household remedy of your choice – depending on its consistency – directly to the glass pane or mix it with a little water first. A mixture of baking soda and lemon and baking soda and vinegar have proven to be particularly effective. This allows you to remove even stubborn stains in no time at all. You may need to leave the home remedy of your choice to work for 30 to 60 minutes to remove all stains.

Then allow the window to dry thoroughly before refitting it properly and hanging the door. To do this, hold the door at an angle in front of you and guide the metal hooks back into the respective recess on the oven. Now close the safety catch that you released earlier and the oven door is reattached. Now you can finally enjoy a sparkling clean oven again. Good luck trying it out.

1080x1080 whatsapp

Source: utopia, chip

Know More About Mobile Casino Reviews

0

Mobile casino gaming identifies playing mobile games of skill or fortune for money online using a mobile device like a smartphone, tablet or even a hand held mobile phone with a cellular wireless network link. These devices allow players to gamble in the comfort of their own homes. In the past people used to gamble at land based casinos but

Cleaning plastic windows: Short and simple instructions

0

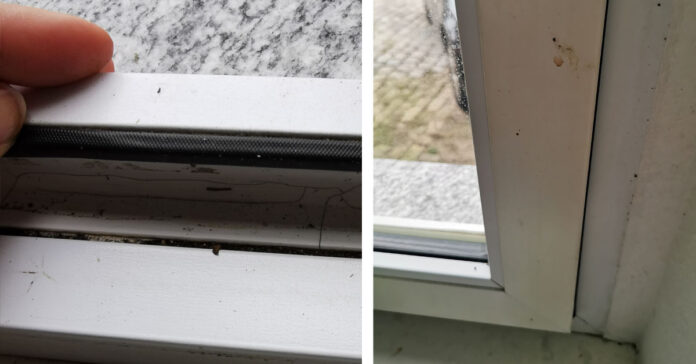
Almost every home has plastic windows. Initially bright and white, after a while they are no longer quite as attractive to look at. The white plastic windows become dirty and yellow. Even if plastic windows appear easy to clean, there are a few things to consider when caring for them. Their biggest enemy is dust, which sticks to them and can even cause scratches when wiped off. In this article, you will find out the best way to clean your vinyl windows and remove dust and dirt.

Remove light soiling

Cleaning plastic windows: how to do it quickly and easily Photo: Media Partisans/FUNKE Digital

Light soiling can usually be removed with a microfiber cloth and water. Proceed as follows:

  1. Dust and dirt should be vacuumed or swept off at the beginning.
  2. Then apply lukewarm water, soapy water or a neutral cleaner to a microfiber cloth and wipe the surface of the frame. Leave the cleaning agent to work for a while and then rub the frame with water. Old toothbrushes or a butter knife wrapped in a cleaning cloth are ideal for corners and edges.
  3. You should not rub the window frames dry after cleaning, as any remaining dirt particles can scratch the frame. It is sufficient to wipe again with a damp cloth after cleaning.

Tip: If you prefer home remedies, you can try a mixture of vinegar and water.

What to do with stubborn stains?

For stubborn stains, warm water or washing-up liquid is often not enough:

  • To Paint or color stains you can use a little turpentine or white spirit. Or you can heat the stains with a hairdryer and try to scrape them off carefully.
  • Adhesive residue from fly screens or roller blinds can be removed with cooking oil, acetone-free nail polish remover or carpet adhesive remover.

In general, if plastic windows are very dirty, pre-treat them by soaking them. This makes them easier to remove later.

Stubborn stains can also often be removed with oven spray. However, it should only be used in exceptional cases as it can attack the plastic.

These cleaning agents are prohibited

Although some cleaning agents help very well, they can attack and damage the plastic in the long term. They should therefore not be used when cleaning window frames. To the prohibited cleaners include:

  • Bleaching agent with a high chlorine content: they cause the window frames to yellow more quickly.
  • Scouring agentThey damage the surface and ensure that dust and dirt can settle more quickly. They can also damage the window panes if they get onto the glass.
  • High pressure cleanerThey should also be avoided as they can damage the surface and seals.

You may also be interested in these articles:


How to clean yellowed windows

Over the years, plastic windows can turn yellow and fade due to high levels of sunlight. The more dirt there is on them, the faster the process progresses. Cigarette smoke, candle smoke and water vapor can also cause the plastic frames on the inward-facing side to change color.

If the frames are already heavily yellowed, it is difficult to get them properly clean again. In such a case, there are only two options: You can carefully sand the yellowed frames with fine (!) sandpaper or polish them until their original color is visible again. If this is not enough, the only other option is to repaint the plastic windows or replace them.

Regular care is the be-all and end-all

Regular window care is essential to prevent heavy soiling and discoloration. This not only prevents stubborn stains, but also extends the service life of the windows. You should clean PVC windows at least twice a year and check them for damage at the same time. The drainage openings also need regular cleaning and should always be checked.

You should also check the seals and hinges once a year. Clean seals ensure good thermal insulation in winter. Dirty seals are susceptible to mold. Wipe them with a damp cloth and then treat them with deer tallow, silicone oil or a grease stick. Lubricate the hinges with acid-free lubricating oil. But make sure that it does not get into the seals.

With increasing age, the plasticizers contained in the plastic make the material brittle. It then requires additional sealing and more care. To keep your window frames beautiful and radiant in the long term, good cleaning is a must. Cleaning at regular intervals also means less work in the end.

Sources: fensterversand, obi

1080x1080 whatsapp

Fighting mold: these plants will help you

0

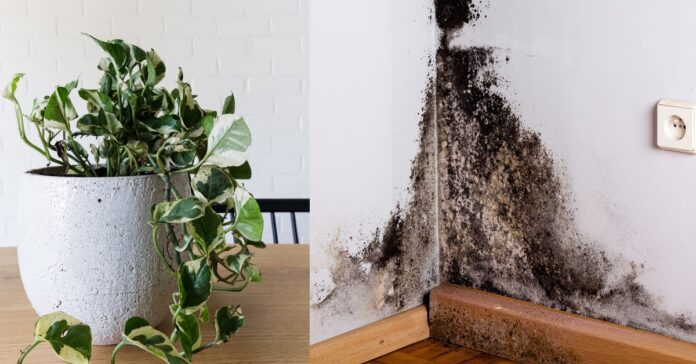
Mold in your own four walls is a problem that not only affects your well-being, but can also cause health problems. In addition to good ventilation and appropriate heating, certain plants can also help combat mold!

These 3 plants can improve the indoor climate and prevent mold. We took a closer look at these green helpers:

Ivy – the moisture-regulating climber

Ivy is not only an easy-care houseplant, but also a natural air purifier and dehumidifier. Its leaves absorb excess moisture from the air and thus help to prevent mold growth. It is particularly ideal in rooms with high humidity, such as the bathroom or kitchen. At the same time, it filters pollutants out of the air and ensures a healthier indoor climate – without requiring a great deal of maintenance.

Ivy is a very adaptable plant with great properties. Photo: Jodie Johnson – stock.adobe.com

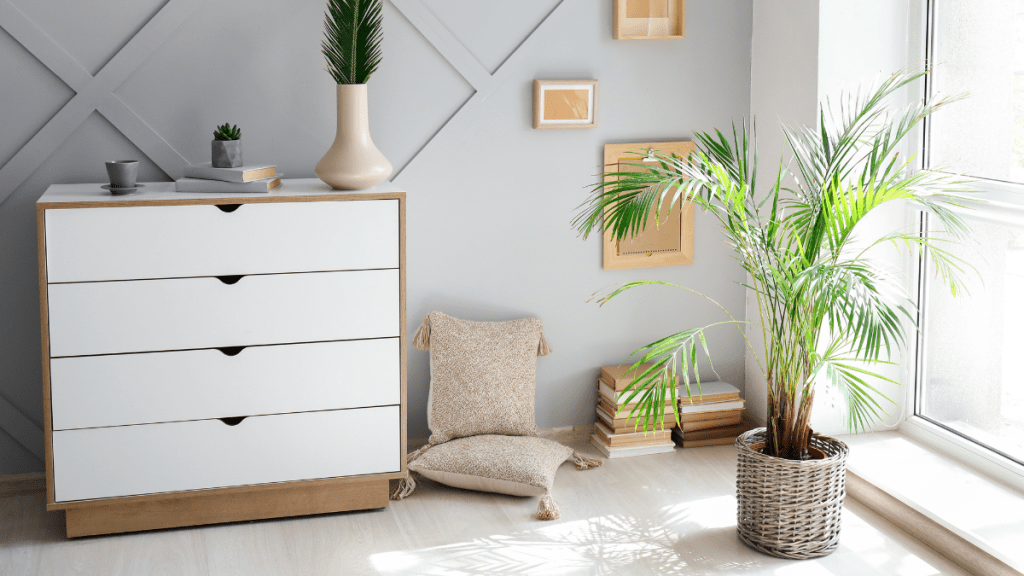
Palm trees – tropical flair with health benefits

Palm trees are not only decorative, they are also masters at dealing with excess humidity. Through their transpiration, they effectively help to maintain the humidity balance in the room and prevent mold. With their eye-catching leaves, palm trees are therefore strong partners in the fight against unwanted moisture in the home.

Plants against mold
Plants against mold: These 3 can help Photo: Pixel-Shot – stock.adobe.com

Aloe vera – the entertaining desert miracle

Aloe vera is a true all-rounder among plants against mold. It not only cuts a fine figure in skin care, but also in absorbing moisture. It stores water in its thick leaves and can therefore keep the air in the room drier – while at the same time acting as a warning if the soil in its pot is too moist.

Using plants against mold does not mean doing without conventional measures. You should also pay attention to proper ventilation and heating. Incidentally, too many plants are also counterproductive – it all depends on the balance.

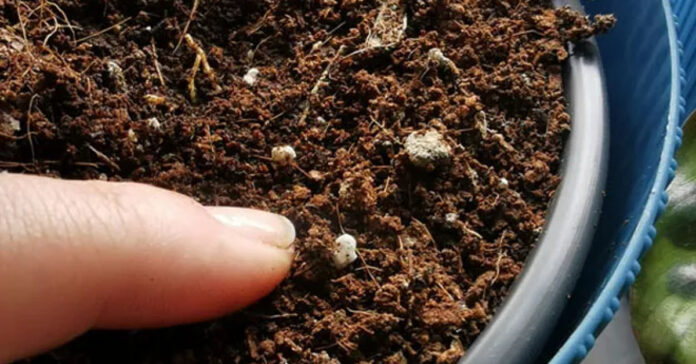
Attention: Mold on potting soil is also not harmless, as the spores can be released into the air. You should therefore urgently repot infested plants and check your watering routine.

Ivy, palm trees and aloe vera can definitely do more than just look pretty. They help to regulate humidity and make life difficult for mold. Are you a fan of plants in the home?

1080x1080 whatsapp

Source: jolie

Fighting fungus gnats: advice for pest-free soil

0

Fungus gnats are an annoying and well-known problem among hobby gardeners and flower lovers. The black, small flies in the potting soil can become a real nuisance within a very short time. A small infestation of flies hardly harms the plants, but if they multiply, the roots can die and start to rot, which often results in the death of the plant.

But where do the small flies in the potting soil come from? The eggs of the fungus gnat are often already contained in the potting soil you buy and you bring the pest into your home. Organic and humus substrates in particular are often infested, as they provide the perfect breeding ground for fungus gnats. Here you can find out how to combat the pests with home remedies.

Fungus gnats in the potting soil: These are the symptoms

In nature, fungus gnats help to decompose rotting plant matter on the forest floor. Because they are very successful at this and reproduce very quickly, they are dangerous for indoor and greenhouse plants. Infested plants are characterized by weak growth and hollow stems. In addition, many small midges fly around the plants and seedlings and seedlings in particular wither quickly.

Prevent fungus gnats

Fungus gnats like it moist. To prevent them, it is important to deprive them of the basis for laying their eggs. You should therefore water your plants a little more sparingly and avoid waterlogging. Only water them when the potting compost has dried out and only water particularly thirsty plants via the saucer. If there is water in the saucer, leave it there for 20 minutes and then pour it away. It can also be helpful to use substrates without soil or to switch your plants to hydroponics.

Because store-bought potting soil is often the cause of fungus gnat infestation, there are a few things to bear in mind when storing it. You should store the potting soil in a cool, dry place and keep the container closed. Also cover it with a tarpaulin to contain any infestation. To be on the safe side, you can sterilize the purchased soil before use.

You will need an oven to sterilize the potting soil. Preheat it to 85 °C, spread the soil out on a baking tray and place the tray in the oven for 30 minutes. The substrate can then be used without hesitation. As an alternative to the oven, the soil can also be heated in the microwave for 30 seconds.


You may also be interested in these articles:


Home remedies against small flies in potting soil

There are numerous methods that are supposed to help against the small insects, but only very few are really effective in combating them. Insecticides are not always the best choice, as they can also cause damage to human and animal health. There are a few home remedies you can try before resorting to chemicals:

Bird sand

An effective way to combat fungus gnats is to sprinkle the soil with a layer of bird sand. This should be at least one to two centimeters thick and kept dry. The sand draws moisture from the soil and prevents egg laying, as the surface is closed but breathable.

Tights for covering

Another way to prevent the little flies from laying their eggs in the potting soil is to cover it with tights. This prevents the fungus gnats from reproducing and they slowly die out.

Baking powder

Baking soda is a real all-rounder in the household and can also be used to control flies in potting soil. Sprinkle it on the potting soil and then spray it with a little water. The baking soda is now absorbed into the soil and is eaten by the larvae, which die due to the ingredients. Depending on the severity of the infestation, the treatment may take a little longer and must be repeated several times. However, it is gentle on the plant and very inexpensive.

Vinegar

Vinegar is also an effective household remedy against fungus gnats. Place a bowl of vinegar, water and washing-up liquid in a ratio of 1:1:1 next to the plants infested with the small flies. The animals are attracted by the smell of the vinegar and eventually drown because the detergent releases the surface tension of the water.

Kitchen herbs

Kitchen herbs such as parsley and chives are good for getting rid of small flies in the potting soil. The essential oils they contain repel fungus gnats and thus prevent them from laying eggs in the soil. To do this, chop the parsley into small pieces and spread it over the potting soil or place pots of fresh chives between the infested plants. Because the parsley dries out at some point and loses its fragrance, it must be sprinkled again and again.

Sounds unusual? Kitchen herbs help to control fungus gnats. Photo: FUNKE Digital

Never oil

Niemöl 🛒 is obtained from the seeds of the niem tree and acts as a kind of natural poison on the larvae of the fungus gnat. The active ingredient azadirachtin influences the hormone balance of the larvae so that chitin formation is disrupted. Mix the oil with water in a ratio of 1:100 and add a little washing powder. Then moisten the soil of the infested plants with the mixture.

Beneficial insects

If your plants are suffering from a very heavy fly infestation, nematodes are usually the last biological solution. These are beneficial insects that eat the eggs of the fungus gnat. They are harmless to the plant as well as to humans and animals. Nematodes (Steinernema feltiae) or bacteria (Bacillus thuringienses) are particularly suitable because they reproduce immediately and offer good long-term protection for the potting soil. You can easily administer them via the irrigation water.

Less suitable household remedies are matches, garlic, cinnamon or coffee grounds, as their effect is often too weak or they even exacerbate the problem because they cause the potting soil to become compacted and start to mold. You should also stay away from tea tree oil, as it damages the roots of the plants and they have already suffered enough from the infestation.

If you can’t get the infestation under control despite home remedies, you can of course also use chemicals or the classic yellow boards 🛒. The small flies stick to them and eventually die. This means that flies can no longer lay eggs in the potting soil and your plants can recover. However, when using chemicals, make sure that the plants are not within reach of your pets and children to avoid damage to their health.

1080x1080 whatsapp


Sources: focus, plantopedia

Easy-care houseplants: Green despite little effort

0

Houseplants bring life into the home, but not everyone has the proverbial green thumb. Some plants are sensitive to too much or too little water, the wrong light or dry heating air. The good news is that there are indestructible, very easy-care houseplants that can cope with almost anything and thrive even with minimal effort. You can find out what these are and how to look after them optimally here.

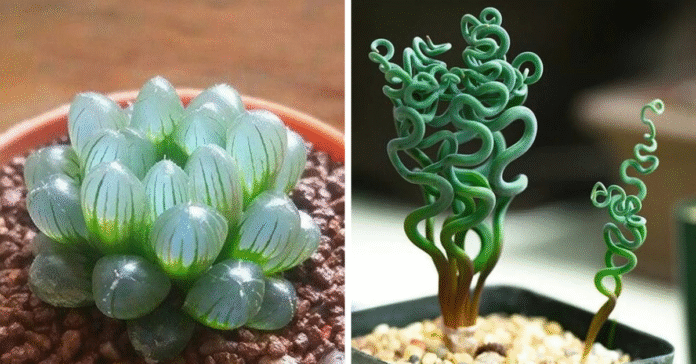
Haworthia

Haworthia is a succulent plant and can therefore store water. What it does not tolerate is waterlogging.

Here you will find external content from Pinterest that is recommended by our editorial team. It complements the article and can be displayed and hidden again with one click.

I agree to this external content being displayed to me. Personal data may be transmitted to the provider of the content and third-party services.

Window sheet

You should remember to water the window leaf regularly, but otherwise it doesn’t need any extra care. Also important: as it can grow very large, it should be repotted every few years.

Bow hemp

Bow hemp likes light and warmth, but is otherwise an undemanding contemporary. However, it is not only undemanding, but also helpful, as it is an air-purifying plant.

Trachyandra

Trachyandra is also a succulent plant. The plant, which has its natural habitat in southern Africa, is unfortunately very difficult to obtain. However, if you like the spiral leaves, you can buy an Albuca spiralis as an alternative. It needs cactus soil and plenty of sun.

Here you will find external content from Pinterest that is recommended by our editorial team. It complements the article and can be displayed and hidden again with one click.

I agree to this external content being displayed to me. Personal data may be transmitted to the provider of the content and third-party services.

Tillandsie

Tillandsias are aerial roots that do not grow in the ground but on trees or stones. The tillandsias in this picture have been placed in sea urchin shells so that they look like jellyfish. Instead of watering them, you just need to spray them with water.

Ivy lily

Ivy is one of the most popular, easy-care houseplants. It can be used as a hanging or climbing plant, for example in a hanging basket or a room divider. It likes a warm, light to semi-shady environment. As it likes humidity, it is ideal as a bathroom plant.

Flamingo flower

The flamingo flower is a good choice for anyone who wants to be comfortable but still wants a few splashes of color. It likes it warm, but does not tolerate direct sunlight.

Schefflera

The Schefflera is not only very popular as an easy-care houseplant at home, but also as an office plant, as it tolerates partial shade. It can grow to over 2 meters tall, so it should be repotted regularly in the first few years. The soil should never get too wet.

Yucca

The classic among easy-care houseplants is the yucca. If you tend to forget to water it, it is the best choice. It does not respond well to waterlogging and a room that is too warm in the winter months.

Zamie (Lucky Feather)

Like the ivy, the zamia likes high humidity, making it a suitable plant for the bathroom.

Not everyone has a green thumb and some even have the famous “dry thumb”. But with the right houseplants, this is not necessary. Easy-care plants require hardly any attention, are forgiving of watering errors and get by with little light. If you have little time for plant care, opt for these robust species – they make any room greener with almost no effort.

Source: plantura
Thumbnail images: © Pinterest/ohmymag © Pinterest/sassytownhouseliving

Wash the down comforter: It breaks because of this mistake

0

A down comforter is a wonderful investment for restful sleep – light, cozy, warm and breathable. But sooner or later the question arises: How do I get my down comforter clean again? Many people are reluctant to wash their high-quality comforter themselves for fear of it getting lumpy or damaged. However, with the right procedure, you can easily clean your down comforter at home and maintain its quality for years to come. Here you can find out what is important when washing down comforters.

When is cleaning necessary?

A down comforter does not need to be washed as often as bed linen, for example. As a rule of thumb, a thorough cleaning every two to three years is usually sufficient if you use a comforter cover. However, there are signs that make earlier cleaning necessary: Stains, unpleasant odors or if the comforter has lost significant fluffiness. People with house dust allergies benefit from more frequent washing as this reduces mites and allergens.


You may also be interested in these articles:


It is often sufficient to air the blanket regularly between washes. Hang it outside for a few hours on a dry, not too sunny day. This refreshes the down and allows moisture that has accumulated overnight to escape.

The right preparation and washing method

Before you get down to business, first check the care label of your down comforter. Most modern down comforters are machine washable, but there are differences in the recommended washing temperatures and care instructions.

For machine washing, you need a sufficiently large washing machine – for a single comforter at least 7 kg capacity, for a double comforter preferably 9 kg or more. If your machine is too small, the down comforter cannot be rinsed properly and may not get clean.

Choose a special down detergent that preserves the natural oils in the feathers. Do not use fabric softener, as this sticks the down together and impairs its insulating effect. Wash the comforter at a maximum of 40 degrees on a gentle cycle and add two to three clean tennis balls or special drying balls. These prevent the filling from clumping together.

You should avoid this mistake when washing your down comforter. Photo: agencies – stock.adobe.com

The drying process: you should avoid this mistake

Drying is the most important step in caring for your down comforter. If dried incorrectly, even a perfectly washed comforter can become lumpy or moldy. You should only spin-dry the comforter briefly and at low speed so as not to damage the quills.

The best method is to tumble dry at a low temperature. Here too, tennis balls or drying balls help to loosen the down. The drying process takes considerably longer than for normal washing – allow two to three hours, or longer for thicker comforters. Interrupt the process several times to fluff up the comforter and distribute the down evenly.

Drying a down comforter without a dryer

If you don’t have a tumble dryer, lay the comforter flat on a washing rack and turn it regularly. Air drying can take several days. Important: Make sure that the blanket is completely dry before you use it again, as residual moisture can lead to mold growth.

With these tips, your down comforter will stay fresh and fluffy for a long time – for many more nights of restful sleep under your clean, cozy comforter.

1080x1080 whatsapp

Source: utopia

Drying chives: this method makes it possible to

0

Do you have a rich harvest of chives from the garden or balcony? To preserve the aromatic herb for longer, you can dry it – but chives lose some of their flavor in the process. With the right method, you can still get the best out of it. Alternatively, you can freeze them to preserve their color and aroma almost completely.

Drying chives: step by step

Chives consists largely of water, which makes drying somewhat more challenging. The fine tubular leaves become slightly brittle and lose their intensity. This is how you can still dry it successfully:

  • Preparation: Cut the fresh chives into small pieces. rolls and spread them evenly on a baking tray or the shelves of a dehydrator.
  • In the oven or dehydrator: Set the temperature to maximum 40-50 degrees Celsius to preserve the essential oils and thus the aroma. Dry it until it is rustling dry.
  • Air dry: Tie the chives into small bundles and hang them on a shady, well-ventilated place and leave them to dry for several days. However, the leaves may lose their green color and taste less intense.

After drying, you should put the chives in lightproof containers so that it will keep for up to nine months.


You may also be interested in these articles:


Dried chives in the kitchen

Dried chives is less aromatic than fresh or frozen, but can still be a good addition to the kitchen. It goes well with stews, herb butter or quark – Dishes that don’t need a fresh touch.

You can also combine it with other dried herbs, for example in Herbal salts, Herbal mixtures or Oiling. In this way, dried chives can be used in a variety of ways and kept for longer.

What is the right method for you?

Whether you Freeze or dry chivesdepends on how you want to use them later:

  • For intense aroma and fresh appearance freezing is the better choice.
  • If you Save space in the freezer compartment or if you prefer to work with dried herbs, drying is a good alternative.

With the right method, you can optimally preserve your harvest and have an aromatic herb to hand all year round.

Checklist: Drying chives made easy

  • Preparation: Cut into fine rolls and spread evenly.
  • Drying methods: In the oven (40-50 degrees), dehydrator or by air drying.
  • Storage: Store in lightproof jars or tins – will keep for up to nine months.
  • Freeze: For a more intense flavor, cut into rolls in freezer bags or ice cube molds.
  • Use: Perfect for butter, herbal salts, soups, sauces or herbal oils.

This article was partly created with the help of a machine and carefully checked by the editorial team before publication.