
Home Blog Page 1552

Houseplants: These watering mistakes cause yellow leaves

0

Watering houseplants needs to be learned. There is usually a fine line between “far too dry” and waterlogging. But one thing is certain: your beloved plants will die if they are not cared for properly. Fortunately, with the help of these tips, you can easily determine how often you should water your plants and what additional care they need. Read on to find out how to correctly assess the “thirst” of your houseplants.

However, it is important to note that every plant species has different needs. The tips should only serve as a general guide. Therefore, always inform yourself about the individual care of your plant, on which you will often find a label with care instructions. You can also ask the retailer directly about the correct handling of the respective plant.

Waterlogging will kill your plants and cause mold on the potting soil. Credit: ElenaEmiliya – stock.adobe.com

Avoid waterlogging of houseplants

There are a few types of plants, such as primroses and mountain ash in the garden, that have no problem with waterlogging. However, potted plants only have a limited volume of soil available, so excessive watering should be avoided at all costs. Ivy plants, for example, need a moist substrate, but should never stand in water.

Succulents are the most sensitive plants. Their roots and stems quickly become moldy if they stand in water for a long time. Waterlogging prevents the plants from absorbing nutrients and oxygen through the roots. Once these have died, it becomes difficult to save the plant.

Correctly assess the water requirements of plants

You can now find out which 5 things you need to pay attention to in order to water your plants correctly.

Check the plant for yellow leaves

You should check your plants every two days. Leaves and any flowers can provide information about their well-being. The following characteristics can be signs that the plant needs water:

  • Yellow or brown leaves
  • withered flowers
  • soft and drooping leaves
  • sagging stems
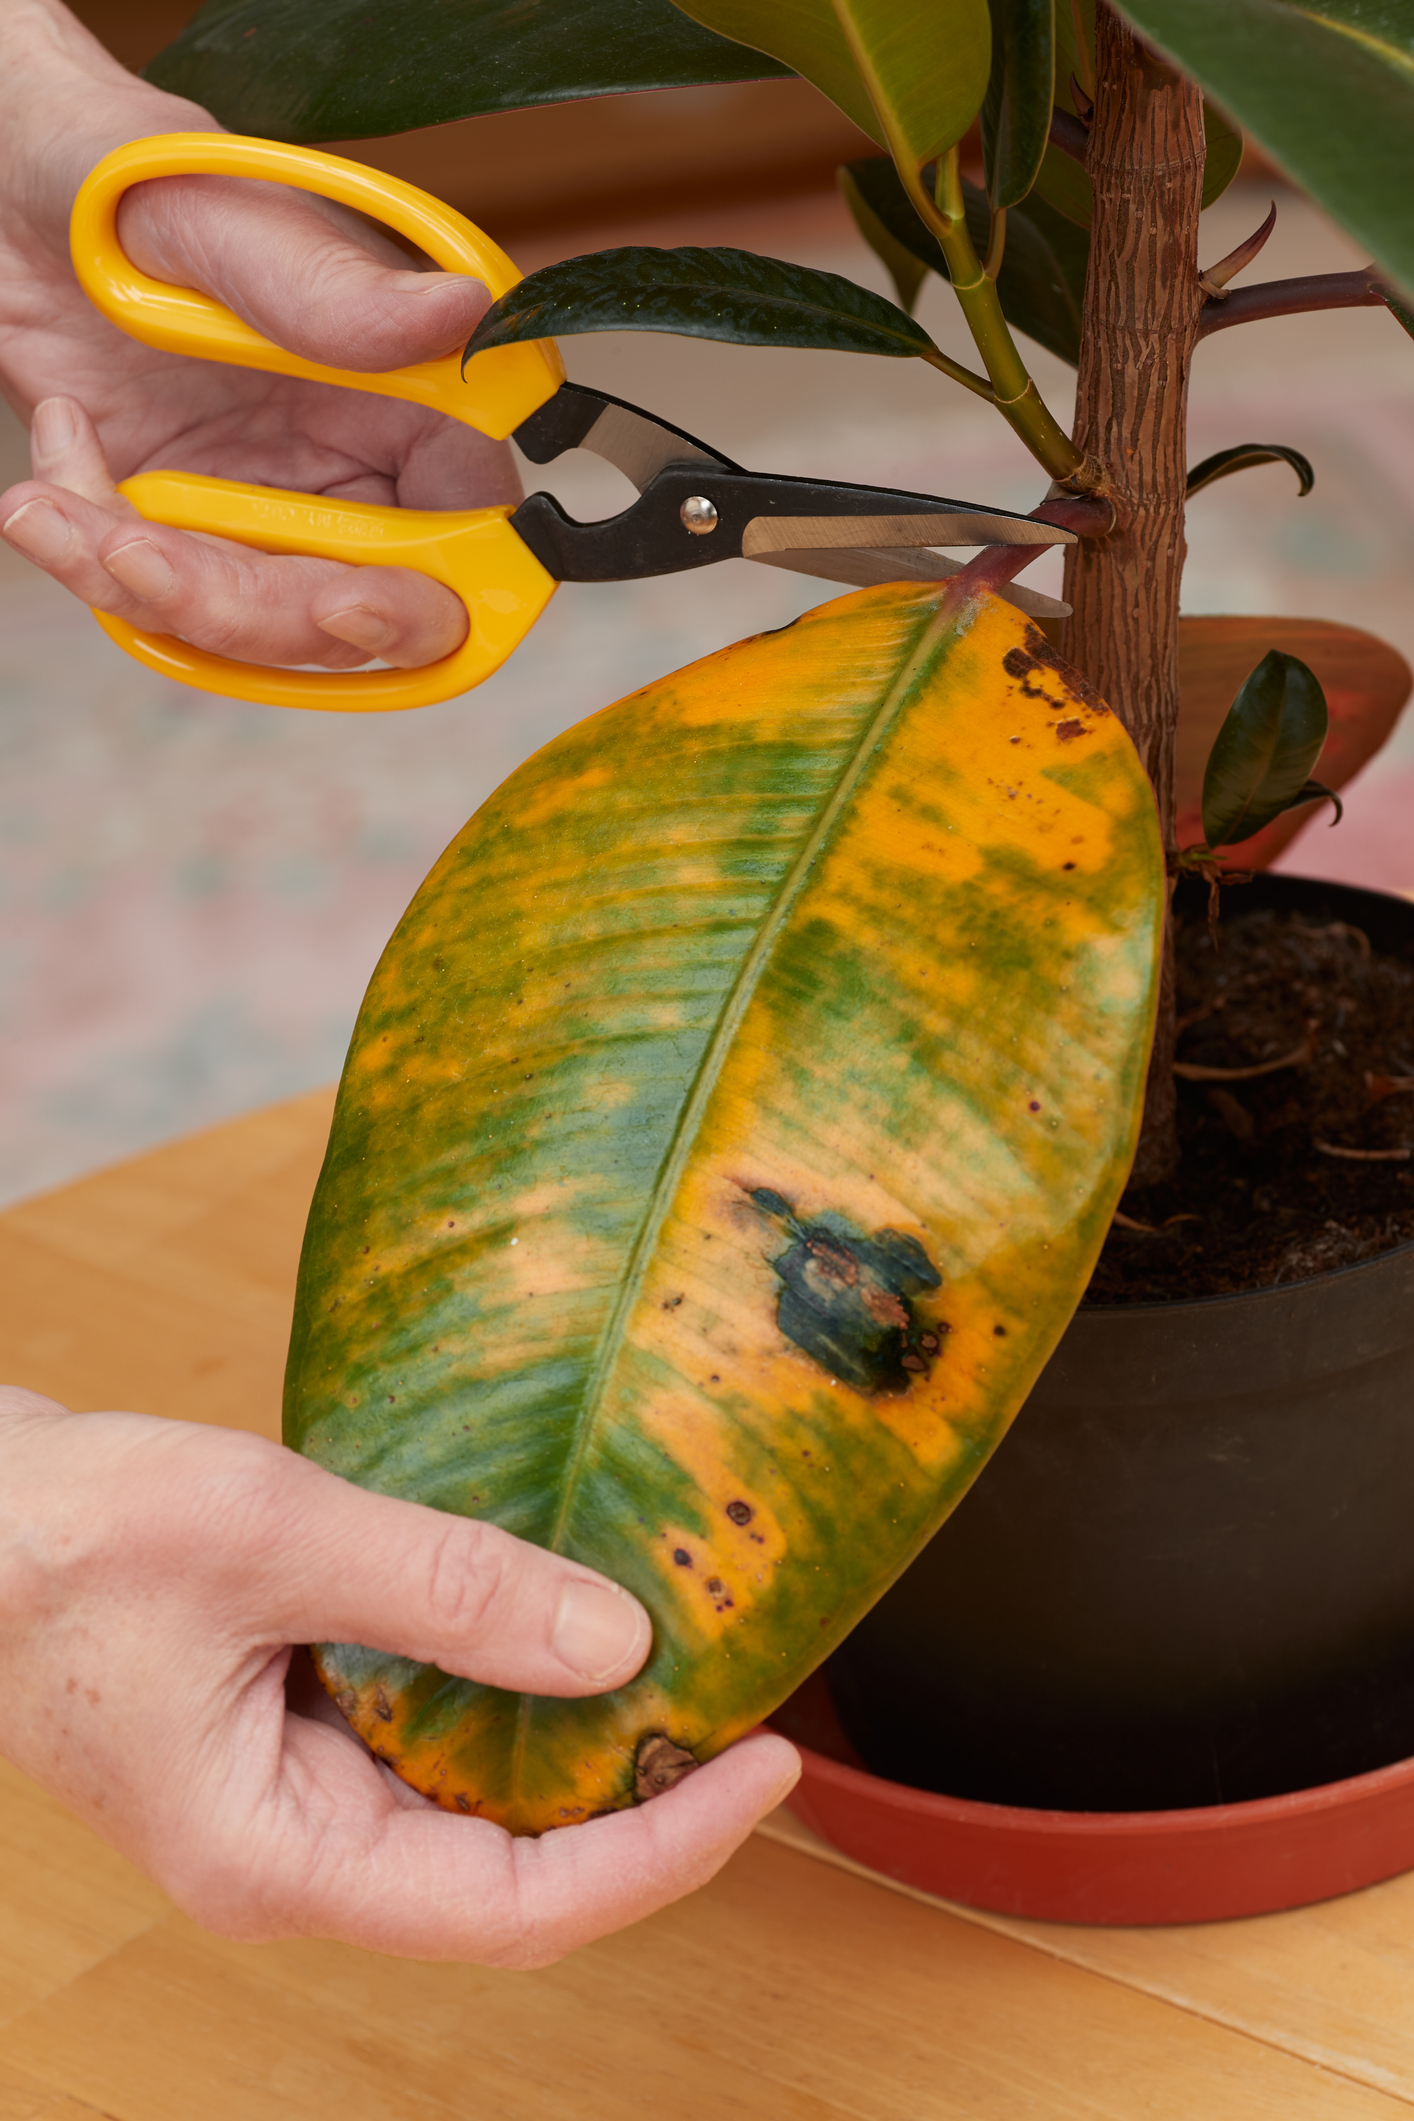
Someone cuts off a yellow leaf on a plant.
It is better to cut off yellow leaves. Credit: HandmadePictures via Getty Images

Lifting the pot

You can test whether a plant needs water by lifting the flower pot. If it is heavy, there is still enough water in the soil. This method can be combined with other tricks until you get a feel for the weight of the pot. If the plant has a planter, you can see whether water has collected in the pot by lifting the plant.

Carry out a stick test

You can use a shashlik skewer or another stick to check the moisture content of the soil. To do this, stick the stick several centimeters deep into the soil. If the stick is dry, you should water the plant. If it is moist, you should do the test again two days later.

TipYou can of course also do the test with a finger. Here, too, you should make sure that you stick your finger deep enough into the soil.

Checking the quality of the soil

Sometimes it is also enough to look at the soil in the pot. Dry soil is lighter than moist soil. This method is particularly helpful for plant species that require permanently moist soil. Moldy soil should be carefully removed and you should wait until the soil is dry before watering the plant again.

Moisture sensor for the soil

If you don’t feel like or don’t have time to deal with the plants, moisture sensors 🛒 can be the solution. These measure the moisture content of the soil and let you know when it’s time to water.

SOS tip for dried out plants

If you have forgotten to water your plant, you can try to save it. To do this, fill a bucket with water and place the plant and its container (if it has a hole) or pot in it. Wait until there are no more air bubbles in the water. Then remove the plant and allow the excess water to drip off.

With these tips, you will hopefully never have to deal with moldy soil or dried out leaves again. You can find more articles about plants and gardening here:

1080x1080 whatsapp

Source: comment-economiser, utopia, myhomebook, home garden

Herb garden: How to ruin basil by making a harvesting mistake

0

Originally a classic of Mediterranean cuisine, basil has become an indispensable part of our kitchens. Who would want to do without the spicy green on a plate of tomato and mozzarella or can imagine a fresh green pesto without basil? However, this popular plant likes to drop its leaves and die. To prevent this from happening to you, you need to look after your basil properly – find out how here.

Proper basil care: tips for location, watering and harvesting

You usually buy it as a fresh plant in the vegetable section. However, what looks so juicy and lush in the store usually cuts a rather sad figure after a few days and ends up in the organic waste garbage can or on the compost heap with a heavy heart. However, it is quite possible to save the plant. There are even people who give their basil names and have a veritable cult surrounding the spice plant. But that’s exactly what you need: a good dose of dedication and the following tricks and tips.

Watering basil – the right amount

Most people go to two extremes: some water their basil overprotectively and literally drown it in water. Others don’t bother and let the soil dry out. The right thing to do, however, is to keep the soil evenly moist and avoid waterlogging. In addition, you should only water the soil, not the leaves, as otherwise fungi are encouraged.

The right location for basil

This Mediterranean plant loves as much light as possible. So choose the sunniest spot in the house if you want to keep it indoors. The garden or balcony is better, at least in the summer months. Outside, the plants get plenty of sun and fresh air and usually have more space to develop.

Basil: It thrives magnificently in this location. Credit: Media Partisans / FUNKE Digital

Growing basil in a pot

It is best to give the plants plenty of space. To do this, you can divide the pot from the store into four parts and plant each in an individual pot with plenty of fresh soil.

This is the soil basil needs

Please do not use herb soil for this, but high-quality, nutrient-rich potting soil. Basil is demanding and hungry.


You may also be interested in these articles:


Fertilizing basil correctly

Fertilize your basil once or twice a month with an organic liquid fertilizer for foliage plants (outdoors, every six weeks is sufficient). It will thank you with plenty of fresh leaves and pests such as spider mites will be kept at bay.

Harvesting basil

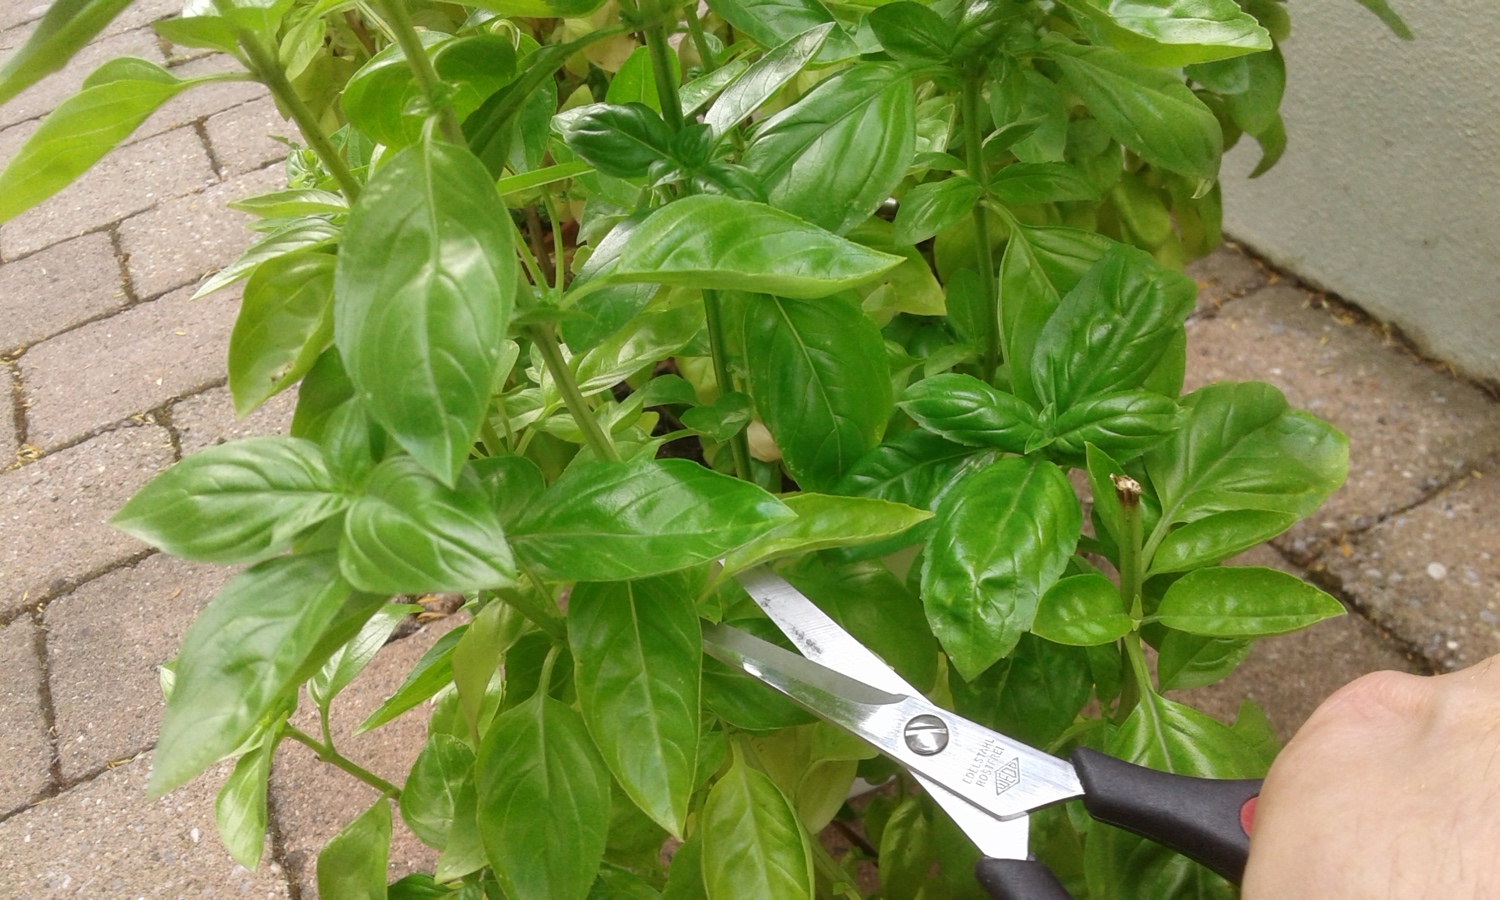
Many people believe it is best to pick individual leaves from different branches so as not to weaken any branch too much. In reality, however, it makes more sense to cut off entire stems. This makes the growth denser, as new shoots and leaves form at the cut points.

Someone cuts something off a basil with a pair of scissors.
This is what you need to look out for when harvesting basil. Credit: Media Partisans / FUNKE Digital

Basil in bloom: Can you still eat the leaves?

Cutting off the stems also has the advantage that you can control the flowering. This is because when the plant flowers, the leaves lose their size and aroma. However, if you overlook a branch and it starts to flower, don’t panic: The flowers are also edible, extremely tasty and an adornment for any salad.

Your basil arrives at your home rather stressed, as the stems are actually too densely packed in the finished herb pot, have too few nutrients and transportation is hard on them. This means that the plants only have a short life ahead of them when you buy them. However, if you provide them with a “species-appropriate environment”, they will thank you for it – in the best case for a long time.

1080x1080 whatsapp

Sources: t-online, utopia, gartenlexikon

Houseplants: These 7 care mistakes will ruin your dragon tree

0

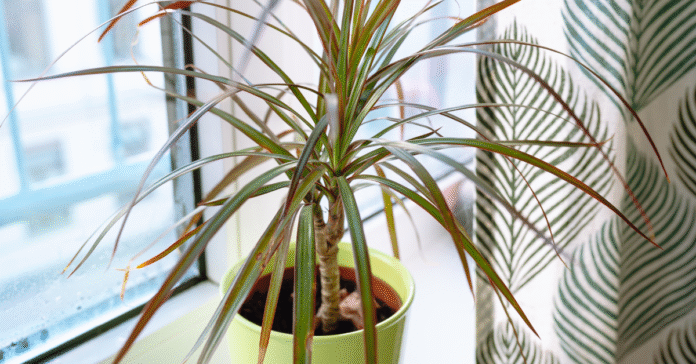
The dragon tree (Dracaena) is a popular houseplant that provides an exotic flair with little effort. Does your dragon tree keep getting brown tips, constantly losing leaves or not growing properly? This easy-care plant also needs the right treatment to stay healthy for a long time. Here you can find out how to care for your dragon tree.

The right location makes all the difference

You determine the location, because the dragon tree copes well with different light conditions. If you want it to grow quickly and compactly, make sure it gets as much light as possible! In order for the dragon tree to grow optimally, it needs a bright, but not too sunny spot.

Direct midday sun can burn its leaves, while too little light inhibits growth. A semi-shady spot near a window is ideal. On frost-free days, your dragon tree can even move outside, as it tolerates temperatures between 2° and 36° C. Do you want your dragon tree to grow straight? Then turn it a little regularly, for example when watering!

How often should it be watered?

A common care mistake is too much water. The dragon tree likes it dry rather than wet. Only water it when the top layer of soil has dried out well. Waterlogging can lead to root rot, so excess water should always be able to drain away easily and should be poured away. It is best to use low-lime, stale water.

Dust off your plant

Dust settles like a film on the leaves of your houseplants and reduces energy production and growth. Does dusting your dragon tree leaf by leaf sound unattractive? You’re right! Put it in the shower once a year and dust will be a thing of the past! This allows leaf respiration and photosynthesis to run optimally and your dragon tree is perfectly cared for.

Which substrate is the right one?

Choose a soil that suits the location! Your dragon tree will also be really happy with standard potting soil if you add enough pumice 🛒 or perlite 🛒 to the soil (mixing ratio of potting soil to pumice/perlite 2:1). This makes it much more permeable and minor watering accidents do not directly lead to the roots rotting. However, succulent soil or a mineral substrate are also ideal for dragon trees.

Choosing the right substrate is crucial for the vitality of your plant. Credit: Andrii Lysenko- stock.adobe.com

How to fertilize correctly

The dragon tree needs nutrients to grow vigorously. You can fertilize it all year round with a low-dose solution in the irrigation water. Yes, you read that right! If you do not place it in a cool winter habitat, such as a conservatory, but keep the conditions almost the same all year round, then year-round fertilization is also good for your plant.

Leaves turning brown? This helps

Brown leaf tips are often a sign of dry air or too much, too little or too irregular watering, but can also occur in nature under optimal conditions. ButIn heated rooms, it is worth increasing the humidity, for example by occasionally spraying with low-lime water.

Pruning for more vitality

If the dragon tree grows too tall or develops bald patches, it can easily be pruned back. Cut the trunk to the desired height with a sharp knife. New shoots will form in a few weeks.

If you don’t want to cut away the entire crown, you can also cut off individual shoots with a clean, disinfected knife. To do this, take the leaves up and tie them together in a “plait” with a soft hair band, then nothing will get in the way when cutting. You can put the cut shoot in a glass of water to root. Once enough roots have sprouted, plant the mini dragon in the same pot for a bushy appearance or give the cutting as a gift.

The following generally applies to all houseplantsAlways orient yourself to the conditions of the place of origin and adjust the location, the amount of watering and the substrate in your home accordingly. The darker the leaf color, the less light it needs.

The dragon tree is an easy plant to care for as long as you follow a few basic rules. A bright location, moderate watering and occasional fertilization are enough to keep it healthy and strong. If you also keep an eye on the humidity, you will be able to enjoy this exotic houseplant for a long time. And, isn’t it easy to look after a dragon tree? Good luck with our tips!

Do you know other dragon tree lovers? Then share this article with them now!

1080x1080 whatsapp

Source: Youtube/Crazyplantboy

Houseplants: How easy it is to control scale insects with the oil trick

0

Alongside aphids, fungus gnats and whiteflies, scale insects are one of the most common pests of houseplants. They mainly infest woody plants, but also orchids and oleanders. You can find out how to combat scale insects and protect your houseplants from these pests here.

Recognizing scale insects on houseplants

Scale insects feed mainly on plant sap and thus extract valuable nutrients from your plants. The small pests excrete the sugar contained in the sap in the form of a sticky secretion. A pest infestation is therefore usually only noticed when the leaves of a houseplant become strangely shiny or sticky. On closer inspection, small, pockmark-like formations are then usually discovered on the shoots and on the underside of the leaves. Orchids are also frequently infested by scale insects. You can recognize this by the fact that the leaves wilt and the flowers are deformed.

Scale insects can severely damage your plant. Oleander and orchids are particularly targeted by these little beasts. Photo: IMAGO / Michael Kristen

Some scale insects also release toxic substances into plants, which can massively impair their growth and even lead to the death of the plant. If you notice an increased number of ants in your home, this could also be an indication of scale insects on your houseplants. The ants love to feed on the so-called honeydew produced by the scale insects.

Which houseplants are particularly frequently affected?

Scale insects spread mainly in winter and spring. If they find a dry, warm climate, they also multiply rapidly. However, they particularly target some houseplants. These include

  • orchids
  • Oleander
  • Ficus
  • Palms
  • Aralia
  • Citrus plants
  • Laurel
  • Succulents with thick fleshy leaves

However, it is best not to let it get that far in the first place. Healthy and strong plants are much less likely to be infested. With an optimal location and the right care, you can effectively prevent scale insects. Plants over-fertilized with nitrogen are particularly susceptible to scale insects. To strengthen your houseplants, you can spray them with a mixture of garlic, nettle and tansy during the winter months.


You may also be interested in these articles:


Effectively combating scale insects

If you discover scale insects on your houseplants, it is important to act as quickly as possible. First of all, you should separate the pest-infested plant. If it is only a light infestation, you can simply wipe off the scale insects with a damp cloth or carefully brush them off with an old toothbrush. Check your plant regularly for new infestations and repeat the process. Spraying with water usually does not have the desired effect on scale insects.

Oil as a secret weapon against scale insects

In some plant forums, hobby gardeners recommend combating scale insects with olive oil, orange oil or tea tree oil. You can also try your luck with preparations based on kerosene or rapeseed oil. The oil film suffocates the small pests. Please note, however, that not all plants tolerate oil treatment. Young shoots in particular could turn brown and die. Therefore, find out in advance whether this treatment is suitable for your plant. You will probably not get rid of all the scale insects the first time you spray, so repeat the application after a week.

If the pests are not impressed by this either, the only other option is to use plant protection sticks 🛒 with chemical agents from specialist retailers. Simply insert these into the pot ball. The sticks poison the plant sap, causing the scale insects to die. However, only use the sticks on ornamental plants.

Use these tips to combat scale insects and save the lives of your houseplants. It is best to check your plants regularly for pests so that you can react in good time if the worst comes to the worst.

Source: meinschoenergarten

1080x1080 whatsapp


Pests: These tricks will combat small whiteflies on your plants

0

Hobby gardeners have to protect their beloved plants from various pests all year round. Fungus gnats and aphids are particularly common. But there are also small whiteflies that infest your houseplants, herbs or vegetable plants. Find out what you need to know about the so-called moth scale insect and how to combat it.

Recognize moth scale insects

The small white flies are closely related to aphids and scale insects and have nothing to do with the classic fly. A distinction is made between the greenhouse moth scale and the cotton moth scale. Both species occur mainly in greenhouses or indoors, but in rare cases also outdoors, e.g. on balconies. The aphids are 2 to 3 mm in size – with their milky white wings, the females resemble moths, which is where the name comes from.

Moth scale: How to control the pest. Photo: IMAGO / Zoonar

Both the larvae and adult moth scale insects damage your plants through their sucking activities. This also transmits viruses. In addition, the pests excrete honeydew, which makes your plants susceptible to fungal infestation. Yellow, falling leaves, growth disorders and fruit deformities are the result.

Which plants are particularly at risk?

The following plants are considered particularly endangered:

  • Basil and other herbs (also in the home)
  • Money tree
  • Tomatoes
  • Cucumbers
  • Beans
  • Cabbage
  • Fuchsias
  • Gerbera
  • Geraniums

The insects can only survive for a short time at temperatures around freezing point. However, they find optimal living conditions in the greenhouse, in the home or anywhere where high temperatures prevail. Incidentally, the females lay up to 400 eggs in their short, four-week life. These are elongated-oval and white to yellowish-green in color. Especially in warm places, the small whiteflies have the ideal conditions to multiply rapidly. All the more reason to combat them as quickly as possible.


You may also be interested in these articles:


Fighting small whiteflies

The first step, of course, is to prevent a pest infestation. Insect hotels in the garden and beneficial insects, such as ladybugs or spiders, can help you to keep the pests away. If necessary, you can strengthen your plants with tansy tea or nettle slurry. Also make sure to ventilate your home and greenhouse regularly and check your plants for pests from time to time. However, preventative measures are not always successful or you may bring the moth scale insects into your home, greenhouse or garden via newly purchased plants. Various methods have proven successful in combating the small whiteflies.

  • Yellow tablets 🛒 attract the pests. They stick to them and eventually die.
  • Rapeseed oil 🛒 or Neem products 🛒 are also suitable for controlling the moth scale insect. Make sure you also treat the underside of the leaves and repeat the application regularly. You should mix rapeseed oil with a little water before use.
  • Ichneumon wasps 🛒 are particularly helpful in the greenhouse or in the home to control pests.
  • Predatory bugs are also effective. It is best to give them grain moth eggs as food so that they do not accidentally damage your plants.
  • Certain plants, such as the poison berry or the Blue lantern flower effectively control the pests within a radius of six square meters. The little beasts die when they suck on these plants.
  • After successful pest control, it is advisable to change the substrate for houseplants.

Do without pesticides

The use of pesticides should really only be considered in an absolute emergency. Such products can cause considerable harm to the beneficial insects in your garden. First try the means and methods listed here to get rid of the small whiteflies for good. Good luck!

Source: meinschoenergarten

1080x1080 whatsapp


Fridge: why you should freeze sausage and salami from now on

0

Have you cut up too much sausage or taken advantage of a special offer? No problem – you can simply freeze salami and enjoy it later. Due to its processing, salami has a longer shelf life than many other types of sausage anyway – and if you do everything right when freezing it, you can extend its shelf life even further.

Freezing salami – when is the right time?

If you want to freeze salami, it should be frozen as soon as possible. fresh be fresh. It is best to freeze them before the best-before date. Whether in slices or in one piece, the sooner you freeze the sausage, the better its quality will be preserved.

Especially with sliced salami quick action is required. As soon as the surface has dried out or the first changes appear, it is too late. Fresh, slightly moist sausage with a good smell, on the other hand, is ideal for storing for later – without any loss of flavor.

How to freeze salami properly

You should prepare the salami carefully before freezing. If possible, wrap it airtightto avoid freezer burn. Freezer bags, tins or – even better – vacuum bags are suitable for this. The less air comes into contact with the salami, the longer it will stay aromatic.

TipAvoid air pockets and freezer burn with a simple trick.

Divide the sausage into smaller portions before freezing. This saves you time later and allows you to defrost only as much as you really need. Don’t forget to put the packaging with the freezing date to be labeled. Salami stays fresh in the freezer for around three to four months.


You may also be interested in these articles:


Defrosting without loss of quality

When defrosting, small changes can occur – especially with thinly sliced salami. This is due to the fact that ice crystals form during freezing, which slightly affect the structure of the sausage. Especially sensitive are thin slices, while pieces in one piece remain more stable.

It is best to defrost the salami slowly in the fridge. This way it stays juicy, retains its flavor and is ready to use again after a few hours – whether for a sandwich board, a pizza or as a snack between meals. Once defrosted, however, it should consumed quickly can be consumed quickly.

If you want to avoid freezing

Do you need the sausage soon? Then you can avoid freezing it and store it well packaged in the fridge. Salami keeps well here up to two weeks. It is important that you store it in an airtight container so that it does not dry out or absorb foreign odors.

Particularly long-life varieties such as chorizo or cabanossi can even be stored unrefrigerated – provided they are in their original packaging or well protected. These varieties are also excellent for freezing, as they remain particularly stable due to the salt and fat.

Checklist: Freezing salami made easy

  • Only fresh, use flawless salami
  • On Piece or in Slices freeze – as required
  • Airtight packaging (freezer bags, tins or vacuum seal)
  • In small portions freeze for more flexibility
  • Labeling with freeze date do not forget
  • Frozen 3-4 months shelf life
  • Slow Thawing preferably in the refrigerator
  • Thawed Salami consume quickly
  • AlternativesRefrigerator storage or long-life varieties at room temperature

This article was created partly with machine support and carefully checked by the editors before publication.


Refrigerator: Freeze yogurt? Why it’s less healthy afterwards

0

Did you pick up a few too many tubs when you went shopping for the week and realize that you won’t be able to finish them before the best-before date? No need to throw yogurt away – you can freeze yogurt to use it later. This is a sensible solution to food waste, especially for larger stocks or spontaneous purchases.

However, if the yogurt already smells sour, looks bad or the packaging is bloated, it is better to dispose of it. For everything else, freezing is a simple and practical way to extend the shelf life – provided you pay attention to a few important points.

What is the best way to freeze yogurt?

Freezing yogurt is basically uncomplicatedbut requires some preparation. Freezing causes ice crystals to form, which separate the water from the solid components. As a result, defrosted yoghurt appears more grainy or liquid than fresh yoghurt. For direct use in muesli or on its own, this may be unusual, but for cooking, baking, smoothies or dressings it is completely unproblematic.

It is best to fill the yogurt into smaller portions before freezing – e.g. in airtight freezer containers, ice cube trays or freezer bags. This way, you always have a handy amount ready when you need it. Leave some space in the container, as yogurt expands slightly when it freezes. You can use a label to note the date and contents. Yogurt stays frozen for about for about two months in good quality.

Tips for consistency and shelf life

Greek yogurt or natural yogurt are suitable especially good for freezing, as they are naturally thicker and the consistency remains somewhat more stable after defrosting. If you want to make yoghurt ice cream from the yoghurt, you can mix it with pureed fruit beforehand to create a delicious homemade ice cream alternative.

Already opened Yoghurt pots should be kept tightly closed in the fridge and used as soon as possible. If you are unsure, check the smell, consistency and appearance. If there is mold or gas formation: do not use.


You may also be interested in these articles:


What happens to the nutrients?

Most nutrients are also well preserved when yogurt is frozen. Calcium, protein and B vitamins survive storage in the freezer largely unscathed. The situation is somewhat different for probiotic cultures: They can partially die off due to freezing and lose their original effect. If the probiotic effect is particularly important to you, you should freeze the yoghurt. is better eaten fresh.

However, as with many dairy products, freezing is still worthwhile. Milk, butter and cheese can also be stored well – and help to use stocks efficiently and make good use of leftovers.

Checklist: Freezing yogurt made easy

  • Use fresh yogurt: Only freeze perfect products, no sour-smelling or expired tubs
  • Portioning: Divide into small quantities – e.g. into ice cube molds, cups or tins
  • Pack airtight: Seal containers well to avoid freezer burn
  • Labeling: Label contents and freezing date with a label
  • Observe shelf life: Keep yogurt in the freezer for a maximum of 2 months
  • Defrost slowly: Defrost in the refrigerator – not at room temperature or in the microwave

This article was partly created with the help of a machine and carefully checked by the editorial team before publication.


Refrigerator: Mistake when freezing soup destroys all nutrients

0

Freezing soup is the perfect solution for a quick meal. Clear broths and vegetable soups in particular can be easily portioned and stored in advance – ideal for stressful days or quick meals in between. Even with larger quantities, you don’t have to waste anything: If you keep a few things in mind when freezing, the nutrients and taste of your soup will be preserved.

Freezing soup – correct portioning

If you want to freeze soup, the most important step is to complete cooling. Warm food in the freezer causes condensation to form and other food to thaw or even spoil. So let the soup cool down thoroughly before pouring it into containers or bags.

Reading tip: These vegetables are a must for fall

Ideally, use flat, airtight sealable containers. freezer bags or tins. Leave about one to two centimetres of space around the edge, as liquids expand when freezing. Flat bags are particularly practical – they save space, freeze through more quickly and are easier to stack.

The right preparation counts

Not every soup freezes equally well: clear soups or Broths or light vegetable soups usually retain their flavor without any problems. Creamy soups, on the other hand, especially those with cream or milk, can lose their flavor when defrosting. flocculate or change their consistency. A simple solution: freeze the soup without dairy products and only add fresh cream when reheating.

Depending on the ingredients, it will keep in the freezer for two to three months. The soup remains particularly aromatic if you freeze it in portions and adjust the quantities to your requirements. to suit your needs – this saves time later and prevents unnecessary leftovers.

Freeze soup – preferably without cream. Photo: Maliflower73 – stock.adobe.com

Defrosting without loss of quality

You have several options for defrosting: The gentlest way is to defrost the soup overnight in the fridge. Alternatively, you can heat it up directly in a pan over a low heat – but stir regularly to prevent the soup from thawing. Burning to avoid burning.

If you have frozen the soup in a freezer bag, defrosting in a bain-marie also works very well. This method is particularly evenly and prevents hot and cold spots from forming – ideal for more delicate soups or creamy consistencies.


You may also be interested in these articles:


What happens to the nutrients

Many people think of freezing as a loss of nutrients – but most vitamins and minerals are surprisingly well preserved when stored correctly. High-fiber soups with pulses or vegetables in particular retain their nutrients. health-promoting value even after thawing.

Incidentally, this also applies to many other foods: kitchen herbs, stews or homemade sauces can also be frozen without any problems. If you regularly pre-cook larger portions, you not only save time, but also actively reduce food waste.

Checklist: Freezing soup made easy

  • Soup Cool completely before putting it in the freezer
  • Place in shallow, airtight containers or Freezer bags fill
  • 1-2 cm Air to the edge leave – liquid expands
  • Cream or milk only add when warming up
  • Portion wise freeze for flexible use
  • Shelf life: approx. 2-3 months at -18 °C
  • Defrosting in the refrigerator or preferably in a water bath
  • Heat evenly and stir regularly
  • Clear broths and vegetable soups are particularly suitable
1080x1080 whatsapp

This article was partly created with the help of a machine and carefully checked by the editorial team before publication.


Washing: This is how often you really need to put your bra in the washing machine

0

A bra can be a real investment. But then it should also last a long time! But when it comes to caring for this delicate underwear, many people often make mistakes that drastically shorten its lifespan. Deformed cups or worn-out straps are often the result of incorrect washing. Here you can find out how to wash your bras correctly and what you should avoid at all costs.

Washing bras: How to get your bra ready for washing

Before you wash your bra, you should first check the care label. This will give you valuable information on the recommended washing temperature and whether the bra is machine washable at all. Particularly high-quality bras with lace, silk or elaborate embellishments should possibly only be washed by hand.

Correct preparation in the washing machine is then crucial: close all hooks so that they do not get caught in other items of clothing or damage the fabric. For bras with removable straps, you can remove them and wash them separately. Push-up bras with removable pads should be removed before washing.

A special laundry net is essential when machine washing bras. It protects the delicate materials and prevents the straps from twisting or the fasteners from damaging other items of clothing. You should use a separate laundry net for each bra so that the items do not rub against each other.

The right wash cycle: gentle and effective

If you wash your bras in the machine, choose a gentle or delicate wash program at a maximum of 30 degrees. Higher temperatures can affect the elasticity of the material, which leads to it wearing out more quickly. The spin speed should be low – ideally under 600 revolutions per minute.

Use a mild mild detergent or a special detergent for underwear. Do not use fabric softener, as this attacks the elastic fibers and causes the bra to lose its elasticity. Bleaching agents are also taboo, as they can damage the materials and fade colors.

Wash your bra by hand

Hand washing is particularly recommended, especially for high-quality bras or bras decorated with lace. Fill a sink with lukewarm water and a little mild detergent, carefully immerse the bra and gently move it back and forth. After about 15 minutes, rinse it thoroughly with clear water until there is no soap residue left.

How to wash your bra by hand. Photo: fotoduets – stock.adobe.com

Correct drying: crucial for the shape

After washing, it is important to carefully squeeze out excess water – do not wring it out! Wrap the bra in a towel and squeeze gently to remove any further moisture. You should then leave it to air dry flat on a towel or hung up by the straps. You should avoid direct sunlight as it can fade colors.


You may also be interested in these articles:


The tumble dryer is absolutely taboo for bras! The heat can damage the elastic fibers and deform the cups. Radiators are also not a good idea for drying.

To maintain the shape of the cups, you can carefully press them into the correct shape before drying. With underwired bras in particular, it is important that the cups retain their shape and are not pressed in.

So: A good bra is an investment in comfort and well-being – treat it with care and it will serve you well for a long time.

1080x1080 whatsapp

Source: merkur

Washing: Why you should avoid fabric softener from now on

0

Opinions differ on the subject of fabric softener: some love the flattering feeling on the skin and the scent of fresh laundry; others think it’s a waste of money and are offended by what they see as the penetrating perfume smell.

These things speak against fabric softener

It is clear that fabric softener also has other useful properties: laundry is easier to iron and, according to the manufacturer, fabric softener is even supposed to protect the color and fibers of clothing – not to mention the numerous applications in the household. Nevertheless, the Federal Ministry for the Environment considers fabric softener to be at the “top of the list of household products with questionable benefits”!

Here are 6 arguments and disadvantages that speak against the use of fabric softener. Will they convince you?


You might also be interested in these articles:


Fabric softeners cause skin problems

Fabric softener can be a blessing for people with neurodermatitis. The sensitive skin is less irritated by the fluffy clothes. Conversely, fabric softeners contain many substances that are known to trigger contact allergies. The pleasant feeling of wearing clothes can then turn into a real plague of itching. Dermatologists strongly advise against using fabric softeners, especially for baby clothes.

Not suitable for every wash

Laundry becomes negatively charged during washing. This results in so-called drying rigidity, which makes the clothes feel brittle. Fabric softeners contain positively charged surfactants that form a film around the fibers and remove the drying rigidity. However, this film has side effects and is not suitable for every material:

  • Terry cloth and cotton lose their absorbency, which is particularly undesirable for hand towels and tea towels.
  • Sports and outdoor clothing is no longer breathable. The special membrane incorporated into the fabric becomes clogged.
  • Synthetic fibers are attacked by fabric softener. Stretch jeans bulge out more quickly, elastic bands lose their elasticity. Textile manufacturers point out that fine lace underwear loses its shape due to fabric softener.
  • Wool, fleece and silk feel greasy with fabric softener. Their fibers stick together. Down jackets and pillows should also never be washed with fabric softener for this reason.

Fabric softener can cause smelly washing machines

Yes, it’s true: fabric softeners are one of the most common causes of smelly washing machines. Fabric softener is only added to the laundry at the end of the wash cycle. Bacteria settle in the residue. Anyone who confronts a smelly washing machine with fabric softener fragrance is therefore caught up in a vicious circle. Instead, regular cleaning of the household appliance is even more important when using fabric softener.

They also cause environmental damage

Fabric softener has these disadvantages. Photo: Media Partisans/FUNKE Digital

Fabric softeners were heavily criticized in the 1980s. A lot has happened since then. Since 2005, only biodegradable surfactants may be used. However, this does not apply to other ingredients such as fragrances, solvents, dyes and preservatives. These are still a burden on the environment. Not to mention the fact that the 200,000 tons of fabric softener that Germans use every year generate a whole lot of plastic waste and greenhouse gases.

They may contain animal waste

A very specific ingredient in fabric softeners is often responsible for making the sweater feel so cozy. If you read “Dihydrogenated Tallowoylethyl Hydroxyethylmonium Methosulfate” on the packaging, this is nothing other than beef tallow. It is usually obtained from the waste products of slaughtering. This is very cost-effective for manufacturers, but rather disgusting for some customers. Products bearing the “vegan” logo do not contain beef tallow.

In a way, they are generally unnecessary

“You can safely leave fabric softener on the store shelf,” advises the German Federation of Consumer Organizations. There are several inexpensive and environmentally friendly alternatives:

  • If you use a tumble dryer, you can do without fabric softener: The drying rigidity is shaken out of the laundry; the antistatic effect of fabric softener is achieved with a ball of aluminum foil, which is placed in the dryer with the laundry.
  • Laundry can also be made smooth by pouring 125 ml of vinegar into the fabric softener compartment. Don’t worry, the laundry will NOT smell of vinegar afterwards! The fabric and machine are also not damaged by the acid at this dosage; on the contrary, the vinegar dissolves harmful limescale residues.
  • For a fresh scent, there are scented pads that you can hang in your closet. You can buy them or simply make them yourself. The detergent is also usually already scented.

The disadvantages of fabric softener are manifold. For some, the personal benefits may outweigh the concerns. How you feel about the subject is entirely up to you. At least now you know.

1080x1080 whatsapp

Sources: wunderweib, forum-waschen, t-online