Home Blog Page 1760

Cleaning: Which is better – dishwasher or hand washing?

0

Washing dishes is an activity that needs to be done every day. After all, a regular three meals a day produces a lot of dirty cups, plates and cutlery. Many households use dishwashers instead of hand washing. But which of the two methods is better for the environment and cheaper? Find out here!

Dishwasher versus hand washing: which method is better?

The idea that washing up by hand uses less water and energy than washing up in a dishwasher is an obvious one, but it is not always true. This has been discovered by an initiative of the Federal Ministry for Economic Affairs and Energy (BMWi). Find out here which cleaning method can really reduce your water and electricity costs.

Which method do you use to get your dishes clean? Credit: LianeM – stock.adobe.com, Lars Koch – stock.adobe.com

What are the benefits of the dishwasher?

According to the BMWi initiative, when the dishwasher is fully loaded, up to a third less electricity and almost half less water is used compared to washing dishes by hand. A comparative study by the University of Bonn shows even more savings potential: washing dishes by hand consumed an average of 46 liters of water. In contrast, the same amount of dishes could be washed in the dishwasher with only 15 liters of water. Newer models sometimes use even less water.

5 tips for using your dishwasher even more efficiently:

  1. Fully loadedEvery tenth wash cycle could be saved if the dishwasher was fully loaded every time.
  2. Avoid pre-rinsing: Modern machines also clean dishes without pre-washing. Rinsing under running water is therefore unnecessary in most cases.
  3. Select an economical programAn economy or short program is completely sufficient for light soiling and uses less electricity. The Eco program, for example, takes up to four hours, but requires less electricity as the water is only heated to 40 °C.
  4. Cleaning the dishwasher sieveA clogged strainer prolongs the wash cycle, causing the dishwasher to consume more energy. Therefore, clean it at regular intervals.
  5. Ensure good conditionsPay attention to the water hardness and dose detergent, salt and rinse aid accordingly.

You may also be interested in these articles:


What are the advantages of hand washing?

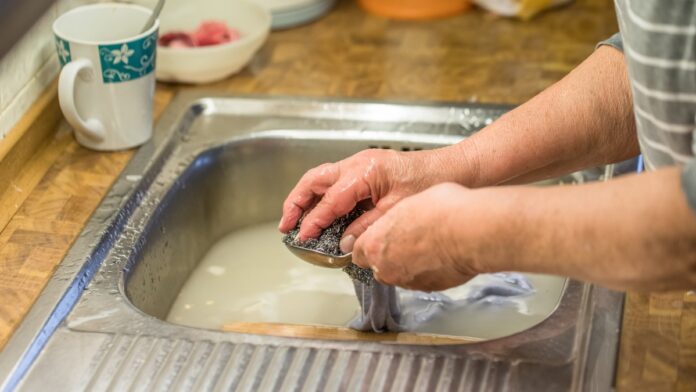
Compared to dishwashers, hand washing uses detergents that are less aggressive. Dishwasher tablets contain phosphates, which remove incrustations and burnt-on food, but are harmful to the aquatic environment. When washing up by hand, on the other hand, it is sufficient to soak the dirty dishes or scrub them with a sponge and a little washing-up liquid.

To wash dishes by hand as sparingly as possible, you should always fill the sink with warm water and washing-up liquid instead of cleaning the dirty dishes under running water. Depending on how many dishes need to be washed, it may make sense to change the water in between. Always make sure to wash the dishes that are the least dirty first.

Number check

According to researchers at the University of Bonn, washing dishes by hand consumes an average of between 0.2 and 16 kilowatt hours and 14 to 447 liters of water. The dishwasher uses between 1 and 2 kilowatt hours and 15 to 22 liters of water for the same amount of dishes. This means that in most cases, using a dishwasher costs significantly less water and electricity than washing dishes by hand.

Conclusion

Which method is really cheaper in the end depends above all on the correct behavior of the consumer. If you use and load your dishwasher correctly, you can save more water and electricity when cleaning dirty dishes than someone who washes dishes by hand without any planning. On the other hand, thoughtful washing up by hand can be cheaper than using an incorrectly loaded dishwasher. In addition, washing up by hand avoids the use of aggressive and chemical detergents, which in turn benefits the environment.

Sources: t-online, br, geo

Household: Harmful substances discovered in kitchen roll – how to protect your health

0

You reach for kitchen roll several times a day to wipe up splashes of fat, wipe out your pan before washing it or dab a piece of meat. But have you ever wondered what exactly is in kitchen roll and whether it is really as safe as it seems? In this article, you’ll find out what you should look out for when buying kitchen roll, which ingredients are problematic and how to use kitchen roll sustainably.

Practical, but not always safe

Kitchen paper is as much a part of everyday life as salt and pepper. Once used, it ends up straight in the bin. That’s why it’s worth taking a closer look: Many kitchen rolls are made from virgin pulp – i.e. from trees that have been felled specifically for this purpose. Some of this wood comes from countries with a high risk of deforestation, such as Brazil, South Africa or Russia. Recycled paper is clearly the better choice here, as it not only saves energy and water, but also a lot of CO₂.

How to recognize sustainable products

Choose kitchen rolls made from 100% recycled paper. They use significantly fewer resources during production and protect the forests. Also look out for seals such as the “Blue Angel”, which identify environmentally friendly products. Nevertheless, even recycled kitchen paper is a disposable product. A cloth that you can use several times is often sufficient for simple cleaning tasks.

Kitchen roll does not belong in the organic waste

Although some manufacturers advertise it as “biodegradable”, you can only dispose of kitchen roll in the organic waste garbage can in exceptional cases – namely when it is used as packaging for kitchen waste. Otherwise, used kitchen roll belongs in the residual waste. This is the only way to keep organic waste free of foreign matter.

Kitchen roll and food: this combination can be risky

Many people use kitchen roll to dab food. This is where things get critical: in a recent test, laboratories found bisphenols such as BPA and BPS in almost all kitchen rolls – even in products made from recycled paper. These substances are considered to have a hormonal effect and can be harmful to health. The chemicals dissolve particularly strongly when greasy food remains in contact with the paper for a long time.

Be careful when in contact with food: Kitchen roll is not as harmless as previously thought. Credit: IMAGO / Westend61

How to use kitchen roll correctly – without risk

Avoid direct contact with food – especially with recycled kitchen rolls. It is better to use them only for cleaning or soaking up liquids. If you want to be on the safe side, use kitchen towels for food preparation that are expressly labeled for this purpose or only use kitchen paper for short periods of time.

Choose kitchen roll carefully – and use it sparingly

Kitchen roll remains a practical helper, but should be used wisely. Choose products made from recycled paper, look at the ingredients and avoid unnecessary contact with food. This will not only protect you, but also the environment.


You may also be interested in these articles:


Kitchen roll is an indispensable part of everyday life, but it has its downsides. When buying it, look for recycled quality, avoid unnecessary contact with food and dispose of it correctly. With a little mindfulness, you can also make a small but important contribution to your health and the environment with kitchen roll.

Follow Geniale Tricks on WhatsApp to make sure you don’t miss any more tips and tricks in future!

Source: Ökotest

Houseplants: How to produce surprisingly beautiful flowers with your hemp bow

0

Houseplants: How to make your hemp produce surprisingly beautiful flowers

Laundry: This tablet from the medicine cabinet turns gray laundry white again

0

Aspirin for white laundry – it sounds crazy at first, but it’s a real insider tip! No matter how hard you try to wash your white laundry properly, it will eventually get it: the dreaded gray haze. Once it’s there, the clothes seem to sink more and more into a dirty shade of gray with every wash. All you need is a simple ingredient from your medicine cabinet to put an end to the problem. The trick actually works – and better than you think!

How aspirin whitens the laundry

So: Grab five 325-mg aspirin tablets and first dissolve them in eight liters of hot water. You can also break the tablets so that they dissolve more quickly.

Now place your greying clothes in the solution and leave them there for eight hourspreferably overnight. Make sure that all items of clothing are covered by the water. Alternatively, you can add the tablets directly to the wash cycle in the machine, but the better option is to dissolve them in a separate container.


You may also be interested in these articles:


Post-treatment of laundry

After the aspirin bath, dry the laundry or wash it normally in the washing machine if you prefer. Incidentally, the tablets also remove yellow deodorant stains and blood.

However, to remove blood, it is essential that you soak the aspirin in cold water and soak the garment for around two hours. Never remove blood stains with hot water, as this causes the protein in the blood to clump together, making it even more difficult to remove!

Aspirin contains a weak acid which causes the great effect. And you can always find a few headache tablets in the medicine cabinet. This saves you a trip to the drugstore to buy overpriced special cleansers.

Source: Ludwigshafen24

Laundry: only then does a prewash really make sense

0

Doing laundry really isn’t rocket science: put the dirty laundry in the machine, select easy-care, boil wash or colored wash and off you go! However, some washing machines also have a pre-wash option. Find out here when this extra wash is useful!

It’s really annoying: you take the freshly washed laundry out of the washing machine and still discover dirt on it. A prewash could have prevented this – couldn’t it?

5 cases in which a prewash makes sense

As the name suggests, the prewash is an extra wash cycle before the actual main wash. During the pre-wash, which lasts around 20 minutes, your textiles are thoroughly washed once with cold water. The pre-wash water is then pumped out and the main program starts. So far, so good – but when is the prewash useful?

Do you know when a pre-wash is useful? Credit: IMAGO / bonn-sequenz

Prewash for particularly heavily soiled laundry

The children have given their all in the mud puddles and your clothes clearly show the work in the garden. In such cases, a pre-wash is recommended. This removes most of the sand, dust or soil from the clothes, rinses it away and your laundry is cleaned more gently during the main wash.

Your curtains are particularly dirty

Most people don’t enjoy washing curtains. Nevertheless, you should make the effort from time to time and give your textile window charmers a bath in the washing machine. An extra pre-wash can loosen stubborn stains, but many machines nowadays also have their own curtain rinse cycle.

Your woolen blankets have stains

There are special wool washing programs to protect the delicate wool fibres. These are usually quite short. A prewash is recommended so that you can still get stubborn stains out of your wool blankets or heavy fabrics. The stains are then soaked better and can be removed in the subsequent short wool wash cycle.


You may also be interested in these articles:


The cleaning rags need to be washed

Cleaning cloths and mops should also be washed regularly. As these often contain residues of cleaning agents, pre-washing is advisable.

Your sportswear smells strong

If you do sport, you will inevitably work up a sweat. To eliminate the unpleasant odor, which quickly spreads to other items of clothing, you should pre-wash strong-smelling sportswear. This will soak the textiles for longer and the odor can be rinsed out more easily.

Good to know: Normally, no detergent is used in the prewash. However, for particularly stubborn stains, you can add a little liquid detergent to the detergent compartment.

What else you need to know about the prewash program

Each prewash uses additional water and energy. To avoid this extra cost, you can also pre-treat heavily soiled clothes without pre-washing. Soak the textiles in a bucket or bathtub, for example, to loosen stains and incrustations. You can either add a dash of vinegar to the water or rub the stains with curd soap and then leave them to soak in the diluted lye for around 30 minutes.

Do you regularly use the pre-wash or do you prefer to skip this extra wash cycle?

Source: utopia.de

Laundry: Nobody really needs these detergent products

0

The detergent market is overflowing with specialty and combination products that all promise the best for your laundry. From color detergents to mild detergents to special products for wool, sportswear or baby clothes – the choice is huge. But which detergents do you actually need for perfect washing results? Most households get by with far less than the advertising suggests. Here you can find out which three basic products are completely sufficient and what you can do without when buying. Which detergents do you really need? Just read on!

Which detergents do you need: These detergents are enough

Experts from the consumer advice center agree: For an average household, three different detergents are enough to cover all washing needs. This basic range is not only cost-effective, but also more environmentally friendly as it reduces the use of chemicals.

1. heavy-duty detergent (universal detergent):
Heavy-duty detergents are the all-purpose weapon for white and heavily soiled laundry. They contain bleaching agents and optical brighteners that keep white textiles bright and remove stubborn stains. Colored laundry can also be washed occasionally with heavy-duty detergent, but the colors will fade if used frequently.

2. color detergent:
Color detergent is the first choice for coloured laundry. It does not contain bleaching agents or optical brighteners, which protects the colors and prevents them from fading. Modern color detergents often contain special enzymes that clean reliably even at low temperatures.

3. mild detergent:
Delicate materials such as wool, silk or clothing with the care label “delicates” require a mild detergent without aggressive enzymes. Delicates detergents clean gently and preserve the structure of the fibers.

Superfluous special products: You can do without them

Many detergent manufacturers offer special products for certain applications. However, most of these are superfluous and can be replaced by the three basic detergents:

Sports detergent: These promise to remove sweat odors and are often significantly more expensive than conventional detergents. In fact, a good color detergent at 40 °C is completely sufficient to get sportswear hygienically clean.

Baby detergent: Even if the advertising suggests otherwise, special baby detergent is not necessary. A mild mild detergent or color detergent without fragrances cleans baby clothes just as well and is gentle on sensitive skin.

Black detergent: These products are designed to protect black clothing from fading. However, a high-quality color detergent serves the same purpose and is more versatile.

Wool detergent: A mild detergent is sufficient for occasional washing of wool sweaters. A special wool detergent may only be useful for very expensive or delicate wool items.

Additives and aids: What is useful?

In addition to the basic detergents, there are some additives that can be useful in certain situations:

Stain remover: Special pre-treatment agents can be helpful for stubborn stains such as blood, grease or grass. However, home remedies such as gall soap or a paste made from baking soda and water are often sufficient.

Water softener: In areas with very hard water, a water softener can improve the detergent effect and prevent limescale deposits in the machine. Check the water hardness in your region – this additive is often superfluous.

Hygiene rinse aid: These products promise special hygiene and bactericidal properties. They are superfluous for normal laundry, as modern detergents already wash hygienically clean at 30-40 °C. They can only be useful in special cases, such as illness or the need for care.

You really need these detergents. Credit: IMAGO / imagebroker

Powder or liquid: Which is better?

In principle, both powder and liquid detergents have their place:

Washing powder is usually cheaper and often contains fewer preservatives. It is particularly suitable for white laundry and heavily soiled textiles. However, it can leave residues at low temperatures.

Liquid detergent dissolves completely even at low temperatures and leaves no residue on dark clothing. However, it is often more expensive and contains more chemicals for preservation.


You may also be interested in these articles:


Dosage: less is often more

A common mistake is overdosing detergent. More detergent does not automatically mean cleaner laundry – on the contrary! It can lead to residues that make textiles appear stiff and gray. Follow the dosage recommendations on the packaging and take this into account:

  • The degree of soiling of the laundry.
  • The water hardness in your region.
  • The load size of the washing machine.

With the right basic set of three detergents, you can manage in almost all washing situations. This not only saves money and space in the household, but also protects the environment. Avoid superfluous special products and rely on proven, high-quality detergents.

Source: verbraucherzentrale

Laundry: Is your washing machine wandering during the spin cycle? How to solve the problem

0

Is your washing machine wandering during the spin cycle, shaking a lot or even jumping out of place? You should fix this problem as quickly as possible. In the worst case scenario, the appliance could disconnect from the water supply and cause water damage in your home.

Washing machine wanders during the spin cycle: 8 helpful tips

Here you will find possible causes of the washing machine moving during the spin cycle and find out how you can solve the problem in just a few simple steps. And don’t worry – the washing machine doesn’t necessarily have to be broken, the problem can also have completely different causes.

Removing the washing machine’s transport lock

Has your newly purchased washing machine started to move during the first wash cycle? Then the reason is usually the transport lock. It holds the free-swinging washing drum in place during transportation. If the transport lock of the washing machine is not released afterwards, the drum cannot swing freely during the spin cycle. To release the transport lock, you need to loosen four large screws on the back of the washing machine (six screws on a top loader). Modern models cannot be started at all with the transport lock tightened. With older models, however, it is worth checking this point.

Anti-vibration mats

Special rubber mats can absorb the vibration of the washing machine. Anti-vibration mats – also known as washing machine mats – are available at any DIY store.

Note: The higher the spin speed, the greater the risk of the washing machine jerking or wandering. Although a high speed ensures that the laundry is slightly drier, it does not ensure that it is also cleaner. For most washing cycles, a maximum speed of 800 revolutions is completely sufficient.

So-called anti-vibration mats can provide a remedy. Credit: IMAGO / Michael Gstettenbauer

Optimal location

The washing machine often wobbles or wanders if it is not exactly level with the floor. As soon as the washing machine is tilted, the drum will also be tilted. In this case, try to adjust the support feet of the washing machine to the floor. Follow these steps to check whether the washing machine is level:

  • Start a test spin cycle and place a pin on the washing machine. If the machine is tilted, the pin will always roll in the downward direction.
  • As even small deviations cause the washing machine to move, you can use a spirit level for precise alignment or for checking.

Make sure the surface is clean

If the washing machine wanders, a dirty floor could also be the cause. If there is an anti-vibration mat on a greasy or dirty floor, the effect is even greater. Nobody cleans the floor under the washing machine after every wash cycle. After a few years, however, dust, dirt and moisture accumulate there. This can cause the washing machine feet to slip and the washing machine is then no longer perfectly aligned. It is therefore better to clean the floor under the washing machine at regular intervals.


You may also be interested in these articles:


Loading the washing machine evenly

Unevenly loaded or overloaded washing machines are more likely to move during the spin cycle. Every washing machine has information on the maximum load volume. This makes it easier for you to estimate how much laundry you can wash at once. Also make sure to mix large items (e.g. sheets) with smaller items of clothing (e.g. socks and shirts).

Is the drum broken?

You cannot tell from the outside whether the washing drum is defective. Therefore, start a test run and let the washing machine spin at 600 to 800 revolutions without any load. If the washing machine moves at this low speed, the drum could actually be defective.

Washing machine in a bathroom.
Your washing machine may be faulty. Credit: IMAGO / Michael Gstettenbauer

Defective shock absorber

Over time, the drum’s shock absorbers can wear out. The washing drum itself also suffers from this and an imbalance may occur. This means that the drum deflects too much in one direction during the spin cycle. In the long term, this will cause the washing machine to break down.

Check the drain pump and lint filter

If the drain pump is not working properly, excess water will remain in the washing machine. The extra weight could also cause an imbalance during the spin cycle. Before you call a technician, you should first clean the drain pump and the lint filter attached to it. Both parts are hidden behind a small flap in the lower section at the front of the washing machine. You should have a bowl and some kitchen towels ready to catch any waste water.

If you have checked all possible triggers and still haven’t found the fault, it’s high time to contact a technician or think about buying a new washing machine.

Source: t-online
Thumbnail: ©Flickr/Hannah and Simon ©IMAGO / Michael Gstettenbauer

Cleaning: put your wine glasses in the dishwasher like this and they won’t break

0

After a party with lots of guests, the champagne and wine glasses pile up in the kitchen. You don’t feel like washing them all by hand. Can’t you just put the wine glasses in the dishwasher? Opinions differ on this question. Anyone who has ever had to pick up the shards of a champagne glass from the bottom of the dishwasher is more likely to use washing-up liquid and a washcloth to clean them. However, there is an ingenious trick that allows even delicate champagne glasses to survive every wash cycle without damage.

Putting wine glasses in the dishwasher?

They still exist: spontaneous inspirations that make the scales fall from your eyes. That’s what happened to X user Anna Klatsche. When she didn’t feel like washing her champagne glasses by hand, she simply put them in the cutlery basket of her dishwasher.

Not only do the champagne glasses get clean there – they are also much safer than in the sink. Killing two birds with one stone and not even lifting a finger! You praise tricks like this for everyday life.

Here you will find external content from twitter.com that is recommended by our editorial team. It complements the article and can be displayed and hidden again with one click.

I agree to this external content being displayed to me. Personal data may be transmitted to the provider of the content and third-party services.

Anna’s post caused a storm of enthusiasm online: “How incredibly good, simple!” it says. “This ingenuity almost makes me want to start drinking prosecco …”, writes another user.

But not everyone is thrilled. They are annoyed because their dishwasher doesn’t have a basket – or only one that isn’t the right size. For some it is too small, for others too big, so that the glasses would wobble dangerously with every jet of water.


You may also be interested in these articles:


Very well. A single trick – however ingenious it may be – rarely solves all the world’s problems. But there is a clever alternative to Anna’s idea. Many dishwashers have their own wine glass holder – without their owners knowing about it. Simply open the holder on the sides of the upper basket and lean your wine glasses against it at an angle.

You can safely store both wine glasses and champagne glasses here. Annoying washing up and broken champagne glass stems in the sink are now a thing of the past!

Note: Wine glasses and champagne glasses should not be washed too hot. Therefore, select the eco or gentle program of your dishwasher.

Source: twitter/Wirrbelkind


Glass cleaner: it can damage these 6 surfaces

0

Every well-stocked cleaning cupboard also contains a bottle of glass cleaner. You can use it to make your windows shine again and ensure a clear view. But did you know that you can also use glass cleaner as a universal household cleaning agent? Thanks to its ingredients, the cleaner ensures that smooth surfaces anywhere in your home, such as your bathroom tiles, become streak-free.

But before you grab the all-rounder and spruce up your home, you should know that glass cleaner is not suitable for all surfaces. In this article, we tell you which surfaces should not come into contact with it.

6 surfaces that you should never treat with glass cleaner

Used incorrectly, glass cleaner can damage some surfaces instead of cleaning them. Find out which ones here:

Mirrors

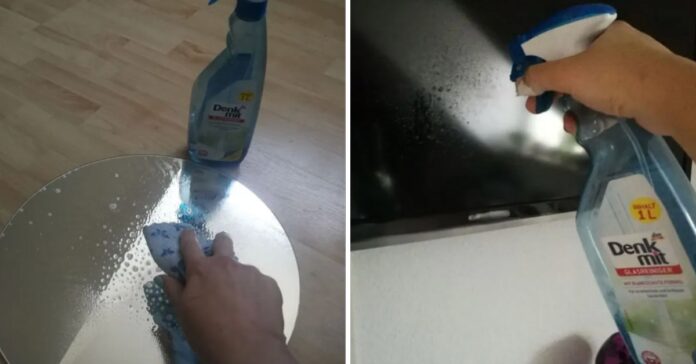
Better not clean your mirror with glass cleaner. Credit: FUNKE Digital

Admittedly, this sounds a little unusual at first, as you are probably one of those people who clean their mirrors with glass cleaner. But you’d be better off not doing that in future. This is because the substances contained in the glass cleaner attack the silver coating and dissolve the film over time. This is shown by the mirror suddenly getting brown stains that look as if they have been burnt in. Particularly with old mirrors, it is therefore better to use warm water or, for more stubborn stains, white spirit.

Granite worktops

Unfortunately, using glass cleaner on granite or marble worktops is not a good idea. The porous stone surfaces are corroded by the ingredients, causing permanent damage. Glass cleaner also causes stains on these surfaces and makes them look dull and dirty.

Car windows

Very few people know that car windows should not be cleaned with standard glass cleaner. This can lead to streaks and stains, which are not only unsightly but also impair visibility. It should also never be used on tinted windows, as the ammonia it contains can damage the film. It is better to use a cleaner specifically for car windows that is less aggressive.

Screens

a screen is cleaned with a glass cleaner
You should not use glass cleaner on screens. Credit: FUNKE Digital

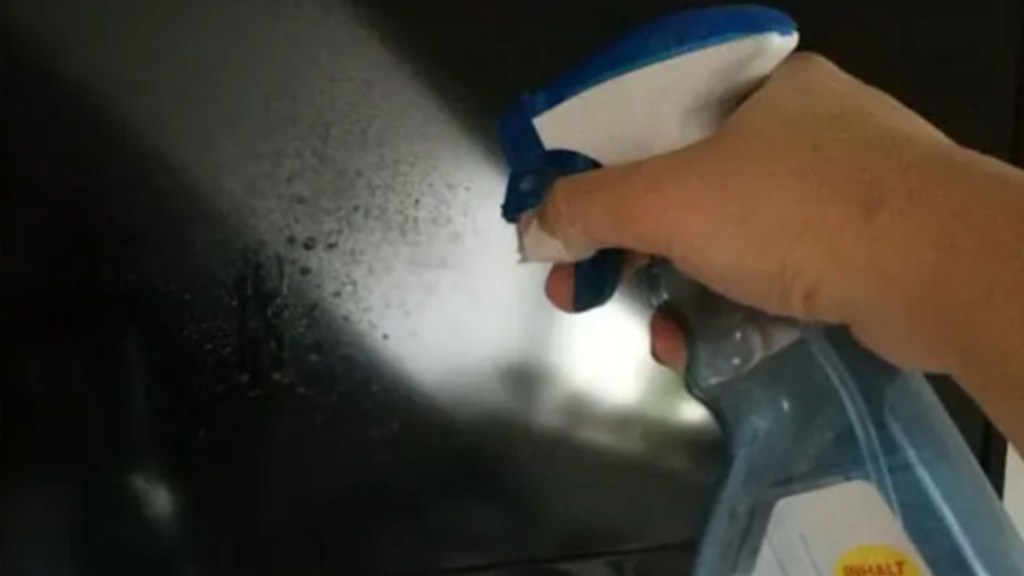
To remove fingerprints or grease stains from a laptop, computer or TV screen, many people like to use glass cleaner. Although this degreases and cleans well, its ingredients are too harsh for sensitive screens. Instead, use a microfiber cloth with a little water or a special cleaner for electronic devices.

Wood

Care should also be taken with wood. Untreated wood should never be cleaned with glass cleaner. It can be used on varnished wood from time to time, but a thin layer of varnish may well be attacked. In the case of leached or oiled wood, the glass cleaner draws the protective oil out of the wood, making it much more sensitive to stains and water. It is better to use special wood care products such as oil or wax.

Skin

Some time ago, there was a tip circulating on the internet to reverse unsuccessful self-tanning results with glass cleaner. However, this is not recommended as it damages the skin’s protective acid layer and dries it out extremely. Sensitive people may even develop a rash or allergies.

Some products that are effective and harmless to health when used on their own can have unexpected consequences when used in combination with other cleaners. As a general rule, you should therefore never mix glass cleaner, especially not with bleaching agents. This is because the ammonia contained in glass cleaner releases a potentially toxic substance called chloramine, which irritates the eyes, nose, bronchial tubes and throat.

So when cleaning, be careful which products you use for which things, as not all of them are universally applicable. Chemical cleaning agents in particular can damage the surfaces in your home by causing stains and streaks and thus have exactly the opposite effect to what you want to achieve.

Source: tippsundtricks

Encourage orchids to bloom: Clever trick for lush houseplants

0

Are your orchids no longer flowering properly or looking weak? With a simple lemon trick, you can make them shine again! Lemon juice provides the perfect supply of nutrients and strengthens the roots. Find out now how to care for your orchids with lemon!

Orchid care: lemon as a home remedy

Admittedly: It doesn’t exactly have a pretty name – after all, “orchid” is derived from the Greek word for testicle. But orchids are all the more beautiful to look at!

To keep it that way, there is a clever trick that many florists regularly use when caring for orchids.

What does the lemon do to your orchids? Credit: Media Partisans/FUNKE Digital (symbolic image)

Healthy roots, lush green leaves and a magnificent flowering shoot – that’s what every orchid lover wants. In addition to the classic tips on location, watering and pruning, there is another secret recipe that guarantees beautiful orchids: Lemons.

Lemon juice has a disinfectant effect and protects the plant from diseases and pests. Lemon also contains a lot of potassium and vitamin C, which supports the growth and flowering of the orchid.

However, the lemon juice should not be applied undiluted to the orchid, as the high acid content could otherwise damage the plant.

How to use lemon juice for orchid care

Method A

  • Mix 10 drops of lemon juice with 200 ml of water.
  • Dip a soft cloth in the lemon water, wring it out and then wipe the leaves and roots of the orchid with it.
  • Repeat this procedure about once a week.

Method B

  • Add a few drops of lemon juice to the water in the pot when watering the orchid.
  • Wait about half an hour until the orchid has absorbed the lemon water and then drain it.
  • Use this lemon treatment about once a month.

A natural way to help orchids grow healthy and strong. Who would have thought that orchid care with lemon is so easy?

Source: quickerrecipes