Home Blog Page 1805

Removing limescale: these two household remedies really help

0

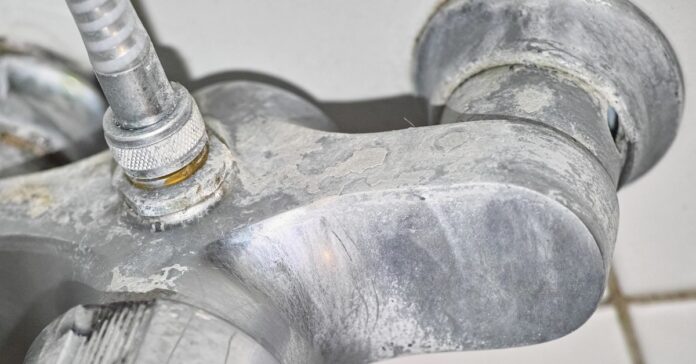
Whether on the sink or in the kettle – limescale deposits occur mainly in the kitchen and bathroom. The white stains not only look unattractive, they are also extremely stubborn. What really helps against limescale and can it be removed with household remedies?

Removing limescale with household remedies

Two well-known household remedies have proven effective in getting rid of stubborn deposits: Vinegar and citric acid. The acid dissolves the limescale and it can then be easily wiped off. However, both household remedies have their advantages and disadvantages, which is why you should bear a few things in mind when using them.

Home remedies also help with stubborn limescale stains. Photo: andhal via Getty Images

1. remove limescale with vinegar

  • The best way to remove limescale is to use household vinegar (5 percent acetic acid) or dilute vinegar essence (25 percent acetic acid) in a ratio of 1:5 with water.
  • Place calcified shower heads, faucet aerators and sink faucets in a cup or bowl filled with vinegar. It will take some time until they are clean again and the limescale has dissolved.
  • A kitchen towel soaked in vinegar helps with limescale deposits in the sink or at the transition between the sink and tap.
  • You can also use vinegar to clean the kettle. Mix 2-3 tablespoons of vinegar essence with at least one liter of water and bring the mixture to the boil in the kettle. The kettle must then be thoroughly rinsed out.

Take care with seals and fittings

The acid contained in vinegar can attack rubber and plastic parts, such as seals. It is therefore better not to clean coffee machines with vinegar. The thin chrome layer on taps and other fittings can also be damaged by the vinegar.

Many people also find the pungent smell of vinegar unpleasant. When vinegar is boiled, it even produces corrosive vapors that should not be inhaled under any circumstances. Therefore, ensure adequate ventilation when working with vinegar and rinse all treated appliances and surfaces with water.

2. remove limescale with citric acid

Natural lemon juice contains between six and eight percent acid. However, pure citric acid (also known as citric acid) is usually used for descaling. You can buy it in powder form or in liquid form at the drugstore. This is how you use it for cleaning:

  • Coffee machines: Dissolve two to three tablespoons of citric acid in one liter of water and run the mixture through the machine. Then rinse twice with clear water.
  • Kettle: Dissolve two to three tablespoons of citric acid in one liter of water and heat the mixture directly in the kettle.
  • Dishwasher: Sprinkle six tablespoons of citric acid into the empty dishwasher, avoiding the sieve. Select a program without a pre-rinse cycle at a minimum of 50 °C and run the machine through.
  • Stainless steel, plastic, ceramic or chrome surfaces: Dissolve three tablespoons of citric acid in one liter of water and wipe the calcified surfaces with it.
  • Washing machine: Mix six tablespoons of citric acid with half a liter of water and pour the mixture directly into the drum. Start a 60°C program without prewash and without textiles in the drum.
  • Teapots, cups and coffee mugs: Depending on the size of the container, add half a tablespoon or a whole tablespoon of citric acid and fill with hot water. Leave to act briefly and then rinse with water.
  • Shower heads and fittings: Dissolve one and a half tablespoons of citric acid in a quarter of a liter of water and immerse the calcified parts directly in the solution. A plastic bag can help with non-removable parts.

Clean a calcified tap.
You can use a plastic bag to soak taps and shower heads. Photo: Media Partisans/FUNKE Digital

Although citric acid does not smell like lemon, it does not leave an unpleasant odor, unlike vinegar. It can also be used without hesitation to clean rubber or plastic parts and is very versatile. For particularly stubborn limescale, however, the exposure time is several hours. The same basic rule applies here: After cleaning, rinse with clean water.

Tip: Natural lemon juice (from a squeezed lemon, for example) can also be used for light calcification.

Removing ingrained limescale

Ingrained limescale can be a real challenge, as it often stubbornly clings to corners, fittings or the inside of appliances. To remove this limescale, you should use acidic cleaning agents – vinegar, citric acid or special limescale removers are particularly effective here. First, it is advisable to treat the affected surfaces generously with the cleaning agent and leave it to work for a few minutes so that the acid slowly softens the limescale.

You can then remove the limescale mechanically using a brush or sponge that is not too abrasive. For very stubborn deposits, it often helps to repeat the process or leave the cleaning agent to work overnight. Make sure you rinse thoroughly with water after cleaning to remove any acid residue that could attack the material. This will ensure that your fittings and surfaces are not only free of limescale, but also remain in optimum condition.

Correct procedure for sensitive materials

Before you declare war on limescale deposits in your household, it is best to try out the two household remedies on an inconspicuous area. Materials such as natural stone and marble generally do not tolerate acid and should be treated with other products. Vinegar is also not suitable for cleaning copper and aluminum.

Vinegar and citric acid have proven to be particularly effective in removing limescale. Would you still prefer to experiment or try something new? Then try toothpaste, cola, a paste made from baking powder and water or baking paper.

Attention: Caution is advised when cleaning with acids. In the event that your hands come into contact with the cleaning water, you should wear rubber gloves if possible. Avoid getting acid in your eyes at all costs.

1080x1080 whatsapp

Source: ndr
Preview image: ©Leonsbox via Getty Images

Freeze raw broccoli: Guaranteed to work with these tips

0

Sometimes the week goes differently than planned and the fresh broccoli is left in the fridge. Instead of throwing it away, you can freeze broccoli and use it later. If it is already wilted, it is still suitable for a vegetable stock – inedible leftovers belong in the organic waste garbage can.

Freeze raw broccoli correctly

If you Freeze broccoli raw you should follow a few important steps to preserve the quality and nutritional value. Firstly, it is important to select fresh and firm broccoli with no signs of spoilage. Wash it thoroughly under cold water and divide it into equal florets.

Blanching is recommended before freezing: Immerse the florets in boiling water for two to three minutes and then immediately transfer them to ice-cold water to stop the cooking process. This step inactivates enzymes that can otherwise lead to loss of quality such as discoloration, poor taste and nutrient degradation. Then dry the broccoli thoroughly with kitchen paper or in a salad spinner.

It is best to freeze the florets individually on a baking tray before transferring them to airtight freezer bags or containers to prevent them from sticking together. Label the packaging with the freezing date; frozen broccoli will keep in the freezer for around 10-12 months. Note that the broccoli will be slightly softer after defrosting and is therefore particularly suitable for cooked dishes, less so for raw food.

Preserving broccoli: Other options

In addition to freezing, you can also preserve broccoli in other ways. One method is the pickling in vinegar or fermenting – not only keeps longer, but also develops new flavors.

Alternatively, you can boil broccoli after blanching: Filled in sterilized jars and sealed airtight, it will keep for several months. Make sure to maintain a constant temperature in the freezer or pantry to preserve the quality.

Nutrients in the freezing process

Freezing preserves many vitamins and mineralswhich make broccoli so healthy. Vitamin C is largely retained, but slight losses can occur with water-soluble vitamins – especially during long storage or temperature fluctuations.

Other vegetables such as Peas, carrots or spinach can be frozen without any problems. Frozen vegetables remain a valuable addition to your diet, especially when fresh produce is not available.

Checklist: Freezing broccoli made easy

Prepare: Cut the florets from the stalk, wash thoroughly and drain
Blanch: Two to three minutes in boiling water, then quench in ice water
Dry: Drain well or pat dry to avoid ice crystals
Pre-freeze: Pre-freeze the florets individually on a tray so that they do not stick together
Pack airtight: Fill into freezer bags or tins and seal well
Label: Note the freezing date – Shelf life: up to 12 months
Use: Use directly for soups, casseroles or wok dishes without defrosting

This article was partly created with the help of a machine and carefully checked by the editorial team before publication.


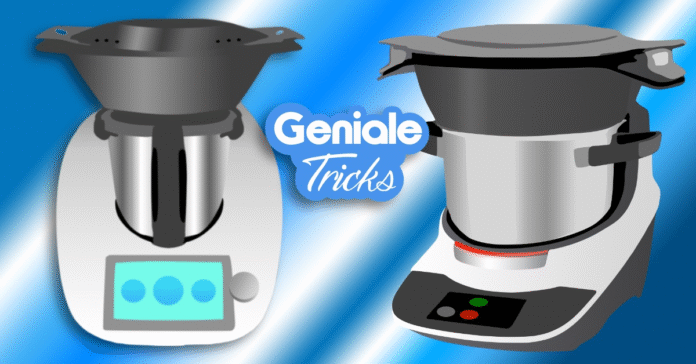
Thermomix TM6 or Bosch Cookit? This food processor is the better choice

0

The Thermomix brought high-tech to the kitchen. For a long time, the Vorwerk food processor was regarded as the absolute top dog in its field. Even entire cookbook series were adapted to the all-rounder.

In the meantime, however, the competition has caught up. At the forefront: the Cookit from Bosch. But can the Cookit beat the classic Thermomix?

Thermomix TM6 or Bosch Cookit?

Of course, not everyone can relate to the concept of “high-tech cooking”. But for more and more people, all-round kitchen appliances such as the Thermomix are making everyday life much easier. Beginners in particular enjoy the simple step-by-step instructions that guarantee successful cooking results.

But which food processor should you choose? The individual models all have their advantages and disadvantages. Let’s take a look at two of the market leaders: the Thermomix from Vorwerk and the Cookit from Bosch.

Both appliances are based on engineering skills made in Germany. The basic principle is also similar: both the Thermomix and the Cookit can bake, boil, steam, chop vegetables, puree and so on. The entire cooking process can be monitored and controlled via an app. It’s like being a child again and having your mother tell you what to do next. You no longer have to think and can just look forward to the food.

Another thing you can look forward to: bowls and accessories can be put in the dishwasher after use with both the Thermomix and the Cookit. So you don’t have to wash up by hand after cooking. But what are the differences between the Thermomix and Cookit?

Which is better: Thermomix or the Bosch Cookit? Photo: FUNKE Digital

Bosch Cookit and Thermomix TM6: These are the key differences

Let’s get straight to the point – the Bosch Cookit is ahead in many respects:

  • The Cookit has a larger pot than the Thermomix, which also makes it suitable for large families or guests. The disadvantage: the pot is also heavier as a result. Not for people with arthritis.
  • Also with the Accessories Bosch is more generous. In addition to the knife and whisk, which the Thermomix also has, the Cookit also comes with two slicing discs and another whisk. This enables the Cookit to not only somehow reduce the size of the vegetables, but also to dice, slice or grate them. The disadvantage is that you have to change the attachments more often than with the Thermomix.
  • A major weakness of the old Themomix generations was that you could not fry could. This is now possible with the TM6 – but only up to a maximum of 160 °C and only if you have a subscription for just under 50 euros a year. The Cookit from Bosch can reach 200 °C – without a subscription.
  • Only with a subscription is the Thermomix also available with the Guided Cooking offers – i.e. guided cooking. This function is included with Cookit. However, the Cookit also has a much smaller selection of recipes. The classic from Vorwerk has an enormous advantage here!
  • Further advantages of the Thermomix: You can use it to Grind coffee and grain. You can also save your own recipes in the Thermomix and create your own individual weekly plan create an individual weekly plan.
  • On the subject of susceptibility to repair opinions differ: some praise the Thermomix for the fact that its motor is practically wear-free. Others criticize the sensitive display, for which Vorwerk does not provide a warranty.

Apart from all the details in which the Bosch Cookit is ahead of the Thermomix TM6, the biggest shortcoming of the Thermomix is the de facto obligation to take out a subscription. After all, if you’re already spending a lot of money on a food processor, you want to be able to use all the functions – and not have to fork out an extra 48 euros a year, right? If, on the other hand, you like freshly ground coffee and prefer to cook on the fly anyway, you will probably be better off with the Thermomix.

The facts at a glance:

Bosch Cookit Thermomix TM6
Capacity 3 l 2,2 l
Accessories very good sufficient
Frying yes only with subscription
Grinding no yes
Guided Cooking yes only with subscription
Recipe selection > 2.000 > 70,000
individual weekly plan no yes
Engine power 600 Watt 500 watts
Heating capacity 1,700 watts 1,000 watts
Costs 1.299 Euro 1.399 Euro
(+ 48 Euro/year for subscription)

You might also be interested in these articles:


Conclusion: Is the Cookit really better?

Anyone who enjoys high-tech cooking will be very well served by both appliances. Both are in the upper price segment, but deliver solid results.

The Thermomix TM6 from Vorwerk still has a clear lead when it comes to recipe selection. But how long will it last? After all, Bosch promises to add 30 new recipes every week. In terms of accessories, cooking results, variability and customer friendliness, however, the Bosch Cookit is – in our opinion – already clearly in first place.

Sources: please.buy, magazin.kuechenfinder

Drying strawberries: the perfect snack between meals

0

Have you bought too many strawberries and can’t manage to eat them all fresh? No problem: drying strawberries is an easy way to preserve the fruit and intensify its flavor. Whether as a snack, in muesli or in baked goods – dried strawberries give you a fruity taste experience even in the colder months of the year.

Drying strawberries – step by step

At the Drying the strawberries The water is removed from the strawberries, making them keep longer. At the same time, many nutrients such as Vitamin C and antioxidants are preserved. There are a few things you should bear in mind to ensure perfect results:

  • Preparation: Choose firm, ripe strawberries and wash them thoroughly. Remove the stalk and leaves and cut the fruit into slices. even slices (about 3-5 mm thick) so that they dry evenly.

Three drying methods:

  1. Oven: Place the slices on a baking tray with baking paper or a rack. Dry them at 50-60 °C for 6-8 hours. Leave the door ajar to allow the moisture to escape.
  2. Dehydrator: An energy-saving alternative that offers constant temperatures. Lay out the strawberries in thin layers and dry them according to the appliance’s instructions.
  3. Air drying: This method is particularly gentle, but time-consuming. Place the strawberries on a cloth or grid and place them in a sunny, well-ventilated place. Protect them from insects with a fine net. Drying takes several days.

The strawberries are ready when they are dry, but still slightly pliable are.


You may also be interested in these articles:


How to store dried strawberries properly

Correct storage is crucial so that dried strawberries keep for a long time. Store them in airtight containers such as screw-top jars or vacuum-packed bags to keep out moisture. Store the containers in a cool, dark placeto protect the aroma.

Label the containers with the drying date so that you can keep track. If the strawberries start to absorb moisture after a while, you can place them briefly in the Dry them in the ovento extend their shelf life.

Ideas for using dried strawberries

Dried strawberries are versatile and make an excellent topping for muesli, yogurt or porridge. In baked goods such as muffins or cookies they provide a fruity note that goes perfectly with sweet dishes.

Grind the dried fruit to a fine powder. Strawberry powder – ideal for adding flavor to desserts, smoothies or homemade ice cream. Also in Tea blends Dried strawberries make an excellent addition to tea blends. Combine them with herbs such as mint or lemon balm for a fruity, fresh tea.


You may also be interested in these articles:


Durable and aromatic

Make more of your strawberries with dried strawberries favorite fruits. They are not only durable and space-saving, but also versatile – whether in savory or sweet dishes. Thanks to simple drying methods, you can preserve their intense aroma for a long time and try out creative recipes.

Checklist: Drying strawberries made easy

  • Preparation: Wash the strawberries, remove the stalk and cut into even slices.
  • Drying methods: Choose between oven, dehydrator or air drying.
  • Storage: Store airtight and dark in screw-top jars or bags.
  • Use: Perfect for muesli, baked goods, tea or as a powder for desserts.
  • Tip: Remove moisture by briefly drying in the oven.

This article was partly created with the help of a machine and carefully checked by the editorial team before publication.


Drying parsley: how to preserve it as a spice

0

Parsley is a versatile herb that almost always cuts a fine figure in the kitchen. But what to do if you have a surplus? Drying parsley is one way of preserving it for longer. Although dried parsley is not quite as aromatic as the fresh variety, you can get the best out of it with the right method.

How to dry parsley properly

Before drying, you should Parsley Wash thoroughly and carefully pat dry with a kitchen towel. Clean and dry herbs prevent mold growth and ensure a better result.

  • Air dry: Tie the stems small bundles together and hang them upside down on a shady, airy place in a shady, airy place. Alternatively, you can spread the leaves out individually on a clean kitchen towel. After about one week the leaves have dried and rustle when touched.
  • Oven: Lay the leaves flat on a baking sheet and dry them at maximum 50 degrees Celsius. Leave the oven door ajar to allow the moisture to escape. After about two hours the parsley is ready to be dried. This method is quicker, but requires more attention so as not to overheat the leaves.

You may also be interested in these articles:


How to preserve the aroma

So that the dried parsley retains its aroma for as long as possible, correct storage is crucial. Fill the leaves in airtight containerssuch as screw-top jars or metal cans to protect them from light and oxygen.

Store the containers in a dark, cool placeas light and heat can affect the aroma. Chop the leaves just before use to preserve the essential oils and aromas for as long as possible.

Even if dried parsley does not taste quite as intense as fresh parsley, it has one major advantage: it is can be kept for months and always ready to hand when you need it.

Alternative: Freeze parsley

If you like the fresh taste of parsley freezing is a great alternative. Finely chop the leaves and fill them into freezer bags or Ice cube tray. You can also freeze them with a little water or oil to make them last longer while preserving their flavor and valuable nutrients.

Ideas for using dried parsley

Parsley loses some of its essential oils and freshness when it is dried. Instead, it develops a slightly bitter, more intense Aroma that develops particularly well in warm dishes.

  • Soups and sauces: Dried parsley is ideal for seasoning soups, sauces and stews.
  • Potato dishes: It also adds a spicy accent to gratins, roast potatoes or mashed potatoes.
  • Herb salt and spice mixes: Mix dried parsley with salt or other herbs for practical seasoning mixes.

For cold dishes such as salads, however, dried parsley is less suitable as it lacks the fresh aroma. In these cases, the frozen version is the better choice.


You may also be interested in these articles:


Conclusion: Versatile and durable

Whether fresh, dried or frozen – parsley is a great addition to any form add a special touch to your kitchen. Drying is an easy and practical way to preserve it for longer, especially for hot dishes. An even more aromatic alternative is to freeze it to preserve the freshness of the herb and have access to flavorful parsley at all times.

Checklist: Drying parsley made easy

  • Preparation: Wash and thoroughly dry the parsley.
  • Drying methods: Air dry in a shady place or in the oven at max. 50 degrees.
  • Storage: Store in airtight jars or tins in a cool, dark place.
  • Added value: Ideal for soups, sauces or herbal salts – aromatic and versatile.
  • Alternative: Freeze parsley to preserve the fresh taste.

This article was created partly with the help of a machine and carefully checked by the editorial team before publication.


Washing colored laundry: These mistakes could be annoying

0

When it comes to washing, nothing is more annoying than washed-out colors, faded favorite shirts or discoloration from leaking textiles. However, with the right washing technique, your colorful garments will stay fresh and colorful for longer. While washing whites is relatively straightforward, there are a few things to bear in mind when washing colored laundry. Here you can find out how to properly care for your colored textiles and preserve their colors for a long time.

Washing colored laundry: sorting first

Before you fill the washing machine, you should sort your colored laundry carefully. First, sort them by color: Dark colors such as black, dark blue or dark green in one group, medium shades such as red, light blue or green in another and light shades in a third. New, intensely colored textiles in particular should be washed separately at first, as they often release color.

Check the care labels before washing. Not all brightly colored garments can be washed at the same temperatures. Delicate materials such as silk or viscose require special care and should not be washed together with more robust fabrics such as cotton.

Turn your clothes inside out before washing. This protects the outer, visible side from abrasion and direct contact with detergent, keeping colors bright for longer. For pants, close the zippers and buttons to minimize friction.

The right temperature and the right detergent

For colored laundry, less is more – both in terms of temperature and detergent. Most colored textiles retain their color intensity the longest if they are washed at low temperatures. 30 °C is perfectly sufficient for normally soiled colored laundry and is gentle on the colors. For heavier soiling, you can increase the temperature to 40 °C, but you should not go above this.

Use a special color detergent that is formulated without optical brighteners and bleaching agents. These ingredients, which are contained in heavy-duty detergents, can attack and fade colors. Liquid detergents are often more suitable for colored laundry than powders, as they dissolve well even at low temperatures and leave no residue.

Use the detergent sparingly – too much detergent can build up in the fibers, making the colors look dull. Follow the dosage instructions on the packaging and take into account the degree of soiling and the water hardness in your region.


You may also be interested in these articles:


Gentle washing programs and helpful additives

If possible, choose a gentle or easy-care program with a reduced spin speed. This reduces the mechanical load on the textiles and protects the colors. An additional rinse cycle can help to completely remove detergent residues that could otherwise damage the colors.

For particularly valuable or intensely colored garments, a color fixer added to the wash water can help. These products seal the colors and prevent bleeding. A dash of vinegar in the last rinse (approx. 50 ml) can also refresh and fix the colors.

You can do without fabric softener

Do not use fabric softener on sportswear and functional clothing, as it can impair the special properties of these textiles. It can be used sparingly for normal colored laundry, but fabric softeners can also leave a film on the fibers over time, which makes the colors appear duller.

Proper care of your colored laundry begins with sorting and ends with drying – preferably in the shade, as direct sunlight can fade the colors. With these simple tips, your favorite colorful pieces will stay bright and vibrant for longer – for an outfit that looks just as colorful as it did on day one.

Source: Süddeutsche

Freeze spinach leaves: How to keep it crispy green

0

Have you bought more fresh spinach leaves than you can use in the next few days? No problem: you can freeze spinach leaves and enjoy them for several months. This is a practical solution to avoid food waste, especially if you have large quantities.

How to freeze spinach leaves properly

Leaf spinach is easy to freeze – as long as you prepare it correctly. Wash the leaves thoroughly, as soil and sand often collect between the stems. Remove any wilted or damaged parts and drain the spinach well.

This is important BlanchingPlace the spinach in boiling water for about 30 seconds and then immediately rinse in ice water. This preserves the bright green color and many heat-sensitive vitamins such as folic acid. Then leave to dry well – preferably on a kitchen towel.

You can then dry the spinach in portions into freezer bags or containers in portions. This means you always have exactly the right amount to hand when cooking later – without leftovers.


You may also be interested in these articles:


Practical tips for perfect durability

For space-saving freezing, it is advisable to freeze the spinach flat in the containers in the containers. This makes it easier to stack in the freezer and remove individual portions later. Label the packaging with the freezing date to keep track at all times.

Leaf spinach stays in the freezer for about six to eight months in good quality. After that, the consistency may change slightly, but the spinach can still be used. An alternative is to puree the blanched spinach and freeze it in small portions – ideal for smoothies, soups or sauces.

What actually happens to the nutrients when freezing?

Contrary to common assumptions, many nutrients are lost during freezing. vitamins and minerals are well preserved. Particularly sensitive nutrients such as folic acid and vitamin C survive the process surprisingly well if the spinach has been blanched before freezing.

The same applies to other vegetables such as broccoli, peas or beans. Less suitable are water-rich vegetables such as cucumbers or tomatoes, as they lose their structure after defrosting. With the right preparation, your stock remains nutritious and can be used flexibly.

Checklist: Freezing spinach leaves made easy

  • Wash and prepare: Clean spinach thoroughly, sort out bad leaves and drain well
  • Blanch: Place in boiling water for approx. 30 seconds, then quench in ice water
  • Dry: After blanching, drain completely and leave to dry on a cloth or sieve
  • Portioning: Fill in small quantities in freezer bags or tins – pressing flat saves space
  • Label: Note the date – spinach leaves can be kept frozen for up to 8 months
  • Use: Ideal for pasta, quiche, soups or smoothies – straight from the freezer or slightly thawed

This article was partly produced with machine assistance and carefully checked by the editorial team before publication.


Mad Casino : Une plongée dans l’univers déjanté du jeu en ligne

0

Quand on parle de casinos en ligne, il est facile de tomber dans le piège des discours formatés, où chaque site se vante d’être “le meilleur” ou “le plus généreux”. Pourtant, Mad Casino ne joue pas dans la même cour. Avec une approche qui sort des sentiers battus, ce casino propose une expérience où le fun et l’originalité priment sur les promesses creuses. Si vous cherchez un endroit où le jeu ne se prend pas trop au sérieux, mais où la qualité reste au rendez-vous, https://fr-mad-casino.com/ mérite un coup d’œil attentif.

Une interface qui ne fait pas dans la dentelle

Pas de fioritures inutiles, Mad Casino affiche un design qui rappelle un peu l’ambiance d’un vieux bar clandestin, avec une touche moderne. On pourrait presque imaginer un jukebox dans un coin, prêt à lancer un vieux tube des années 80 pendant que vous faites tourner les rouleaux. Cette simplicité volontaire est rafraîchissante dans un univers où certains sites rivalisent de complexité pour perdre le joueur dans un labyrinthe d’options.

Navigation et ergonomie

La navigation est fluide, même pour ceux qui ne sont pas des as de l’informatique. Les menus sont clairs, les catégories bien définies, et les jeux accessibles en quelques clics. Pas besoin de chercher midi à quatorze heures pour trouver votre machine à sous préférée ou la table de blackjack qui vous fait de l’œil depuis des jours.

Un catalogue de jeux qui ne fait pas dans la démesure

On pourrait s’attendre à une avalanche de titres, mais Mad Casino préfère la qualité à la quantité. Le choix est suffisamment large pour satisfaire les amateurs de slots, de jeux de table, et même de certains jeux live. Pas question ici de se noyer dans des centaines de jeux identiques avec des noms à rallonge. Chaque titre a été sélectionné pour son originalité ou son gameplay.

  • Machines à sous classiques et vidéo
  • Jeux de table : blackjack, roulette, baccarat
  • Jeux avec croupiers en direct
  • Jeux de loterie et cartes à gratter

Les fournisseurs de logiciels

Mad Casino ne s’est pas contenté de signer avec n’importe qui. Les développeurs présents sont reconnus pour leur sérieux et leur créativité, garantissant une expérience fluide et des graphismes soignés. Cela évite les bugs qui vous font pester comme un joueur qui vient de perdre une main à cause d’un glitch.

Bonus et promotions : ni trop, ni trop peu

Si vous espérez des montagnes de bonus avec des conditions impossibles à remplir, vous risquez d’être déçu. Mad Casino adopte une politique plus honnête, avec des offres claires et transparentes. Pas de petits caractères cachés, ni de tours gratuits qui expirent avant même que vous ayez eu le temps de les utiliser.

Résumé des offres promotionnelles
Type de bonus Description Conditions principales
Bonus de bienvenue Bonus sur premier dépôt jusqu’à 100 € Mise x30 avant retrait
Cashback hebdomadaire 5 % sur les pertes nettes Crédité chaque lundi
Promotions saisonnières Offres spéciales selon événements Varie selon la promo

Service client et sécurité : un duo sérieux

On ne plaisante pas avec la sécurité chez Mad Casino. Les transactions sont protégées par des protocoles modernes, et les données personnelles sont traitées avec soin. Le service client, accessible via chat en direct ou email, répond rapidement et avec une certaine dose de patience, même quand vous posez la question du siècle sur les règles d’un jeu.

Options de paiement

La variété des méthodes de dépôt et de retrait est correcte, couvrant les cartes bancaires classiques, les portefeuilles électroniques, et même quelques solutions plus exotiques pour les joueurs qui aiment sortir des sentiers battus. Les délais de traitement sont raisonnables, évitant les longues attentes qui donnent envie de jeter son écran par la fenêtre.

En conclusion : Mad Casino, un pari qui vaut le détour

Si vous êtes fatigué des casinos en ligne qui se prennent trop au sérieux ou qui vous noient sous des promesses creuses, Mad Casino propose une alternative rafraîchissante. Avec une interface simple, un catalogue de jeux bien pensé, des promotions honnêtes et un service client efficace, ce site mérite qu’on s’y attarde. Pas besoin d’être un high roller pour apprécier l’ambiance décalée et la qualité de cette plateforme.

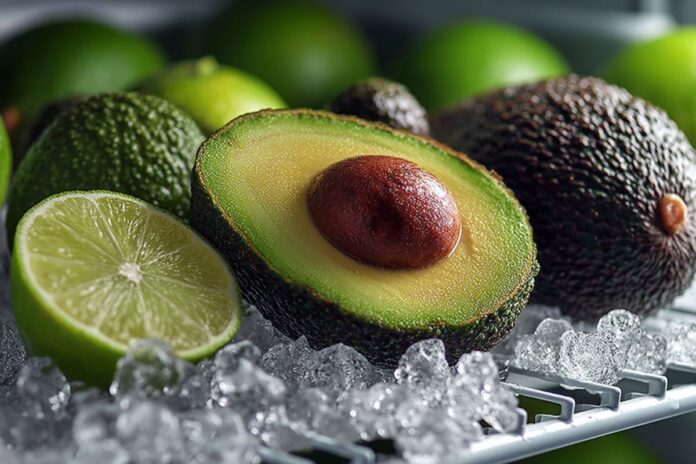
Freeze the avocado: These tricks help it retain its flavor and texture

0

Your avocado reaches the perfect degree of ripeness, but you can’t manage to eat it in time? No problem: Freeze an avocado is a clever way to prevent the fruit from spoiling. However, if it’s already brown or mushy, it’s better to turn it into a quick dip like guacamole or dispose of it correctly.

Freeze avocado: How to do it right

Freezing avocados is straightforward if you follow a few tricks. Whole fruits are less suitable – it is better to freeze the Peel and portion the flesh.


You might also be interested in these articles:


Remove the stone, cut the avocado into wedges or mash it into a puree. For the puree, add a little lemon juice to preserve the color. Pack the whole thing airtight in freezer bags or tins, taking care to trap as little air as possible. Avocado will keep for four to six months in the freezer and is perfect for smoothies, dips or creams.

Tips for optimal storage and use

The fresher the avocado is when frozen, the better the flavor and quality are preserved. It is ideal to prepare the puree in ice cube trays – this way you always have small portions to hand later.

Defrosted avocado is particularly suitable for creamy applications such as dips or dressings. For raw salads, it is better to use fresh fruit, as the texture of frozen avocado is softer.

Nutrient content: What happens during freezing?

When freezing, most of the nutrients such as healthy fats, vitamin E and potassium are preserved. Vitamin C may decrease slightly over time, but overall the avocado remains a nutrient-rich ingredient.

Other foods such as Berries, bread or cream can be frozen without any problems. Berries retain their color and vitamins, bread should be baked briefly after defrosting, and cream must be mixed well before freezing to avoid loss of quality.

Checklist: Avocado freezing made easy

Prepare: Peel and pit the avocado and cut into wedges or mash into puree
Use lemon juice: Sprinkle some lemon juice on the flesh to prevent browning
Pack airtight: Fill into freezer bags or tins, enclosing as little air as possible
Label: Note the freezing date – Shelf life: 4 to 6 months
Use: Ideal for dips, smoothies, dressings or desserts

This article was partly created with the help of a machine and carefully checked by the editorial team before publication.


Freeze ham: Keep it edible for longer with these tips

0

Did you pick up a large pack of ham when shopping or have a few slices left over from your last breakfast brunch? Instead of letting the delicate cold cuts spoil, you can freeze ham to significantly extend its shelf life. This works for many types of ham – provided you do it carefully. If the freezer compartment is full or freezing is not an option, you should store it well wrapped in the fridge and use it up as soon as possible.

Freezing ham – what you should bear in mind

Not every type of ham is equally suitable for the freezer. Air-dried varieties such as Serrano or Parma ham are particularly suitable for freezing as they have a lower water content and largely retain their structure. Cooked ham, on the other hand, can lose some of its consistency after defrosting – but still tastes great in many warm dishes.

It is best to portion the ham before freezing. Place individual slices with sandwich paper in between and pack them airtight in freezer bags or boxes. This way, nothing sticks together later and you can remove individual portions at any time. Ham stays frozen for about can be kept for two to three monthsafter which the taste and quality slowly deteriorate.


You may also be interested in these articles:


How to store ham without freezing it

If you prefer to enjoy your ham fresh, it is often sufficient to store it in the fridge. Cooked ham will keep there for three to four daysair-dried varieties will keep for much longer – provided they are well wrapped, ideally in parchment paper or a clean cotton cloth. You should avoid plastic wrap, as condensation forms underneath, which causes the product to spoil more quickly.

The ham can be preserved even longer by vacuum packing. Airtight sealing protects against oxidation and is particularly useful for larger quantities or high-quality varieties such as Black Forest or farmer’s ham. This preserves the flavor without you having to reach for the freezer immediately. This method is also ideal if you want to store food for longer but don’t want to freeze it.

How does freezing affect the nutrients?

Ham retains its most important nutrients when frozenespecially proteins, iron and zinc. Many vitamins are also well protected by the low temperatures. Slight changes in taste or consistency are possible with more sensitive varieties, but often do not detract from the enjoyment – especially if the ham is used in hot dishes after defrosting.

Incidentally, many other foods are also easy to freeze – for example grated cheese, herbs, cooked pasta or even bread. This means you can not only save money and time with clever storage, but also avoid unnecessary waste. Avoid wasting food.

Checklist: Freezing ham made easy

  • Choose varietyAir-dried ham is better than moist cooked ham
  • PortioningSeparate slices with sandwich paper and freeze in small quantities
  • Airtight packagingUse freezer bags or tins, remove as much air as possible
  • LabelingNote the freezing date – store ham for a maximum of 2-3 months
  • Defrost gentlyDefrost overnight in the refrigerator, not at room temperature

This article was created partly with machine support and carefully checked by the editorial team before publication.