
Home Blog Page 2115

Supermarket: You can save yourself these things when shopping

0

In most cases, prices only move in one direction: steeply upwards. If, after shopping, you wonder why a few products cost so much money, you’ve probably picked the wrong items. Find out here how you can save money when shopping by simply leaving certain items on the shelves.

Small changes make for more money in your wallet

As we all know, humans are creatures of habit. In addition to our daily routine, regular hobbies and favorite dishes that regularly end up on our plates, we also appreciate the familiar when it comes to weekly shopping. And so the same products always end up in the shopping basket without us giving them much thought.

However, small changes can help you save money when shopping. To ensure that you have money left over at the end of the month in the long term, you should cross 7 things off your shopping list in future:

Magazines and books

Nowadays there are more ways to save money than there were a few years ago. Magazines and books, for example, can be bought digitally. This has the advantage that there are no printing costs and they are often a few euros cheaper. This saves frequent readers a lot of money in the long term.

If you can’t do without the book in your hand, simply register at a library near you or buy your books second-hand online.

Shaving foam

You can confidently do without shaving foam when shopping. Credit: FUNKE Digital/Media Partisans

You can also cross shaving foam off your shopping list, as you don’t actually need any for shaving. Soap or conditioner are sufficient, do the same thing as shaving foam and are often even better for the skin.

However, if you don’t want to do without shaving foam, you should use products for men, as these are generally cheaper than those for women.

Branded pharmaceuticals

You can save a lot of money, especially when buying medicines. Pharmacy staff often sell the products that bring them the highest profit margin. It is not uncommon for them to receive extra payments if they sell certain products from a manufacturer frequently. That’s why pharmacies are like supermarkets: you often pay more for the packaging and the brand name, but the contents are the same.

Compare prices and buy your medicines online.

Meat

It doesn’t always have to be meat. For health, ethical and economic reasons, you should reduce your meat consumption and introduce one meat-free day a week, for example. There are good substitutes that make it easier for you to give up meat. Or you can rely on foods such as beans, eggs or other pulses to cover your protein requirements.


You may also be interested in these articles:


Nail modeling

A visit to the nail salon once or twice a month is quite expensive. At around 50 euros a month, that’s 600 euros in a year that you could spend on other, more important things or save. See if you can possibly do without it or even do the modeling yourself at home.

There may also be someone in your circle of friends who has nail modeling as a hobby.

Cleaning agent
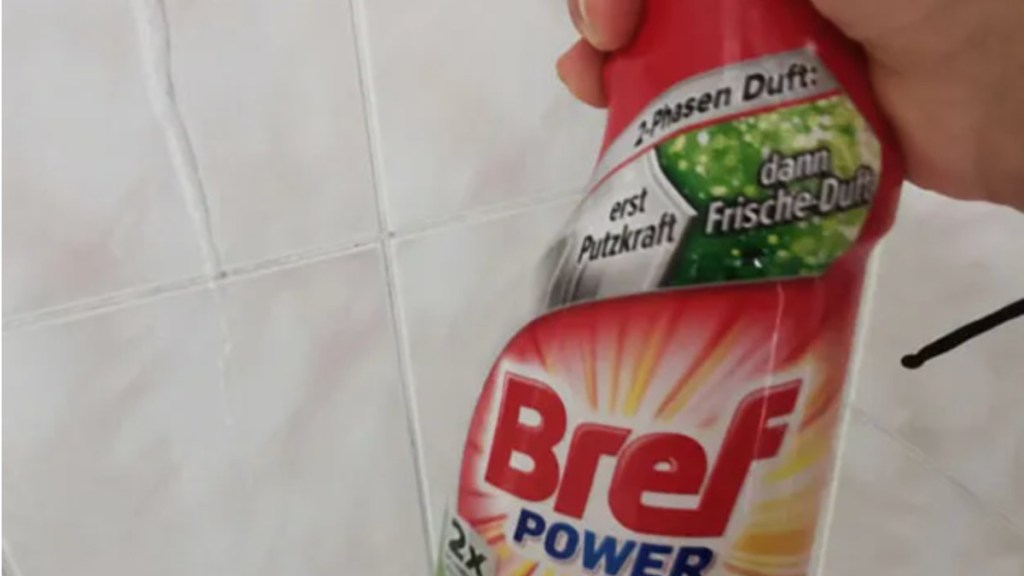
someone holds a bottle of cleaning agent in his hand
You can easily make your own detergent. Credit: FUNKE Digital/Media Partisans

Harsh cleaning agents are often not even necessary to clean your home and you can safely cross them off your shopping list. Many household problems can also be solved with products such as baking soda, citric acid or vinegar. The advantages of these products are that they are not only better for the environment and cheaper, but you often already have them on your kitchen shelf.

But it’s not just cleaning products where you can save money. Products such as deodorants and detergents are also easy to make yourself. And thanks to home-grown herbs on the windowsill, you always have your own herbal teas in stock.

Bulk packs

Bulk packs do not always save money when shopping. Although they give the impression that you get more for your money, this is often a fallacy. A market test carried out by the consumer advice center in Hamburg found that products in large packs are not relatively cheaper than those in smaller packs. They are also often deceptive packs that appear larger although the contents remain the same.

Look out for special offers on products such as toilet paper, which often come in large packs. You can save a lot of money this way, especially on items that you only need to buy once or twice a month.

If you cross these 7 things off your shopping list, you can save money in your everyday life. At the same time, you will also become more careful about other things you spend money on. After all, there may be a cheaper alternative or you may think more carefully about whether you really need a certain product.

Sources: merkur, nadjahorlacher, smarticular

Cleaning: Make tarnished silver shine again with this baking ingredient

0

Silver cutlery, jewelry or grandma’s old candlestick – silver treasures lose their shine over time and tarnish. There are various ways to polish silver back to a high shine. However, in addition to expensive special cleaners, it is above all the simple household remedies that have always been convincing as polishing agents! One solution can be found in your kitchen, for example. Find out here which ingredient from your store cupboard you can use to polish your silver – without any chemicals!

Why does silver tarnish?

Silver reacts with sulphur compounds in the air – this is a natural process that leads to a dark coating on the surface, known as silver sulphide. This may look antique, but most people would rather have the original shine back. And this is exactly where cornstarch comes into play.

By the way: It doesn’t help if you don’t use your silver and store it deep in the cupboard. Unfortunately, it is unavoidable that silver will tarnish at some point.

How does polishing silver with cornstarch work?

Here you will find external content from Pinterest that is recommended by our editorial team. It complements the article and can be displayed and hidden again with one click.

I agree to this external content being displayed to me. Personal data may be transmitted to the provider of the content and third-party services.

Cornstarch has a gentle abrasive effect – it removes the oxidation layer mechanically without damaging the soft metal. At the same time, it is so mild that you don’t have to worry about ruining your fine silver or engravings.

What you need:

  • Cornstarch (corn or potato starch)
  • water
  • A soft cloth or sponge

You might also be interested in these articles:


This is how it works:

  • First, you should remove any dust and dirt from your silver.
  • Now mix a paste of 3 parts cornstarch and one part water. The consistency should resemble toothpaste.
  • Apply this paste to the tarnished silver with a soft cloth and rub it in carefully.
  • You should polish your silver until it shines again.

The next time your silver looks dull, don’t reach for an aggressive cleaner – look in the kitchen cupboard instead. With a little cornstarch, water and patience, you can polish your silver back to a high shine – environmentally friendly and inexpensive.

Source: infranken.de
Preview image: pinterest.de/brigitte

Washing: Washing machine door blocked? How the emergency release works

0

When the washing machine is finished, some models make a beeping sound, then it cracks once and the door springs open. But what happens if the washing machine door does not open by itself, but keeps the damp laundry firmly closed? What many people don’t know: There is an emergency release on the washing machine that you can use to open a locked door. You can find out where to find it here!

What is the emergency release on the washing machine anyway?

It makes sense that the washing machine door cannot be opened just like that. After all, it could flood if you open the door during the wash cycle. However, there are reasons why the washing machine door does not open as expected after the program has finished and then the emergency release on the washing machine is required.

To open the door manually, every washing machine has an emergency release. Credit: FUNKE Digital

The emergency release is a mechanical trick that allows the door to be opened even if it would otherwise remain stubbornly locked. For example, if there is a power failure or a technical defect, the safety lock engages – and the door remains closed.

But don’t worry: behind a small flap at the front of the machine – usually near the fluff filter – is a lifesaver in an emergency. A lever, a latch, a pin or a pull cord allows you to open the door by hand.

Attention: Before you boldly reach for the emergency release on the washing machine, you should definitely check whether there is still water in the drum. Use the emergency drain hose, start the drain program or empty the pump manually.

Where is the emergency release hidden in your model?

Depending on the brand and model, the emergency release is located somewhere else on your washing machine. Below you will find a list of the most common brands:

  • Bosch / Siemens: There is a small black lever right next to the lint filter.
  • MieleBehind the service flap you will find a colored plug in yellow or orange.
  • AEGAEG has a pull cord behind the lint filter – you can reach it with a screwdriver.
  • WhirlpoolYou can either use the pump program to open the door or use the lever in the flap.
  • BekoNo need for a lever here – simply push the handle inwards and then pull it outwards again to open the door.
  • PanasonicSimilar to other models, the door is unlocked via a pin located behind the flap by the fluff filter.
  • LGTo open the door manually, simply press and hold the childproof lock button.

Tip: If you can’t find an emergency release, take a look at the manual – or visit the manufacturer’s website.


You may also be interested in these articles:


When nothing really works: more tricks

If the emergency release on the washing machine also fails and the door remains locked, there are a few more tried and tested tricks:

  • ResetPull out the mains plug, wait briefly, plug it in again – this can solve minor software problems.
  • KnockingMaybe the lock is just jammed! Try to release the lock with gentle pressure or a light tap on the door frame.
  • String methodDo you still have a very old washing machine? Here you can try to open the door lock with a piece of string.
  • Release the pressureOpen the fluff filter, drain the water – if present – and then try to open the door again.

The emergency release on the washing machine is a practical, often forgotten function that can save the day in an emergency. However, if the door regularly fails to open properly, you should consult a specialist – after all, the emergency release is only intended for absolutely exceptional cases!

Follow Geniale Tricks on WhatsApp to make sure you don’t miss any more tips and tricks in future!

Source: chip.de

Cleaning: Make your sink shine with these 3 household remedies

0

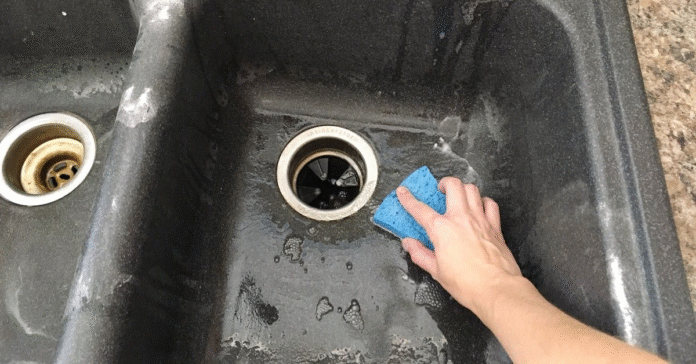
A dark sink is the eye-catcher in any kitchen! However, if it has unsightly limescale stains, the real eye-catcher quickly becomes a dirty stain. You can easily clean your sink with household products that you already have on hand.

In general, you can clean your granite sink like any other sink. The disadvantage of the black sink only becomes apparent once the cleaning water has dried: white streaks and stains appear if the tap water in your area is particularly calcareous. There are various ways to remove limescale stains.

You can clean your sink with these household remedies

Before you reach for aggressive commercial cleaners, you should first try cleaning your sink with the following home remedies:

  • Dishwasher tab or denture cleaner
  • Vinegar essence or citric acid
  • Mineral oil

Remove limescale with dishwasher tab or denture cleaner

The simplest method is to soak the granite sink and then clean it. This works best with a dishwasher tab. If you don’t have a dishwasher but have braces or dentures, you can also use denture cleaner to soak the black sink.

To get your sink clean again, you can use tried and tested household remedies. Credit: pinterest/housetipster.com

You can also put the tab in a sock and moisten it a little. This makes it easier to spread the “cleaning agent” over the sink. It is important that you rinse the sink well with water afterwards and wipe dry directly with kitchen paper or a microfiber cloth.

Tip: If you wipe your sink dry after every use, limescale stains will have a harder time.

Vinegar essence or citric acid

Diluted with water, vinegar essence or citric acid are great household remedies for cleaning and removing limescale. You can also soak the sink with the respective mixture beforehand. However, you only need to do this for very stubborn stains. Otherwise, it is sufficient to remove the limescale with a soft sponge.

Myth: Mineral oil

Some experienced housewives and househusbands recommend mineral oil for the care of granite sinks. However, it should be noted that this cleaning agent must always be washed off with water and should not remain on the material.

Further tips

In addition to these home remedies, there are other tips and tricks on how to clean your sink:

  • DanKlorix 🛒 – Pour 3 caps of water into the sink, leave to work and then wipe the sink.
  • Polishing agent 🛒 – Similar to the cleaning stone, you can use this to remove limescale stains and make the sink shine.
  • Scouring milk 🛒 – Despite the name, this product cleans gently as long as you apply it with a soft sponge.
  • Baby oil wipes 🛒 – Every four to five weeks, you can wipe your sink with the oily wipes to protect it from limescale stains.

You may also be interested in these articles:


If you know how, you can remove even the most stubborn limescale stains from your granite sink. What other kitchen cleaning tricks do you know?

Source: chefkoch, housetipster

The links marked with the shopping cart 🛒 are affiliate links. The products are researched to the best of our authors’ knowledge and some are recommended based on personal experience. If you click on such an affiliate link and buy something through it, our editorial team will receive a small commission from the online store in question. For you as a user, the price does not change and there are no additional costs. The income helps us to offer you high-quality, entertaining journalism free of charge.

Houseplants: This plant looks great, smells wonderful – and hardly anyone has it in their living room

0

The eucalyptus fascinates with its silvery-green leaves and characteristic scent. So it’s no wonder that many plant fans want to keep the eucalyptus as a houseplant. But as decorative as it is, eucalyptus requires attention, space and the right location. So that you can enjoy your eucalyptus houseplant for a long time, we will show you what you should pay attention to in terms of care, location and pruning.

Your tree needs these light conditions

Eucalyptus 🛒 originally comes from sunny regions. That’s why it also loves a bright, full-sun spot as a houseplant. It is best to place it in a large, unshaded window facing east or west. An additional skylight is ideal. South-facing windows can be problematic because the heat builds up there – this can damage the foliage and lead to yellowing. If the location is too dark, the eucalyptus will grow poorly and become more susceptible to disease.

Easy care is different – but feasible

If you want to keep your eucalyptus exclusively indoors, you need a green thumb – or at least a good routine. The plant grows quickly and needs to be pruned regularly, otherwise it will soon overtake any room. To keep your eucalyptus houseplant healthy, provide it with water and liquid fertilizer in summer. Avoid waterlogging at all costs and use lime-free water, for example rainwater or filtered water. In winter, your eucalyptus should be kept in a cool but bright place – an unheated hallway with a window is perfect.

There are many different types of eucalyptus and not all of them are suitable as houseplants. Credit: PhotoSG – stock.adobe.com

Fast-growing and tolerant to pruning

Your eucalyptus grows rapidly, especially in the first few years. Pruning is therefore necessary on a regular basis, otherwise the cute little tree will quickly become an uncontrollable giant. Important: Always have a sharp pair of scissors to hand and plan to repot it once or twice a year. The pot must be large enough to allow the roots to develop freely.

Be careful with pets – eucalyptus is poisonous!

The pleasant scent of eucalyptus does not come without side effects. The plant contains essential oils and toxic substances, so if you don’t have a koala – because they tolerate eucalyptus perfectly – then be careful! It can be particularly dangerous for cats, dogs and rodents. If your pet nibbles on the leaves, this can lead to poisoning in the worst case. It is therefore essential to put your eucalyptus houseplant out of reach.


You may also be interested in these articles:


Eucalyptus houseplant – beautiful, but demanding

Eucalyptus as a houseplant is not for the lazy. You need patience, a suitable place and time for regular care. If you meet these requirements, the eucalyptus will reward you with its characteristic appearance and wonderfully fresh scent. The variety Eucalyptus gunniiwhich is best suited for indoors.

Source: My beautiful garden

The links marked with the shopping cart 🛒 are affiliate links. The products are researched to the best of our authors’ knowledge and some are also recommended from personal experience. If you click on such an affiliate link and buy something through it, our editorial team will receive a small commission from the online store in question. For you as a user, the price does not change and there are no additional costs. The income helps us to offer you high-quality, entertaining journalism free of charge.

Houseplants: Pea plant inspires with its unique look – and smells great too

0

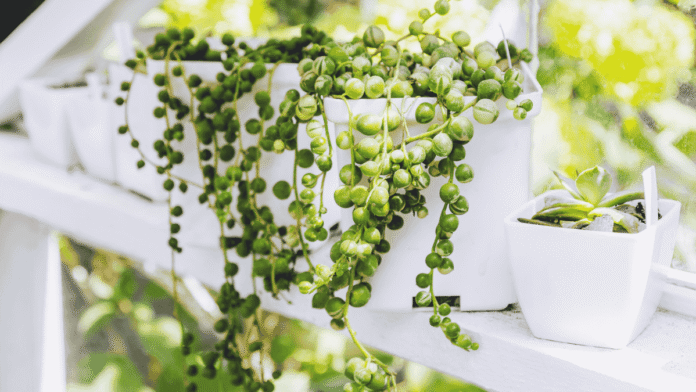
Are you looking for an easy-care houseplant that not only looks pretty in a hanging basket, but also surprises you with an unexpected fragrance? Then the pea plant is made for you. Its spherical leaves are reminiscent of a string of pearls – and if you do everything right, it will even reward you with delicate white flowers that have a surprising cinnamon scent.

The green hanging plant with a hint of cinnamon

The pea plant (Senecio rowleyanus) 🛒, also under the name String of Pearls originally comes from South Africa and is a leaf succulent. Its long, hanging shoots with spherical leaves not only look decorative, but also store water – ideal if you tend to forget to water.

But its visual highlight isn’t everything: in optimal conditions, the pea plant produces small, tubular flowers. And here comes the surprise: they smell sweet and spicy like cinnamon. Who would have thought that of a succulent plant?

How to make your pea plant smell good

In order for your pea plant to produce flowers, it needs a bright location, but not direct midday sun. A window spot with morning or evening sun or plenty of indirect light is ideal. Temperatures also play a role: in summer, the plant feels comfortable at around 20 °C, in winter it needs a cool dormant phase at around 12 to 15 °C. This change in temperature stimulates flower formation.

Beautiful and “fragrant” at the same time: the pea plant is an absolute eye-catcher and also smells good. Credit: Jana – stock.adobe.com

You should also water the plant sparingly. As soon as the leaves can be easily pressed in or show small wrinkles, it’s time to water – preferably from below. During the growth phase, you can help with a mild liquid fertilizer every six weeks. This will give the plant enough strength to produce its fragrant flowers in spring.

Proper propagation of pea plants – very easy with cuttings

Would you like to have more of these charming cinnamon plants in your home? No problem! In spring, cut a shoot between two “peas”, leave it to dry for two days and then stick it in slightly moist soil. In a warm, bright place, the cutting will develop roots in about two weeks.

Tip: Plant several cuttings in one pot at the same time – this will create a lush, dense “carpet of pearls” over time.

Caution: Even if it looks like this, it is not edible

As pretty as the leaves look: The pea plant is slightly poisonous. So keep it out of the reach of children and pets. Contact with the sap or accidental consumption can lead to gastrointestinal complaints.


You may also be interested in these articles:


The pea plant not only smells wonderful – it’s also uncomplicated

Whether in the bedroom, living room or office: the pea plant not only adds style to your home with its hanging shoots, but also surprises you with a delicate scent of cinnamon when it’s feeling really well. Easy to care for, decorative in a self-tied hanging basket and a real talking point – just the thing for anyone who loves plants but doesn’t have green fingers.

Source: Plantura, Feey

The links marked with the shopping cart 🛒 are affiliate links. The products are researched to the best of our authors’ knowledge and some are also recommended from personal experience. If you click on such an affiliate link and buy something through it, our editorial team will receive a small commission from the online store in question. For you as a user, the price does not change and there are no additional costs. The income helps us to offer you high-quality, entertaining journalism free of charge.

You should never flush these 9 things down the drain

0

Pharmaceutical residues can be found almost everywhere in nature. Some of it ends up in wastewater via our urine. However, some is also simply poured down the sink. Although medicines in wastewater are not directly dangerous for humans, they are a burden on the environment. And wastewater treatment is becoming increasingly expensive. After all, nobody wants to have medicines in their drinking water that are not intended for them.

But why do only a few pharmacies offer to accept expired medicines these days? Because a large proportion of residual waste is incinerated. Incineration destroys the harmful components of the medication. In principle, tablets, ointments and tinctures that are no longer used can therefore be disposed of with the normal residual waste. However, there is no standardized regulation for this. Here you can find out how to get rid of old medicines in your region. But definitely not down the drain.

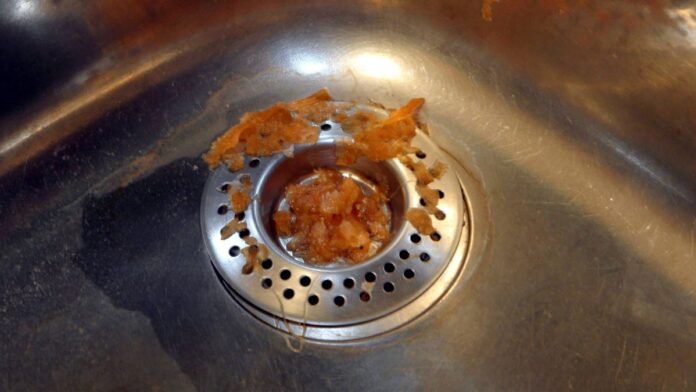
Sinks and washbasins are not garbage chutes! It is certainly unavoidable that more than just water runs down the drain from time to time. But if you pay attention to the points mentioned above, you will reduce the strain on pipes, health and the environment. They will thank you for it. And so will you – because a blocked drain is anything but a pleasure. Credit: IMAGO / Panthermedia

Doing the laundry: This kitchen spice ensures freshness in the washing machine

0

You’re sure to find bay leaves in hearty stews, Mediterranean sauces or savory meat dishes. But did you know that you can use the spicy leaves in more than just the kitchen? Bay leaves also work wonders in the washing machine. Do you already know this simple household trick? If not, read on quickly!

Why you should put bay leaves in the washing machine

Bay leaf is more than just an aromatic culinary herb. The leaves contain essential oils with antibacterial and antifungal effects – properties that can be put to good use when washing.

Have you ever put bay leaves in your washing machine? Credit: FUNKE Digital

Fresh scent instead of musty laundry

If your towels smell unpleasant after washing or your heavily used sportswear just doesn’t want to be fresh anymore, bay leaves in the washing machine can help! They reliably neutralize unpleasant odours – without any artificial perfumes.

Antibacterial cleaning with plant power

Laurel has an antibacterial and antifungal effect. This means that it helps to remove bacteria, mold and other microorganisms from your clothes – completely naturally and without chemical additives. This is a real plus point, especially for bed linen, underwear or children’s clothing!

Also good for the machine itself

It’s not just your laundry that benefits from bay leaves: the washing machine is also happy about the green all-rounder. Bay leaves counteract the build-up of detergent residues and unpleasant odors in the drum. This keeps your machine fresh and clean for longer.


You may also be interested in these articles:


How it works – using bay leaves correctly in the washing machine

All you need is a few dried bay leaves (approx. 2-3 per wash cycle). It’s best to put them in a small laundry net or cotton bag so that they don’t scatter or crumble in the drum. Then simply add them to the laundry and wash as usual. The essential oils develop their effect during the entire wash cycle.

TipIf you like, you can add a few drops of laurel essential oil to the fabric softener compartment for an even more intense fragrance.

Bay leaves in the washing machine are a small but effective insider tip for anyone who wants to clean and freshen up their laundry in a natural way. They provide freshness, hygiene and care all in one – without any chemicals. So it’s definitely worth a try.

Source: chip.de

Houseplants: how easy it is to propagate your Schefflera

0

The Schefflera, also known as Radiant arable is one of the most popular houseplants – and quite rightly so. It is easy to care for, grows reliably and impresses with its elegant appearance. Even better, you can easily propagate your Schefflera. All you need are a few cuttings and a little patience. You can find out how to do this step by step here.

Propagating Schefflera with head cuttings

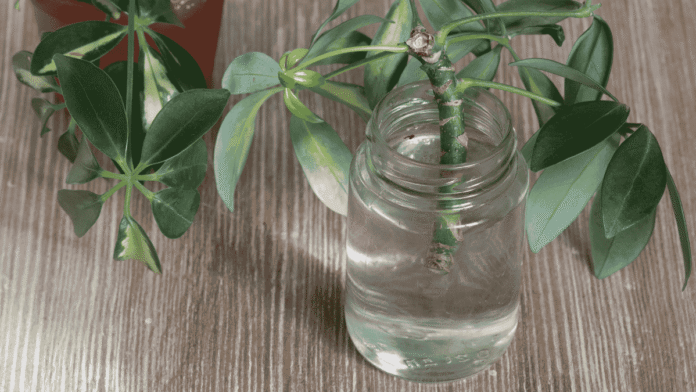
If you want to propagate your Schefflera, it is best to choose a healthy shoot. Cut the shoot with a sharp, disinfected knife directly under a leaf node. Ideally, the cutting should have three to five pairs of leaves and be around eight to ten centimetres long. Remove the lower leaves so that nothing rots in the soil.

Allow the cut to dry for a few hours before placing the cutting either in a glass of water or directly in potting compost. In water, the Schefflera will root after three to four weeks. Make sure that there are no leaves in the water and change the water regularly. As soon as sufficient roots have formed, you can pot up the young plant.

Schefflera are easy to grow, you just need a little patience. Credit: Iryna – stock.adobe.com

Stem cuttings as an alternative

A little more demanding, but also successful: propagation via stem cuttings. Here you cut a long shoot into several pieces five to eight centimetres long. Each piece must have at least one eye – i.e. a small node from which leaves will later sprout. Stick the sections horizontally into moist potting compost or place them in a container of water. One or two leaves should be left on so that the cuttings do not tip over.

This method is particularly suitable if you want to grow several new plants at once. Keep the soil constantly moist, but avoid waterlogging – otherwise a lack of oxygen will cause the roots to die. Ideal temperatures are around 21 degrees Celsius and a bright location, for example on the windowsill above the radiator.

Tips for a particularly large number of young plants

Do you want to produce a particularly large number of offspring from a single shoot? Then put it into the water as a whole – without leaves. Only after rooting do you divide it into shoot tips and stem cuttings. This way, every dormant eye will sprout reliably.

Hydroponics is also possible: place the cutting directly in moist expanded clay. Avoid nutrients at the beginning – you should only fertilize after repotting.


You may also be interested in these articles:


Propagating Schefflera works in a few simple steps

Propagating the Schefflera is uncomplicated, fun and will give you lots of new plants. The easiest way to do this is with head cuttings, but stem cuttings also work well. With the right preparation, the right location and a little patience, you can turn a shoot into a handsome new plant. Give it a try – your green oasis will be happy to grow!

Source: My beautiful garden

Houseplants: How to finally get your clivia to bloom

0

If you want your clivia (Clivia miniata), you don’t need any gardening training, just a little knowledge about its origins and requirements. The clivia – also known as strap leaf comes from South Africa and is one of the most popular flowering houseplants. With its strong, overhanging leaves and bright orange-red flowers, it adds tropical flair to your home all year round.

This is the right location

For your clivia to thrive, it needs a bright spot without direct sunlight. It is best to place it in an east or west-facing window. In summer, it loves fresh air – a balcony or terrace are ideal summer quarters. But beware: during flowering, the clivia does not like changing locations. Mark the pot so that you can realign it exactly every time you put it back. This way you avoid flower drop.

Substrate and pot

Don’t skimp on the substrate: Use a nutrient-rich, loamy and well-drained soil with a pH value of around 6. A small, heavy pot prevents the clivia from tipping over – because its fleshy roots grow vigorously in width. Repotting is only necessary every three to four years when the roots reach the soil surface. Be particularly careful not to damage the delicate roots.

If you follow a few simple care instructions, your clivia will reward you with lush flowers. Credit: manfredkoch – stock.adobe.com

Water and fertilize correctly

Keep the root ball evenly moist, but avoid waterlogging. In winter, give the plant a rest: water sparingly so that the root ball remains almost dry. From March, the clivia will enjoy more water again – and regular fertilizer applications. A liquid fertilizer every two weeks from spring to autumn is completely sufficient.

No flowering without a cold shock

Many hobby gardeners despair because their clivia simply won’t flower. The reason is simple: the plant needs a cold stimulus. From October, place them in a cool place with temperatures between 10 and 12 degrees for at least two months. This “winter rest” stimulates flower formation – and you will be rewarded with magnificent umbels in spring.

Klivie propagation made easy

After flowering, the clivia forms so-called sprouts – small daughter plants that you carefully separate when repotting. Place them in pots with a well-drained substrate and put them in a bright spot. After a few weeks, they will form their own roots – and you will soon have a new, flowering plant.


You may also be interested in these articles:


Caring for Klivie is worth it!

If you want to look after your clivia, the most important things are light, rest and the right soil. With a little patience and the necessary cold stimulus in winter, your clivia will reward you with bright flowers every year. And best of all, the clivia is robust, easy to care for and hardly ever sick. A perfect plant for anyone who loves beauty without stress.

Source: My beautiful garden