
Home Blog Page 2126

Tidiness: tips for eliminating chaos in the household in the long term

0

Tidying up your home is one thing, but keeping it tidy over a longer period of time is another. If you want to keep your household tidy in the long term, it’s no good just cleaning up the occasional mess. Instead, you need a functioning organization system that you can use to keep your household tidy. Read here about the mistakes you are sure to make when tidying up and the tidying tips you should know.

Tidying up the household: these mistakes cause chaos

A tidy household has less to do with discipline than with a clever organization system. Unless you’re a born cleaner, you should avoid the following mistakes that make keeping your household tidy unnecessarily difficult.

Keeping things tidy is difficult if they don’t have a fixed place

Here you will find external content from Flickr that is recommended by our editorial team. It complements the article and can be displayed and hidden again with one click.

I agree that this external content may be displayed to me. Personal data may be transmitted to the provider of the content and third-party services.

Every item should have a fixed place and not simply be quickly hidden away in a drawer as soon as a visitor arrives. If your possessions have a fixed place, you will no longer have to search for them in future. Because now you always know exactly where the remote control or key is. What’s more, your home will be less cluttered as you can put everything back in its designated place immediately after use.

Store items in hard-to-reach places

Probably the most common reason for clutter is leaving items you use every day in hard-to-reach places. Hanging the key that you regularly need on a hook that is too high will ensure that you put it somewhere else next time to save you having to stretch and reach.

Clutter builds up, especially in cupboards, when you first have to pull out lots of other things to reach exactly what you need. Then, due to a lack of time, everything is stuffed back into the cupboard. You should therefore store your belongings in such a way that the items you use most often are easy to reach.

Store different categories together

If you store different categories that have nothing to do with each other together, it’s easy to lose track of where things are. You should therefore divide your belongings into suitable categories and store them separately.

Do not use transparent storage boxes

If you store a lot of things in storage boxes, you quickly lose track of what is actually in which box. If you are looking for something, you have to search through all the boxes until you finally find the desired item. You can counteract this by simply using transparent boxes. This allows you to see at a glance what is inside without having to rummage around.

Leave labels on cosmetic products

Here you will find external content from Flickr that is recommended by our editorial team. It complements the article and can be displayed and hidden again with one click.

I agree that this external content may be displayed to me. Personal data may be transmitted to the provider of the content and third-party services.

A mistake that pretty much everyone makes: leaving labels on cosmetic products. These are a visual distraction in the bathroom and unconsciously create the illusion of clutter. It is therefore advisable to simply remove the labels. The shape and color of the packaging is usually enough to distinguish the different products from one another.

Leave piles of paper on the desk

There’s nothing worse than a huge pile of paper on your desk. It makes the whole study look messy, even if the rest of the room is tidy. So in future, simply store your paperwork in binders or folders, label them and then put them on a suitable shelf.

Do not use storage jars for food

Do you have food packaging all over the place in your cupboard and everything falls out as soon as you open the cupboard door? You can prevent this by simply using storage jars. Not only do they save a lot of space, they also look much tidier in the kitchen and keep your household tidy. You can see what’s inside at a glance.

Keep unused items

That old laptop that no longer works, or that souvenir from 10 years ago that you never liked but are keeping out of courtesy: If you no longer need or even like items, you should either sell them, give them away or dispose of them properly. Because if you own less, it will be much easier for you to keep things tidy in future.


You may also be interested in these articles:


Not using space properly

Many people have so much space in their home, but don’t use it properly. Some drawers remain half empty, while others are bursting at the seams. It is advisable to empty the cupboards once to see how much space is actually available.

Don’t get rid of the chaos in your closet

Organizing your closet by category is also helpful. T-shirts are on one shelf, pants on the next. Dresses and skirts are hung on the clothes rail. This way, you know immediately where things are and can put your outfit together in seconds.

If you avoid the mistakes mentioned here, it’s not that difficult to keep your household tidy in the long term. You’ll see that with these tidying tips, even unannounced visitors will no longer cause you any worry lines.

Source: brightside
Thumbnails: © flickr/Ulleskelf © flickr/Marné Lierman
Houseplants: Every plant fan should use this underestimated helper

0

You love your houseplants, water them regularly – and yet some of them seem sad or simply wither away? Sometimes you literally drown them, sometimes they are left to dry out for weeks. You’re not alone! Many plant lovers experience exactly that. So it’s no wonder that more and more are turning to a little gadget: the Moisture meter for plants. But does it really help? Or does it rather cause confusion?

How do moisture meters for plants work?

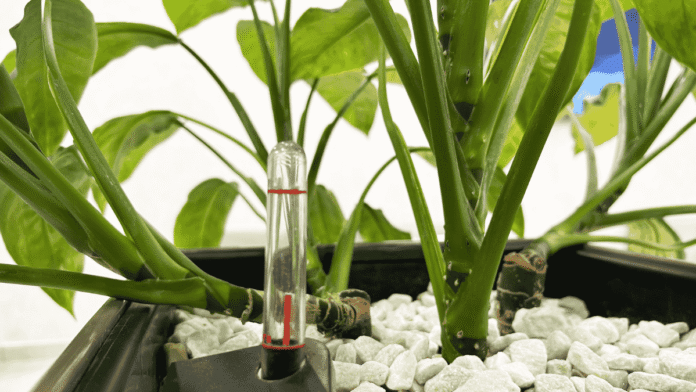
A moisture meter for plants shows you how moist the soil around your plant currently is. At first, this sounds like the perfect solution for all watering problems – but it is only partially so.

The device does not measure moisture directly, but the electrical resistance of the soil. The wetter the substrate, the better it conducts electricity – and this is exactly what the moisture meter shows you. Sounds clever, doesn’t it?

But there are a few catches that you should be aware of.

What a moisture meter cannot do

A big misunderstanding: many people think that a moisture meter for plants tells them exactly when they need to water. This is not true. You have to know for yourself what the optimum value is for your particular plant. And that’s not so easy.

There are also some disruptive factors:

  • Different soils conduct electricity to different degrees. Organic soil often shows higher moisture values than sandy mixtures.
  • The harder you press the soil into the pot, the more moist it appears according to the measuring device – even if it is not.
  • Fertilizers and mineral salts distort the measurement. They collect in the soil over time and influence the resistance.
  • The depth at which you insert the device also plays a role. The moisture differs significantly depending on the soil layer.
  • Calibration is not possible with most devices. This means that if your moisture meter displays incorrect values, you cannot correct them.
Can you rely on the display of the meter or is it better to do the finger test again? Credit: kaninstudio – stock.adobe.com

And then there are plants for which you should completely dispense with the device – such as succulents or orchids. Their soil is either too dry or too airy to display meaningful values.

Measuring devices as a useful addition, but not as the sole aid

A moisture meter for plants can help you get a better feel for your soil – especially if you are just starting out with gardening. However, it does not replace your common sense or your powers of observation.

So don’t blindly rely on the display. Instead: Do the finger test regularly, feel with your finger about two centimeters deep into the soil. Lift the pot – that way you can quickly feel whether the plant needs water.


You may also be interested in these articles:


A Moisture meter for plants can be a useful aid if you use it correctly. It will give you an indication, but not exact watering instructions. Combine it with the finger test and a scrutinizing look at your plants. In this way, you will develop the right watering feel over time – without any technical frustration.

Source: Feey

Mākslīgā intelekta ietekme uz kazino darbību

0

Mākslīgais intelekts (AI) pārveido kazino nozari, uzlabojot funkcijas, uzlabojot saskarsmi ar klientiem un uzlabojot drošības pasākumus. 2023. gadā Deloitte dokumentā tika uzsvērts, ka mākslīgā intelekta inovācijas varētu uzlabot kazino darbības efektivitāti līdz pat 30%, nodrošinot izcilu resursu sadali un klientu palīdzību.

Viena ievērojama figūra šajās izmaiņās ir Deivids Baazovs, iepriekšējais Amaya Gaming izpilddirektors, kurš ir izteicies par AI ieviešanu azartspēlēs. Viņa domas varat pārraudzīt viņa Twitter profilā.

2022. gadā Lasvegasas Bellagio izveidoja uz AI balstītu sistēmu, lai pārbaudītu spēlētāju darbības un atzīmes “Patīk”, ļaujot izmantot personalizētas reklamēšanas stratēģijas, kas ievērojami palielināja klientu noturēšanas rādītājus. Šī pieeja ne tikai uzlabo spēļu pieredzi, bet arī palielina kazino peļņu. Lai iegūtu plašāku informāciju par AI spēļu nozarē, apmeklējiet The New York Times.

AI arī veic būtisku lomu krāpniecības atpazīšanā un apturēšanā. Analizējot lielu datu apjomu tūlītējā laikā, AI sistēmas var identificēt apšaubāmas darbības un iespējamu negodīgumu, nodrošinot taisnīgu spēļu iestatījumu. Turklāt AI pārvaldītie tērzēšanas roboti tiek izmantoti, lai sniegtu ⁄7 klientu palīdzību, ātri reaģējot uz spēlētāju jautājumiem un problēmām. Uzziniet vairāk par AI izmantošanu kazino vietnē licencētie online kazino.

Lai gan mākslīgā intelekta ieguvumi ir ievērojami, kazino ir jāņem vērā arī tās piemērošanas ētiskās sekas. Datu privātuma garantēšana un atklātības saglabāšana AI formulās ir ļoti svarīga, lai radītu uzticību patroniem. Nozarei turpinot progresu, mākslīgā intelekta ieviešana, visticamāk, veidos azartspēļu izredzes, padarot tās produktīvākas un pieejamākas.

Removing limescale stains: Clever trick with baking paper makes cleaning easier

0

On the shower head, on the sink, on the tap and in the sink – limescale builds up over time in all areas of the home that come into contact with water. A simple household trick using baking paper should now help affected areas to regain their shine and remove limescale stains.

Baking paper is a versatile household helper. Not only can you use it to decorate your cappuccino or replace muffin tins, but you can also fry a fried egg without a pan. But did you know that you can even use it to remove limescale stains? Find out here how this ingenious household trick works.

Remove limescale stains with baking paper

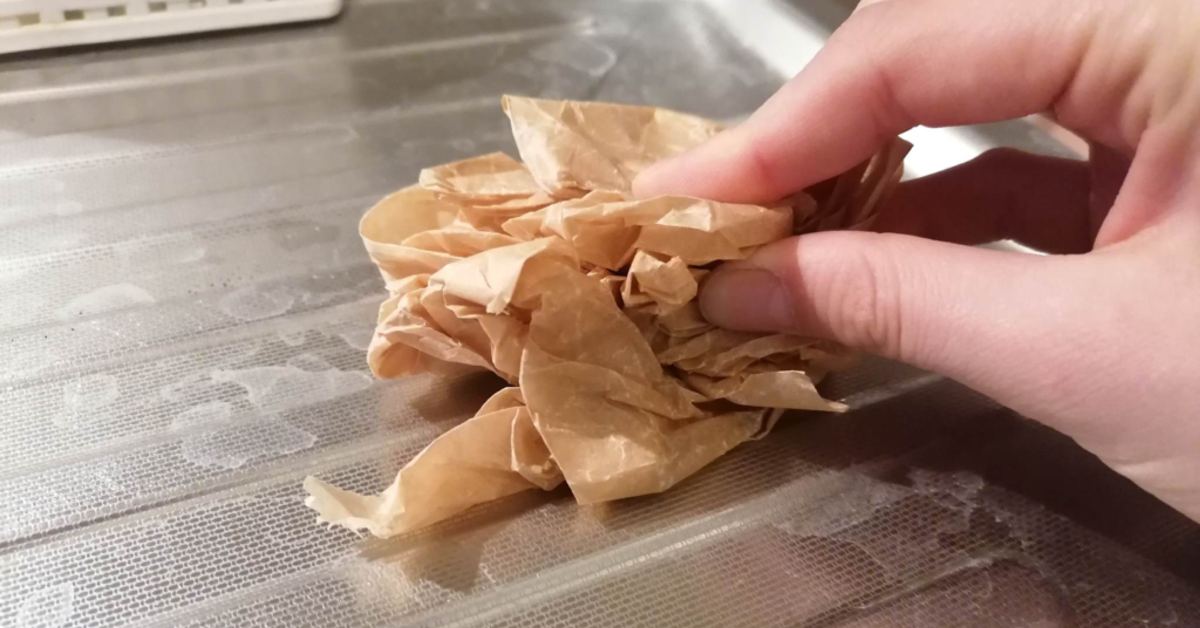
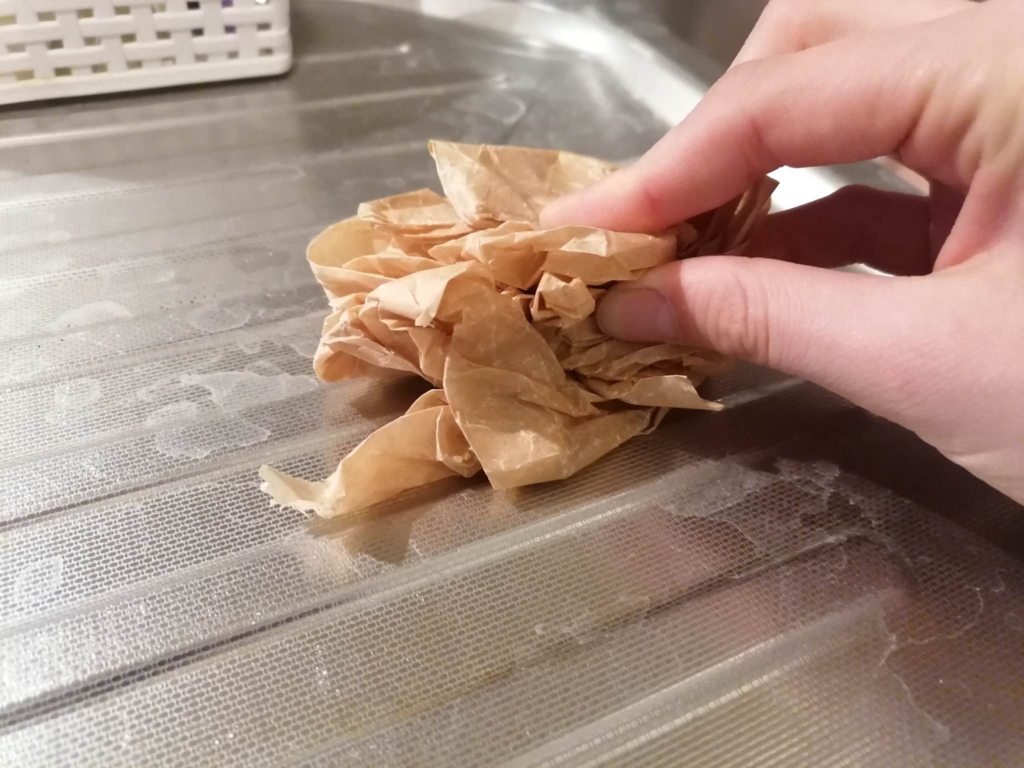
To remove annoying limescale stains, crumple the baking paper up a little with your hands. This makes the paper more stable and easier to hold. Now rub the limescale stains on the tap, in the shower or in the sink with the baking paper in your hand. After just a few seconds, the limescale stains and other discoloration will disappear, giving your bathroom a new shine. Cleaning can be so easy!

You can easily remove limescale using baking paper. Credit: Media Partisans/FUNKE Digital

Reading tip: Have you ever tried cleaning your shower with a potato? This unusual cleaning trick shows how it works.

Before you start, make sure that the surfaces are dry. If the limescale stains cannot be removed immediately, apply a little more pressure with the baking paper. Simply rub the spots with the paper until you are satisfied with the result.

You can also use this household trick to remove limescale from the sink, kettle and all stainless steel surfaces. Light soiling in the oven can also be tackled in this way.

Someone removes limescale stains on a kitchen sink with baking paper. This household trick is ingenious!
Limescale stains are now a thing of the past. Credit: Media Partisans/FUNKE Digital

Long-lasting shine

Another advantage: this trick not only removes limescale stains, it also ensures a long-lasting shine. The treatment with baking paper acts like a protective layer and new limescale cannot build up so quickly.

For water stains and light limescale deposits, you can achieve remarkable results with this household trick. For stubborn limescale deposits, however, it is better to use one of the following household remedies. The baking paper is then used to polish the surfaces!

Reading tip: Here you can find more tips for cleaning stainless steel surfaces.

Sources: ruhr24, brigitte
Preview image: ©Media Partisans/FUNKE Digital

Washing: This mistake will cost you a lot of money

0

You think you save energy with every wash because your washing machine has a good energy efficiency rating? A new study reveals that many of us are still making a big mistake when doing the laundry. Find out more about the eco program on your washing machine here.

Eco program in the washing machine: what you need to know

You buy a washing machine with the best energy efficiency class A and think you are doing something good for your wallet and the environment with every wash cycle. However, a survey by the manufacturer Beko shows that 91 percent of respondents attach importance to a good energy efficiency class, but misunderstand a crucial fact.


You may also be interested in these articles:


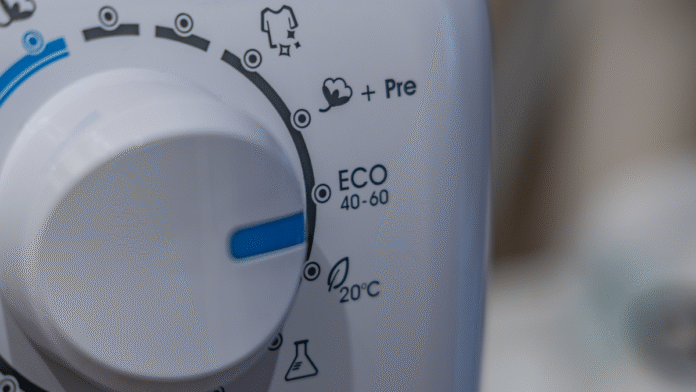
The energy efficiency class only predicts economical consumption for the Eco program. This means that only if you wash your laundry in the Eco program are you actually using the high energy efficiency of your washing machine. However, according to the study, only around 33 percent of respondents regularly choose this environmentally friendly program. Instead, colored, dark clothes/jeans and easy-care programs are much more popular.

This misconception persists when doing laundry. Credit: Pixelot – stock.adobe.com

Fears about the Eco program unfounded

One reason why many people avoid the Eco program could be the fear that their clothes will not be sufficiently clean. Here, too, the all-clear can be given: As a rule, the cleaning performance of the Eco program is equivalent to other programs, even though it may run for longer. This means you can save energy and still get fresh, clean clothes. So it really pays to rethink here!

However, for hygiene reasons, you should make sure to run the washing machine at higher temperatures – 60 degrees or more – once every few weeks to prevent mold, bacteria and deposits from breeding. Öko-Test also advises this.

Source: Utopia, press portal

Houseplants: Vacation planned? These 5 will survive without watering

0

When you finally go on that long-awaited vacation, you want to relax – and not worry about your houseplants or bothering friends and family with these tasks. But what happens to your green roommates if you leave them alone for two or three weeks?

Fortunately, there are many plants that require little water and are therefore ideal for surviving a longer vacation. They can cope with drought, store moisture and look great at the same time. Here you can find out which plants are particularly suitable for your absence-friendly plant care.

Lucky feather: The carefree beauty for those who don’t like the sun

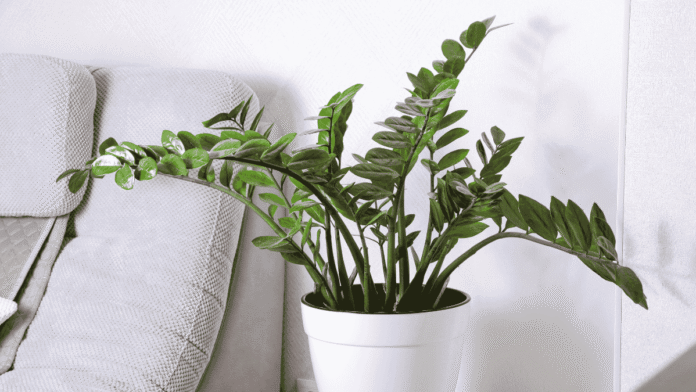
The Lucky feather (Zamioculcas zamiifolia) is one of the most robust houseplants around. It stores water in its thick roots and fleshy stems and can easily survive two to three weeks without watering. You should only water it when the soil is completely dry. Make sure it is in a bright, semi-shady spot without direct sunlight – then your lucky feather 🛒 will grow almost by itself.

Aloe vera: The vacation queen among succulents

If you are looking for a plant that is both easy to care for and versatile, the aloe vera perfect. Its fleshy leaves store water so that it can easily survive for a long time without replenishment. Only water it every three weeks or so and place it in a sunny, warm spot. It feels most at home in well-drained cactus soil.

Many houseplants need less water than you might think and can cope well with a vacation of several weeks without watering. Credit: Ольга Симонова

Bow hemp: The survivalist for frequent travelers

Bowhemp (Dracaena trifasciata) is almost indestructible. Even if you forget about it, it will remain faithful to you. It loves dry conditions, needs little light and grows reliably even in darker corners. Water it sparingly – every two to three weeks is enough. However, make sure to avoid waterlogging, otherwise its roots will rot.

Ivy: Air purifier with low water consumption

The ivy tute is not only pretty, but also extremely frugal. It improves the indoor air and copes well with dry soil. Simply wait until the top layer of soil is dry before watering again. A bright, not too sunny spot is all it needs.

Palm lily: tropical flair despite a dry spell

The Palm lily (Yucca) stores water in its sturdy trunk and manages without constant watering even in the summer heat. Use loose, well-drained soil and give it a sunny spot. A drainage layer prevents waterlogging and keeps its roots healthy.


You may also be interested in these articles:


Vacation tricks for your plants

Before a long trip, you can give your plants a good watering and put them in a bright but cooler place. Alternatively, neighbors or friends can help out. An upside-down water bottle with holes in the lid provides additional security – this way you can keep your plants hydrated even when you are away.

Source: My Home Book

The links marked with the shopping cart 🛒 are affiliate links. The products are researched to the best of our authors’ knowledge and some are also recommended from personal experience. If you click on such an affiliate link and buy something through it, our editorial team will receive a small commission from the online store in question. For you as a user, the price does not change and there are no additional costs. The income helps us to offer you high-quality, entertaining journalism free of charge.

Laundry: Grandma’s home remedies remove gray stains and make laundry white again

0

White laundry should shine. Even in grandma’s day, there were clever tricks and household remedies for removing gray stains and whitening yellowed laundry. The advantage of these is that they are not only effective, but also gentle on the laundry and the environment.

Make your laundry white again with these household remedies

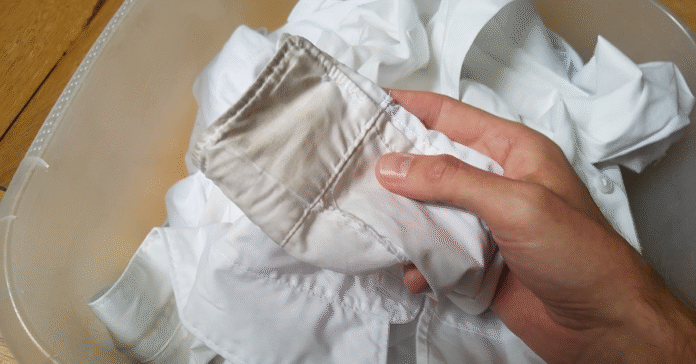
Gray haze usually occurs when the detergent dosage was too low or too old (yes, even detergent enzymes lose their strength over time). Instead of pulling the dirt out of the white laundry and binding it in the detergent solution, the water penetrates the textile fabric with tiny dirt particles that become trapped in the fibers.

Sometimes the gray haze only emerges after the laundry has been in the cupboard for a while and the optical brighteners in the detergent have decomposed. The good news is that in both cases, the gray haze can be removed and the laundry shines white again.

You can remove the gray haze with simple household remedies. Credit: Media Partisans/FUNKE Digital

Stain remover, laundry whitening cloths and chemical stain removers are not necessary. In most cases, old household remedies from grandma’s time are sufficient. Home remedies such as soda, baking soda, vinegar or sunlight remove the gray haze, are long-lasting and gentle on the fabric.

Remove gray haze with sunlight

In the past, white laundry was spread out on the lawn to dry. The UV light from the sun breaks down the color pigments and brings back the original whiteness of the laundry.

Tip: In rare cases, white laundry may turn yellow when drying in the sun. To avoid this, you should pay close attention to the washing powder dosage instructions when washing and avoid using liquid detergent or fabric softener.

Old method: remove stains with the sun.
Have you ever tried to remove stains with sunlight? Credit: Wikipedia/public domain (Max Liebermann: The Lawn Bleach)

Remove gray haze with vinegar

Vinegar is well known as a limescale remover. However, the fact that vinegar is an organic acid and therefore also very good at dissolving dirt particles from organic compounds has been unjustly forgotten.

Place the yellowed laundry in a mixture of white vinegar and water for a few hours and then wash it as normal with detergent.

Tip: Vinegar works best in hot water. However, you should make sure that the clothing can withstand high temperatures. This is often not the case with synthetic textiles.

Remove gray stains with baking soda

Add a sachet of baking soda to your laundry detergent and the stuck-on gray haze is a thing of the past. The reason for this is the mixture of sodium hydrogen carbonate (better known as baking soda) and solid acid in the baking powder. In hot water, this mixture reacts to form an alkaline solution and CO₂ – an excellent mix against dirt.

Tip: You can also pre-treat stubborn stains with baking soda: Slightly moisten the baking soda and work it into the stain. Then pour boiling water over it.

Removing gray stains with soda

Soda (more precisely: pure soda or washing soda) used to be found in almost every household. Soda forms alkaline hydroxide ions in an aqueous solution – a so-called potassium hydroxide solution. This is highly effective against stains, sweat residues, persistent odors and gray haze.

Tip: Unfortunately, the use of soda is not entirely harmless. You should therefore wear household gloves and ventilate the room well.

Does salt help against gray haze?

You often hear the tip to add a little salt to the detergent compartment. However, it remains largely unclear what function the salt is supposed to perform during the washing process: saline solutions are pH-neutral and hardly ever undergo chemical reactions; if the salt does not dissolve, there would be a risk of residues in the laundry. Nevertheless, many people swear by the trick – maybe you just have to try it yourself?


You might also be interested in these articles:


Washing white laundry properly

The easiest way to prevent gray stains is to prevent them from forming in the first place. You should therefore follow a few tips to prevent white laundry from turning yellow:

  • Sort: Always wash whites and colored laundry strictly separately. If the white laundry has a colored pattern, it belongs to the colored laundry. Heavily soiled items are also treated separately.
  • Cold soak: It is best to soak dirty laundry while the stain is still fresh. Use cold water first, as some types of stains curdle and set at high temperatures. If you know the origin of the stain, you can of course also use hot water for soaking.
  • Use heavy-duty detergent powder: Good heavy-duty detergent powder washes white laundry particularly clean with its mixture of surfactants, enzymes, bleach and optical brighteners. In no test could liquid detergents and gel pads even come close to achieving this effect. According to Stiftung Warentest, the key to clean whites – even when treating gray haze – lies primarily in the heavy-duty detergent powder used.
  • Dosing: In addition to the detergent, the correct dosage is also important. Too little detergent promotes gray haze; too much detergent leaves residues and harms the environment.
  • Increase the temperature if necessary: Even though many detergents achieve good results at 30 °C, bleaching agents work better at 60 °C against gray haze and stains. Of course, you should not wash delicate fabrics at such a high temperature.

Modern detergents and stain removers have made laundry washing easier in many respects. However, the old household remedies also produce good results, especially for light stains or gray haze. White laundry is not only visually brightened, but is also really clean down to the pores.

Sources: test, oekotest

Create more storage space in the bathroom with this DIY pipe system

0

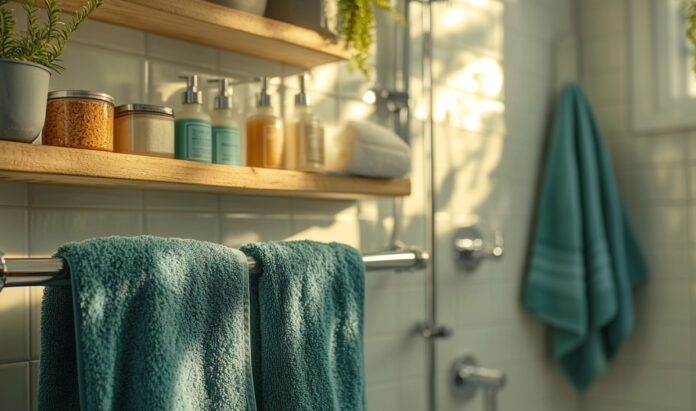
Especially in some old apartments where a bathroom has been retrofitted, this room can sometimes be quite small. If your bathroom gives you claustrophobic fits because it is little more than a wet room in a closet, the following DIY idea will show you how to use the available space as effectively as possible.

The following bathroom is not only very small, but also lined with numerous tiles, which makes it even more difficult to mount hooks, towel rails and cupboards on the wall. But with the following idea, you can create plenty of storage space even in a bathroom like this.

DIY pipe system turns a small bathroom into an eye-catcher

The bathroom is really quite small. Credit: YouTube/Ana White

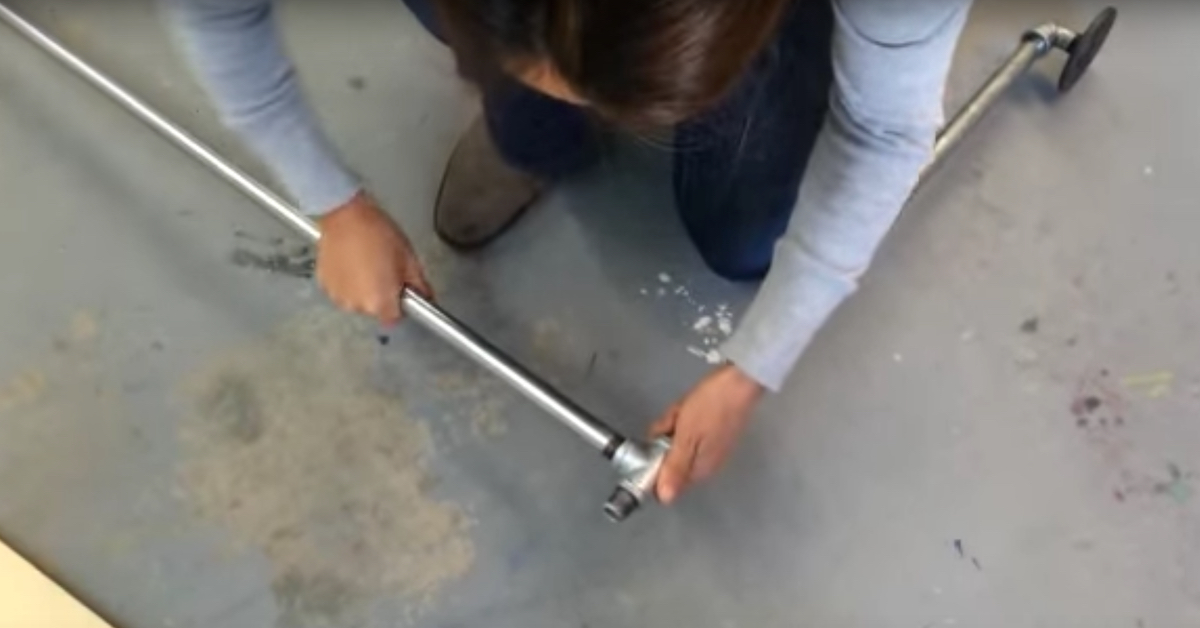
In this case, the rod device, i.e. the solution to the puzzle, is to be mounted around a corner. To do this, first connect an approx. 60 cm and an approx. 1.2 m long pipe together using a T-piece. A knee tube and a wall flange are attached to each end. 🛒 attached.

A woman screws metal pipes together.
First the metal tubes are connected. Credit: YouTube/Ana White

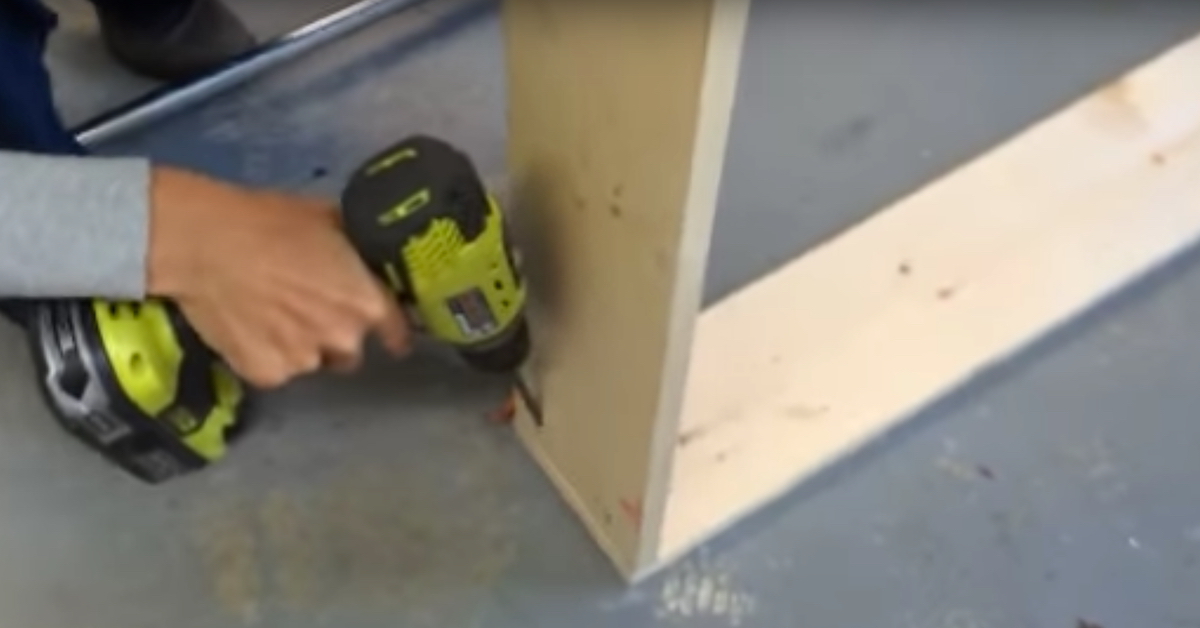
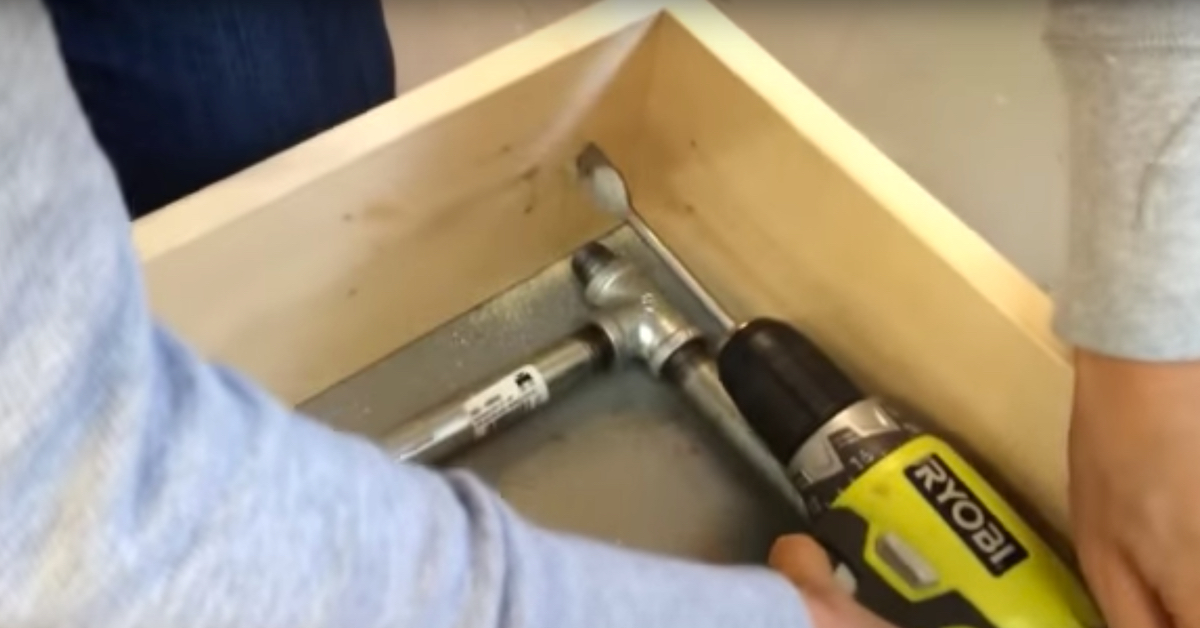
After the pipes have been joined together, two boards are cut to size on which the pipes will be mounted in a later step. The boards must therefore be slightly longer than the pipes so that they have enough space on them. The two boards are screwed together at a 90° angle.

Two wooden boards are screwed together with a cordless drill.
The board base is screwed together. Credit: YouTube/Ana White

To prevent the pipes from sagging in the corner, a bushing is inserted into the open end of the T-piece. The corresponding spot is marked on the wood and drilled through.

A hole is cut into a board using a drill.
The opening for the T-piece must be milled. Credit: YouTube/Ana White

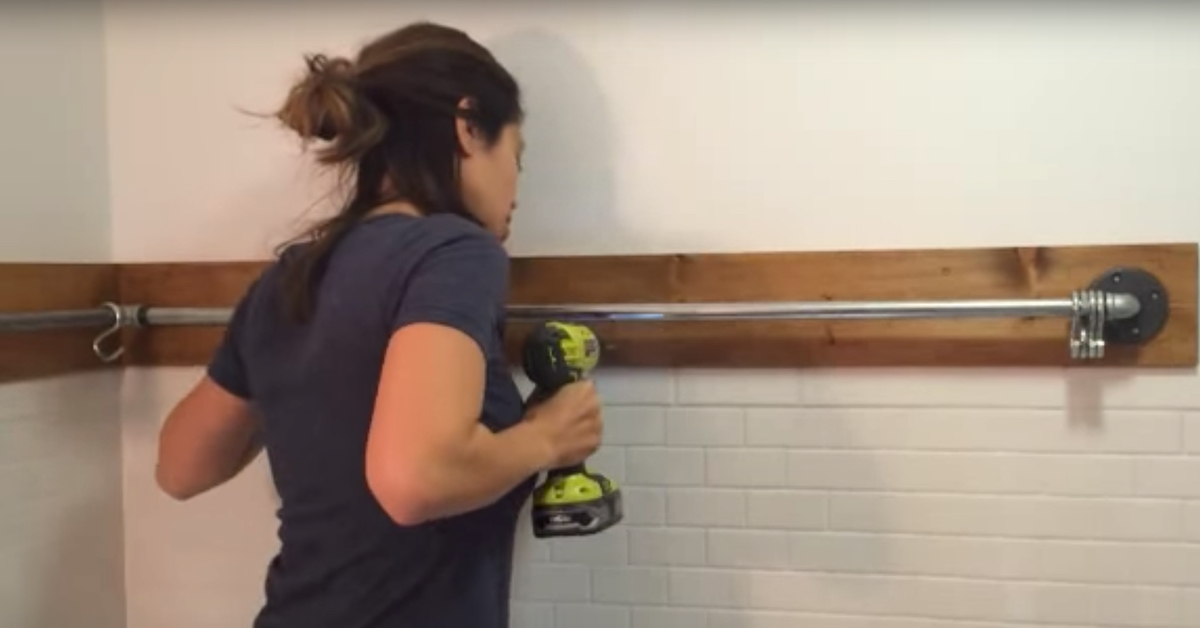
But before the pipes are fixed to the boards, they are painted with wood paint. As soon as everything is dry, the pipe construction is screwed to the board and everything is attached to the wall.

A woman drills a pipe system on a bathroom wall.
Painted and varnished, the boards look really smart. Credit: YouTube/Ana White

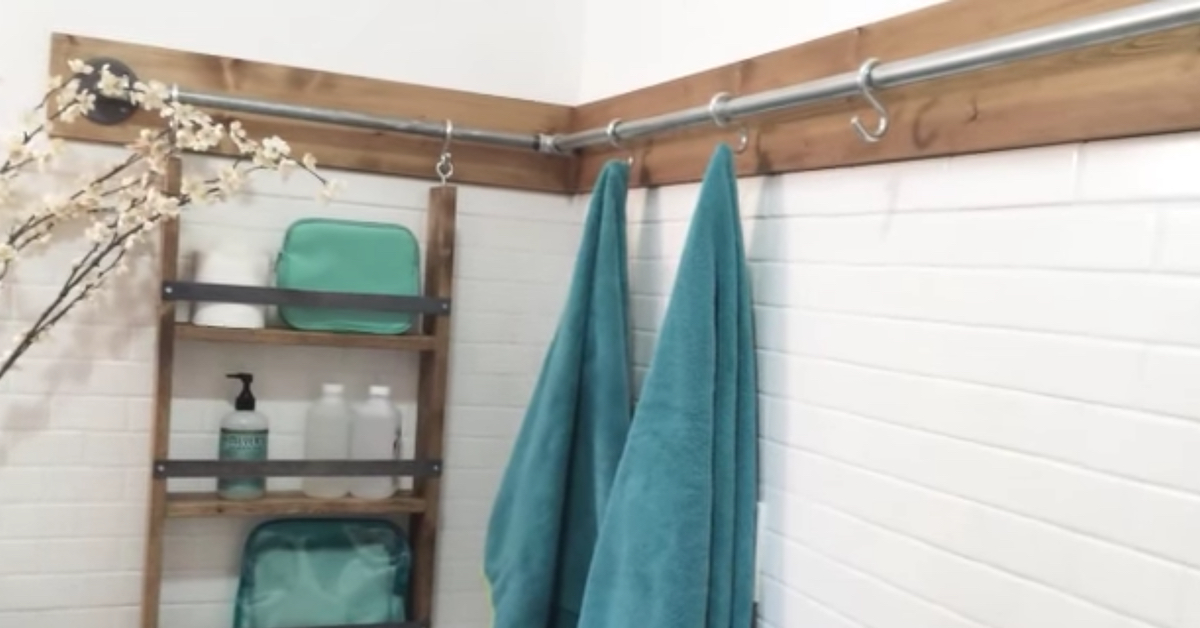
The work is done! Thanks to S-hooks 🛒 this oversized towel rail can be used not only for towels, but also for hanging shelves. 🛒 can be attached. This is a great alternative if there is no space for bathroom cabinets. Above all, you can easily attach additional hooks or shelves to it if you need extra space for guest towels etc.

A hanging system of tubes and hooks in a bathroom.
The hanging system immediately creates a lot more space in the bathroom. Credit: YouTube/Ana White

You can watch the complete assembly instructions in this video:

Here you will find external content from YouTube that is recommended by our editorial team. It complements the article and can be displayed and hidden again with one click.

I agree to this external content being displayed to me. Personal data may be transmitted to the content provider and third-party services.

This pipe system enhances the bathroom aesthetically and is also extremely practical. It provides storage space in a small bathroom without cluttering it.

Preview images: ©YouTube/Ana White,
©Midjourney: This image was created with the help of an AI.

The links marked with the shopping cart 🛒 are affiliate links. The products are researched to the best of our authors’ knowledge and some are also recommended from personal experience. If you click on such an affiliate link and buy something through it, our editorial team will receive a small commission from the online store in question. For you as a user, the price does not change and there are no additional costs. The income helps us to offer you high-quality, entertaining journalism free of charge.

Using multiple sockets correctly: 7 tips against the risk of fire

0

If you have the opportunity to build a house, you can decide for yourself where and in which rooms sockets should be installed. The planning takes into account any candle arches, the Christmas tree, various lamps and, of course, the entertainment electronics. Tenants, however, do not have this luxury and so in many rooms there are multiple sockets that are filled to capacity. However, if you disregard a few rules, they can become a fire hazard!

Multiple sockets: 7 tips to avoid the risk of fire

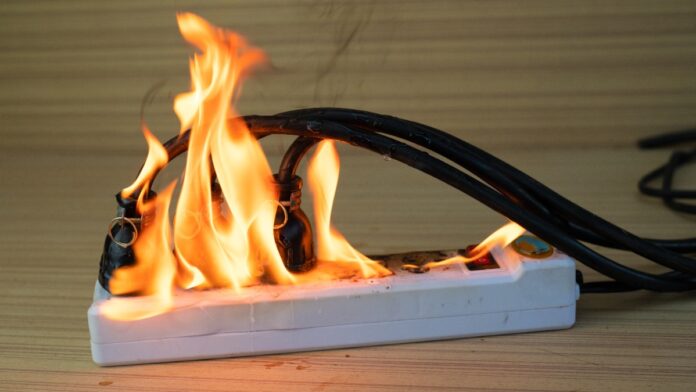
According to experts, the danger of multiple sockets and power strips is all too often underestimated. Many people rely on the fact that the fuse will blow if the circuit is overloaded. Although this is true, an overload of the distribution socket can occur much earlier: Within a few minutes, it is then heated up to 200 °C – a smoldering fire occurs, which can develop into an open fire.

Damage and improper use of a multiple socket outlet can also lead to a fire. Therefore, always observe the following rules:

Keep the socket clean

Dust in multiple sockets can easily ignite. The Federal Institute for Occupational Safety and Health (BAuA) points this out. You should therefore clean multiple sockets regularly. Hiding multiple sockets under the cupboard or sofa is also not a good idea, as this is where dust tends to collect.

Pay attention to overall performance

Do you know the power of your hairdryer? Credit: FUNKE Digital/Media Partisans

A multiple socket outlet is only designed for a certain maximum power. As a rule, this is 3,500 watts. This means that the combined power of all connected appliances must not exceed 3,500 watts. An electric kettle often has up to 2,400 watts. If you then add a toaster with 1,200 watts, the multiple socket is already overloaded.

Typical appliances whose power is often underestimated are

  • Hair dryer (approx. 2,000 watts)
  • Microwave (approx. 800 watts)
  • older vacuum cleaner (approx. 2,000 watts)

Large appliances such as washing machines, tumble dryers or dishwashers should always be connected to separate wall sockets.

Do not plug multiple sockets one behind the other

Turning a 3-way plug into a 6-way plug? Even if the idea seems tempting, multiple sockets should not be plugged in one after the other. This is because the power consumption is not distributed, but bundled. This quickly leads to an overload.

By the way: For this reason, the note “Do not plug in one behind the other” must also be noted on every multiple socket.

Do not cover

The multiple socket outlet becomes hot when it is heavily used. If it is not sufficiently ventilated, the heat can build up and lead to a fire – even if the load limit of the multiple socket outlet has not yet been exceeded. Therefore, make sure that multiple sockets are not covered by a carpet, curtain or other objects.

Banish from bathrooms and cellars

Normal multiple sockets have no place in basements and bathrooms. There is too great a risk of them being exposed to moisture. This can lead to corrosion or short circuits. Therefore, only use multiple sockets with protection class IP 44 and higher in these locations.

Attention: On the balcony and in the garden, you should only use special multiple sockets for outdoor use.

Replacing old multiple sockets

Multiple sockets do not have an expiration date. However, they cannot be used forever. Over time, the materials corrode and the cables become brittle. Old multiple sockets therefore become a permanent hazard. Check older multiple socket outlets regularly for discoloration or other visible defects and replace them as soon as possible.


You may also be interested in these articles:


Avoid cheap goods

A multiple socket has caught fire
Don’t skimp on quality! Credit: New Africa – stock.adobe.com

The quality of multiple sockets can vary considerably. Cheap products often do not meet the necessary standards, which means they are overloaded more quickly or catch fire.

Look for the following signals when buying:

  • Indication of maximum power: It shows how high the total wattage of the connected devices may be.
  • Information on the manufacturer: Does the manufacturer take responsibility for the product?
  • CE mark: Although the CE mark is not a seal of quality, it proves that the product complies with European directives.
  • TÜV seal or GS mark: Multiple sockets with these seals have been tested by a recognized institute.

A fire in the home causes not only material but also non-material damage: things that are dear to us fall hopelessly victim to the flames. Safety is also an important issue with multiple sockets.

Source: swrfernsehen

Cleaning the kitchen: Why you should clean your coffee pot with denture cleaner

0

Do you love the smell of freshly brewed coffee in the morning and can’t start the day without the invigorating effect of the popular hot drink? Then welcome to the club! Whether it’s a cappuccino, latte macchiato, espresso or a simple cup of black coffee – as different as the preferences of the many coffee fans are, they are united by their enthusiasm for the early caffeine kick. But despite all the love for the brown bean, how often do you actually give your coffee pot a thorough clean?

Don’t worry, you’re not alone if you’re now bashfully thinking about some stubborn residue in your favorite pot. But there’s no need to panic! With a few clever home remedies, you can clean any coffee pot. Find out here how to get rid of those nasty deposits.

Dirty coffee pot: how easy it is to clean it

The good old coffee pot is rarely found on the table these days. In most households, fully automatic coffee machines or portafilter machines have long since replaced filter coffee. Coffee is prepared by the cup. For larger coffee tables, however, the (antique) coffee pot is still used. However, soiling is often a real nuisance, especially for pots with a narrow neck. It’s not that difficult to clean the coffee pot if you know which household remedies can replace the tedious scrubbing.

To clean this dirty coffee pot, you’ll have to dig deep into your bag of tricks. Credit: Animaflora PicsStock – stock.adobe.com

Coffee pots 🛒, especially the older ones from grandma’s time, are characterized by a chic glaze, a small opening with a lid and a narrow neck. You can’t clean the coffee pot by hand, the opening is simply too small for that. And the neck of the jug in particular gradually collects deposits that are difficult to remove. But don’t worry! With a few tried-and-tested methods, you can get the inside of your jug sparkling clean again.

Method 1: Salt and lemon

For light soiling, a duo of ingredients that is probably already waiting to be used in your kitchen is sufficient: salt and lemon.

Here’s how it works:

  • Add 2 teaspoons of salt and the juice of half a lemon to your coffee pot.
  • Fill up with hot water.
  • Close the jug tightly and shake vigorously or stir with a spoon.
  • Leave the mixture to work for 30 minutes, rinse thoroughly and your jug will be as good as new!

Method 2: Baking powder or baking soda

If salt and lemon are not enough, you have to resort to stronger means. This is where baking powder or baking soda come into play. These kitchen wonders are real all-rounders and are particularly effective for heavy deposits.

And this is how it works:

  • Empty a sachet of baking powder or baking soda into your coffee pot.
  • Fill it up with hot water and stir.
  • Leave the mixture to work for a few hours, preferably overnight.
  • Rinse well the next morning – done!

Method 3: Dishwasher tabs and denture cleaner

If even baking powder or baking soda can’t dissolve stubborn residues, you’ll have to bring out the big guns. Dishwasher tabs or denture cleaner are real helpers in a pinch.

This is how professional cleaning works:

  • Put a dishwasher tab or denture cleaner tablet in the coffee pot.
  • Fill the pot with hot water.
  • Leave everything to soak for about 30 minutes.

Tip: This way you can also clean vases that are difficult to access.


You may also be interested in these articles:


After cleaning: Thorough rinsing is a must

Very important: No matter which method you choose, don’t forget to rinse thoroughly! Nobody wants to taste lemon residue or even a hint of denture cleaner in their next coffee. A little hot water, a few vigorous swirls, and the pot is ready to go back into service.

With these tricks, you can effortlessly clean your coffee pot so that it’s sparkling clean again. So grab your freshly cleaned pot, invite a few friends over – the next coffee klatch can begin!

Source: lecker.de

The links marked with the shopping cart 🛒 are affiliate links. The products are researched to the best of our authors’ knowledge and some are also recommended from personal experience. If you click on such an affiliate link and buy something through it, our editorial team will receive a small commission from the online store in question. For you as a user, the price does not change and there are no additional costs. The income helps us to offer you high-quality, entertaining journalism free of charge.