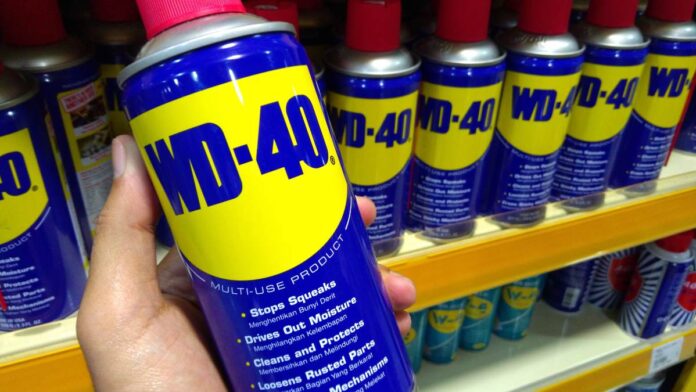
Remove stains with WD-40? Of course you can! When it comes to caring for clothes, most people think of washing, drying and ironing. But there is another way to keep clothes in good condition: WD-40! The penetrating oil, which is normally used to make squeaky doors or rusty bicycle chains work, can also work wonders on textiles.
WD-40 is a versatile penetrating oil that is generally used as a lubricant and rust remover. However, the multifunctional oil can also be helpful when caring for items of clothing.
Removing stains with WD-40
Stubborn oil and grease stains can be removed with WD-40. The multifunctional oil can also help with other stains on clothing. The fine oil penetrates deep into the fibers and dissolves the dyes without leaving any residue.
Simply spray a small amount onto the stain, leave the oil to work in and then rinse it out with detergent.
WD-40 as a waterproofing spray
You can also use the penetrating oil to waterproof your leather shoes or winter boots. It also forms a water-repellent protective layer on many other textiles that keeps out rain and moisture.
This is how WD-40 helps to remove stains. Credit: IMAGO / Pond5 Images
Removing chewing gum from clothing
Anyone who has ever sat on spit-out chewing gum knows how firmly it sticks to clothing. WD-40 can help you to remove the chewing gum from the fabric.
First place the item of clothing in the freezer for a few hours. Then spray some multifunctional oil on the area and pull off the hard chewing gum.
Loosening jammed zippers
Never tug at a jammed or stiff zipper. Otherwise it could break. Instead, use WD-40 penetrating oil. It lubricates the zipper without greasing it.
Note on the use of WD-40 on clothing
Make sure that you do not use the penetrating oil on delicate fabrics such as silk or satin. You should also always try out an inconspicuous area beforehand to see if your clothing is compatible with the penetrating oil.
As it turns out, WD-40 is not only suitable for hinges and bicycle chains. It is also a true all-rounder for textile care.
It makes sense: we spend around a third of our lives sleeping, and we inevitably leave sweat, skin flakes and other body residue on our bed linen. Regular washing is therefore not only a question of hygiene, but also ensures better sleeping comfort. But how do you wash fitted sheets correctly so that they retain their fit, elasticity and color? With the right care tips, you can significantly extend the lifespan of your fitted sheets and ensure restful nights in fresh bed linen.
How often should fitted sheets be washed?
Before we look at the washing methods, the question arises as to the correct washing frequency. As a rule, you should change them every two to three weeks. If you sweat a lot, have skin problems or allergies, you should even wash them weekly. In summer, when we sweat more at night, it is logical to change them more frequently than in cooler seasons.
Regular cleaning not only prevents the build-up of mites and bacteria, but also keeps you feeling fresh when you go to bed. In addition, body oils and sweat can attack the fibers of your fitted sheet over time, shortening its lifespan.
You must pay attention to this when washing your sheet. Credit: Ламина Акулова – stock.adobe.com
The right wash cycle: temperature and program
Choosing the right washing temperature and program for your washing machine depends on the material of your fitted sheet. Always check the care label before washing to follow the manufacturer’s specific recommendations.
As a general guideline:
Cotton fitted sheetsThese robust classics can usually be washed at 60°C without any problems. This temperature reliably kills bacteria and mites and thoroughly removes sweat and skin oils.
Microfiber and syntheticsThese materials should be washed at lower temperatures (30-40°C) and on a gentle cycle to maintain their elasticity.
Jersey fitted sheetThe popular, stretchy jersey sheets made of cotton can usually withstand 40-60°C.
Satin and silkThese fine materials require special care and should only be washed at 30°C on a delicate wash program.
For colored fitted sheets, use a color detergent 🛒 without optical brighteners to prevent fading. For white sheets, use a heavy-duty detergent that refreshes the white tones. You should avoid using fabric softener as it reduces the absorbency of the material and can leave behind residues that can cause skin irritation.
Mastering special challenges
Fitted sheets sometimes present us with special challenges that require special treatment:
Stubborn stainsAlways treat stains immediately. Pre-treat sweat stains with gall soap or a stain remover. Blood stains should first be rinsed out with cold water – warm water fixes the blood in the fabric. For stubborn stains, soaking in water with a splash of lemon juice or baking soda can help.
Yellowed white sheetsSometimes a wash cycle with a cup of white vinegar instead of fabric softener helps against yellowing. Alternatively, you can soak the sheets in hot water with a solution of baking soda before washing them normally.
Decreasing elasticityIf the elastic in your fitted sheet starts to give way, wash it at a lower temperature and do not tumble dry it. Heat is the main enemy of elasticity.
You may also be interested in these articles:
Correct drying for a long shelf life
After washing, proper drying is crucial for the longevity of your fitted sheets: Most cotton fitted sheets can be dried in the dryer at a low to medium temperature. However, take them out while they are still slightly damp to avoid excessive shrinkage and creasing. Synthetic materials and delicate fabrics such as silk should be left to air dry.
Hanging on the washing line should be done in such a way that the fitted sheet is stretched as little as possible. Fold it once in the middle and then hang it over the line. You should avoid direct sunlight on colored sheets as they can fade.
By the way: If you fold your fitted sheets immediately after drying or pull them onto the bed, you can often do without ironing. If creases do remain, a quick pass over with an iron at a low to medium temperature is sufficient for most materials.
The links marked with the shopping cart 🛒 are affiliate links. The products are researched to the best of our authors’ knowledge and some are also recommended from personal experience. If you click on such an affiliate link and buy something through it, our editorial team will receive a small commission from the online store in question. For you as a user, the price does not change and there are no additional costs. The income helps us to offer you high-quality, entertaining journalism free of charge.
Pharmaceutical residues can be found almost everywhere in nature. Some of it ends up in the wastewater via our urine. However, some is also simply poured down the sink. Although medicines in wastewater are not directly dangerous for humans, they are a burden on the environment. And wastewater treatment is becoming increasingly expensive. After all, nobody wants to have medicines in their drinking water that are not intended for them.
But why do only a few pharmacies offer to accept expired medicines these days? Because a large proportion of residual waste is incinerated. Incineration destroys the harmful components of the medication. In principle, tablets, ointments and tinctures that are no longer used can therefore be disposed of with the normal residual waste. However, there is no standardized regulation for this. Here you can find out how to get rid of old medicines in your region. But definitely not down the drain.
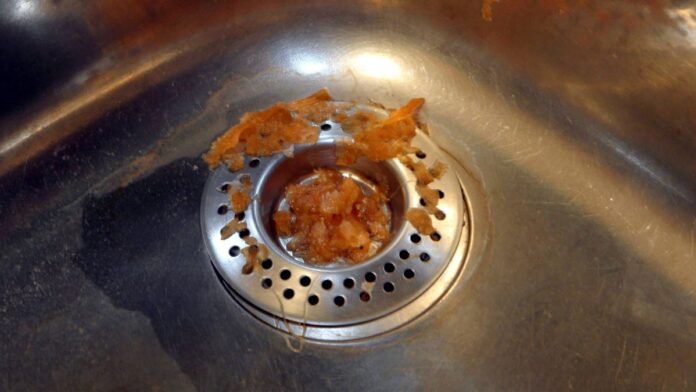
Sinks and washbasins are not garbage chutes! It is certainly unavoidable that more than just water runs down the drain from time to time. But if you pay attention to the points mentioned above, you will reduce the strain on pipes, health and the environment. They will thank you for it. And so will you – because a blocked drain is anything but a pleasure. Credit: IMAGO / Panthermedia
If you discover a white coating on your silicone mold, this is nothing to worry about at first. The discoloration may not look particularly attractive, but in most cases it is harmless. Read this article to find out what the white coating is all about and the best way to clean your silicone mold.
Where does the white coating on silicone molds come from?
When you see a white coating, you might immediately think of mold. But your worries are unfounded. If you have thoroughly washed the silicone mold and it no longer contains any food residue, it is most likely not about mold. Find out which three things can be responsible for the unsightly white coating on silicone molds:
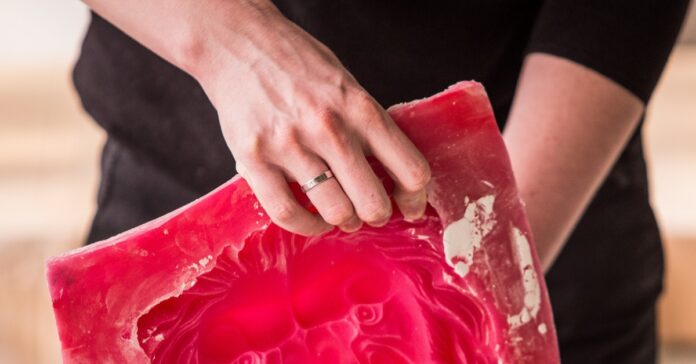
Food residue can cause the silicone mold to go moldy. However, grease, limescale or rinse aid residues are much more frequently the reason for white deposits on silicone molds. Credit: stock28studio – stock.adobe.com
Grease residue
The most common explanation for white deposits on silicone molds is grease residue. Sherin Knoll from the baking accessories manufacturer Birkmann explains the white coating on the silicone mold as follows: “Silicone absorbs the fat from baking like a sponge and stores it in the mold. After a certain time, the mold then releases the excess fat. As silicone also attracts dust and dirt, the mold gets this white coating.”
Rinse aid
Most silicone molds for baked goods or ice cubes are dishwasher-safe. However, if you choose a rinse cycle with rinse aid and special salt, residues can stick to the baking mold. Especially if you leave them to dry after removing them from the dishwasher, the white coating on the silicone mold will become visible.
Lime
Hand-washed silicone molds can also develop white spots. This phenomenon mainly occurs in households where the tap water contains a lot of limescale. Rub the mold dry with a microfiber or kitchen towel to avoid the white coating.
You may also be interested in these articles:
Cleaning silicone molds: how to do it right
According to the manufacturer, you should clean a newly purchased silicone mold with hot water and washing-up liquid. Tap it out on a tea towel and let it air dry to avoid lint in the mold.
If it has been in the cupboard for a long time and has formed a white coating, you can do the following to clean the silicone mold:
Boil with vinegar water
place in the warm oven and then wipe out with a kitchen towel
Rinse with hot water
By the way: The silicone mold does not need to be dry before use. You can pour the dough into the still moist mold. This makes it even easier to remove the baked goods after baking.
The mysterious white coating is therefore not a scary mold infestation, but usually just excess fat that the mold “sweats out” again. It’s reassuring to know that we don’t have to dispose of our beloved baking aids straight away – a little vinegar water, a warm oven or hot water is all it takes to banish the ghosts of past baked goods.
Sources: fragdenstein, oetker
NEWSLETTER
Never miss any more tips, tricks and life hacks – with the free Geniale Tricks newsletter
It is not uncommon for limescale and urine scale to build up in the toilet over time. However, if there are black worms in the toilet, this is definitely a cause for concern. In this case, there is an urgent need for action. Where do the worms come from and how can you combat the vermin?
Don’t panic – if you act quickly now and pay attention to a few things in future, you will soon be rid of the vermin again.
Where do the black worms in the toilet come from?
The worms may be the larvae of flies, beetles or butterflies. This is because small creepy-crawlies such as abort flies, woodlice, cockroaches or silverfish prefer damp rooms. The bathroom is therefore almost ideal. Insects also find countless hair and skin flakes and hair in the bathroom, which are an excellent source of food. However, the black worms in the toilet could also be mosquito larvae.
Here you will find external content from Reddit that is recommended by our editorial team. It complements the article and can be displayed and hidden again with one click.
I agree to this external content being displayed to me. Personal data may be transmitted to the provider of the content and third-party services.
Regardless of the type of pest, the larvae can originate either in the cistern or in the rim of the toilet. However, they could also settle outside the toilet and fall into the bowl from there.
Note: If you have been away, there is a greater risk that pests will have spread in your bathroom during this time. It is quite possible that mosquitoes or other insects have laid their eggs in stagnant water (e.g. in the toilet, cistern or drain) and the larvae have hatched during your vacation.
How do I combat black worms in the toilet?
To combat the vermin, you should first clean your bathroom thoroughly. Clean the cupboards and shelves, wash all textiles and replace the toilet brush. The toilet, cistern and flushing rim should also be cleaned thoroughly. Also make sure that the humidity in the bathroom is not too high. In addition, you should never dispose of leftover food in the toilet.
If these measures are not successful, you can combat black worms in the toilet as follows:
Flush the toilet with hot water.
Use disinfectant.
Clean the drain with pipe cleaner or a mixture of baking soda and vinegar.
Regularly dissolve toilet tabs or dishwasher tabs in the toilet and then flush.
If you still haven’t been able to get rid of the vermin successfully, it’s high time to contact a plumber or exterminator.
Here you will find external content from Pinterest that is recommended by our editorial team. It complements the article and can be displayed and hidden again with one click.
I agree to this external content being displayed to me. Personal data may be transmitted to the provider of the content and third-party services.
Problems with health
However, worms in the toilet could also be a sign of an undetected worm infestation in the body. They may be pinworms, roundworms or tapeworms. A worm infestation is only detected through a bowel movement. In this case, be sure to see a doctor – especially if you often have the feeling that your bottom is itching.
Note: As a worm infestation can be contagious, you should inform all members of the household. However, worms that infest the intestines are usually white rather than black.
To avoid black worms in the toilet, regular and thorough cleaning of the bathroom is essential. And if you do have a visit from the little pests after a long vacation, you can get rid of them quickly with these tricks! Did you know that rats can also get into your home through your toilet? Read here how you can prevent this problem.
NEWSLETTER
Never miss any more tips, tricks and life hacks – with the free Geniale Tricks newsletter
On-line betting has acquired enormous appeal in recent years, using gamers the ease and enjoyment of playing their preferred online casino video games from the comfort of their very own homes. And one of the most preferred settlement approaches that gamers choose is PayPal. In this article, we will certainly discover the world of on-line casino sites
With the fast development of technology, the gaming market has actually undertaken a considerable change. Typical brick-and-mortar gambling establishments are no more the only alternative for gamblers. The rise of online betting has supplied gamers with a convenient and obtainable means to enjoy their preferred casino games from the convenience of
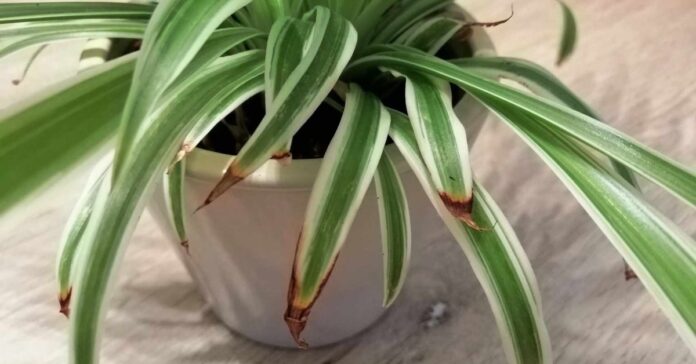
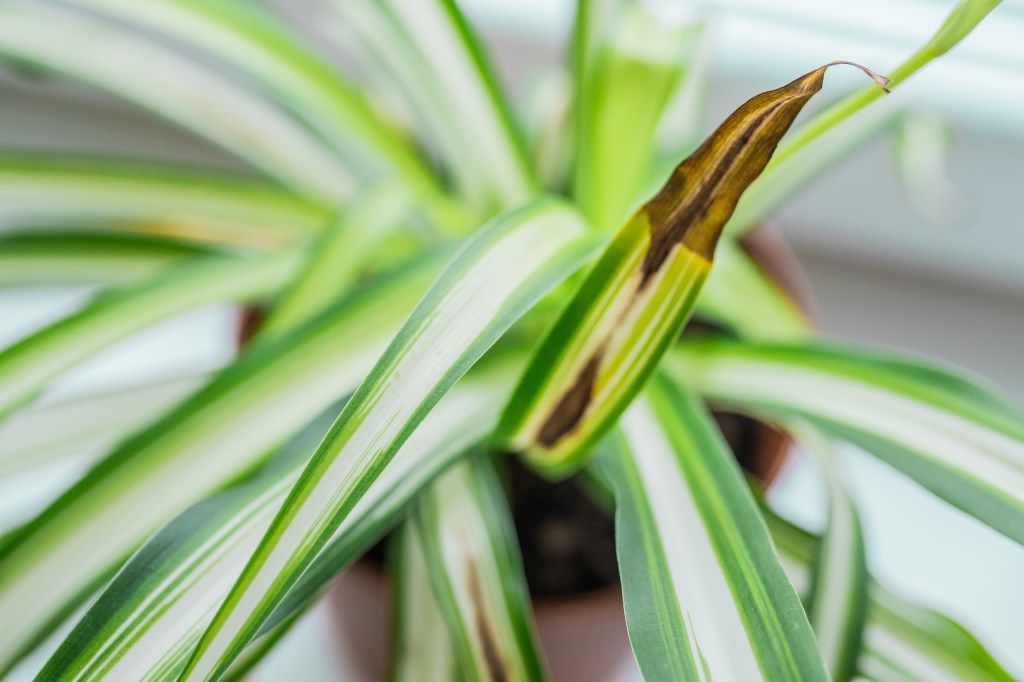
Green lilies are actually easy to care for – because the “Chlorophytum comosum” makes few demands and is therefore also suitable for beginners without green fingers. However, green lilies can occasionally develop brown tips. This detracts considerably from the appearance of this otherwise easy-care houseplant. You can find out what you can do about this and how to care for green lilies properly here.
If the leaf tips of your green lily have turned brown, you have probably done something wrong when caring for it. Here are 5 things to look out for:
The green lily is in the wrong location
Place the green lily in a bright spot near a window, but without direct sunlight. The sun could burn the leaves and cause brown tips.
The leaves of the plant do not hang freely
Make sure that the leaves can hang freely over the plant pot. If the leaves of the green lily hit the floor or window sill, this will also cause brown tips. Green lilies should either be grown in a hanging basket or on a shelf where their leaves can hang down freely.
Make sure that the leaves of the green lily can hang freely. Credit: bozhena_melnyk – stock.adobe.com
The temperature is too low
This frugal houseplant feels most at home at a room temperature of 20 °C. If the temperature in the home falls below 10 °C, the green lily will stop growing. During the warm season, the green lily can also be taken outside for a warm summer shower.
Watering mistakes
Make sure that you only water the plant when the top layer of soil is already slightly dry. Excessive watering quickly leads to waterlogging, which the green lily cannot tolerate. This could cause its roots to rot, resulting in the otherwise robust houseplant dying. As a rule of thumb, a sip of water twice a week is enough to prevent the green lily from drying out. It stores enough water in its fleshy roots to survive longer periods of drought.
Tip: If the soil in the flower pot is noticeably dry, this could also be a reason for the brown tips. In this case, give your green lily a lukewarm immersion bath. When no more air bubbles emerge from the root ball, remove the plant from the bath and allow it to drain well before placing it back in the planter.
Errors in watering can lead to brown tips. Credit: Victoria – stock.adobe.com
The air is too dry
You have followed all the care instructions and your green lily still has brown tips? This could be due to the humidity. The brown tips of the shoots indicate that the air is too dry. You can easily solve this problem by spraying the green lily regularly with water.
Reading tip – The best tips for houseplants: Curious pine cone trick saves your houseplants These 7 houseplants survive even in dark rooms These 3 houseplants protect your home from mold
NEWSLETTER
Never miss any more tips, tricks and life hacks – with the free Geniale Tricks newsletter
Cleaning the oven – just the thought of it puts most people in a bad mood. So much so that many people spend a lot of money on self-cleaning ovens that burn off the dirt or work with steam. However, the latter method can also be carried out with any normal oven.
Cleaning the oven with steam
Cleaning the oven regularly is unavoidable. Because even if you are careful when cooking and baking, grease vapors settle in cracks and hard-to-reach places. Added to this are splashes of sauce, blobs of dough and other stubborn incrustations.
Scrubbing by hand, however, is laborious and often frustrating. Chemical oven cleaners are expensive and harmful to health. A trick with steam can help here: it makes cleaning the oven much easier and prevents stubborn stains from forming in the first place.
In self-cleaning ovens, this process is called hydrolysis. However, it is very easy to carry out yourself.
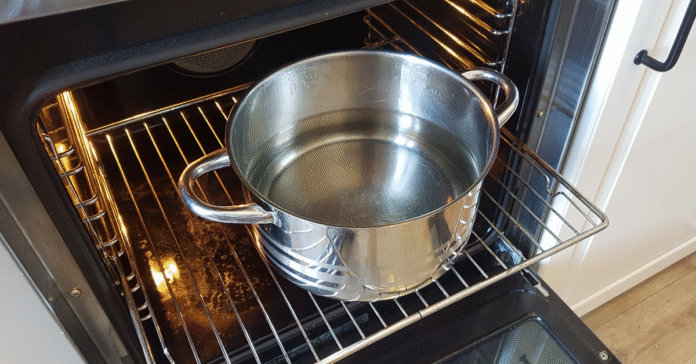
Place a pot of water in your oven. Credit: Media Partisans/FUNKE Digital
For this you need:
Pot (suitable for oven), casserole dish or deep baking tray
hot water
Vinegar (alternatively: washing-up liquid)
This is how it works:
Preheat the oven to 230 °C. Even better: use the residual heat from the oven immediately after cooking and baking.
Boil the water in the kettle. Fill the pan (or baking dish or baking tray) with the hot water.
Add a little vinegar to the water. This prevents the steam from leaving behind limescale residue. It also increases the cleaning effect of the steam. Don’t worry: you will hardly smell the vinegar afterwards. Alternative: For heavier grease residues, add two squirts of washing-up liquid to the water. However, you should then air out the oven thoroughly.
Place the pan on the lowest shelf of the oven. Let the steam do its work for 30 to 60 minutes. Do not open the oven door.
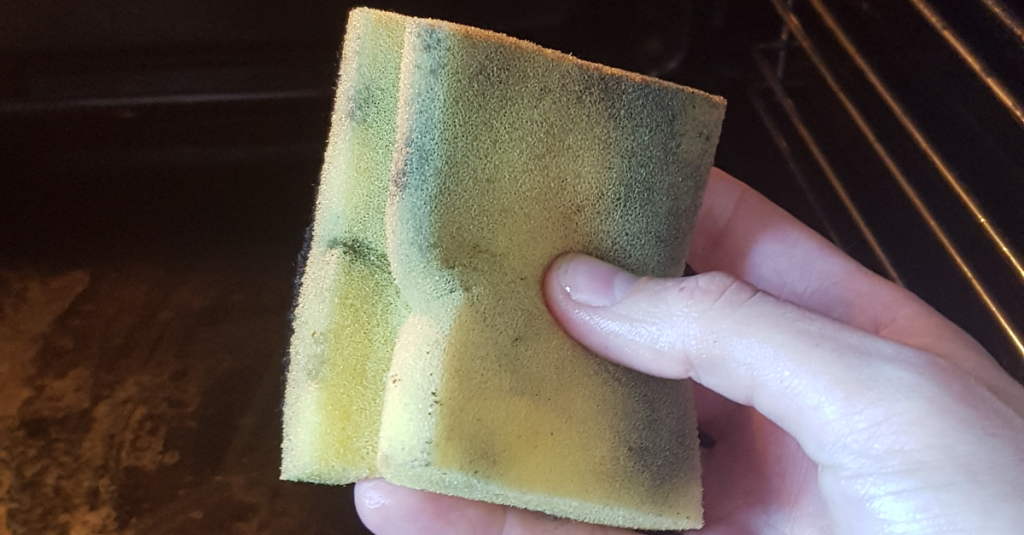
Switch off the oven and let it cool down so that it is only lukewarm. Now you can wipe out the oven with a sponge or kitchen towel.
Then wipe out the oven with a sponge. Credit: Media Partisans/FUNKE Digital
Cleaning the oven with steam: advantages and disadvantages
The method of cleaning the oven with steam is particularly suitable for regular use and for minor soiling. The steam helps to loosen grease and dirt more easily or prevent them from sticking in the first place. This keeps the oven clean down to the last crevice. The best way to do this is to use the residual heat immediately after cooking or baking. This prevents vapors, splashes and stains from burning in and also saves energy.
The Advantages of the steam trick lie in its simple and cost-effective application. Wiping out the oven afterwards is much easier.
The DisadvantageEven with this method, you cannot completely do without wiping. In addition, steam reaches its limits with old and heavy encrustations. In this case, it is better to use one of the home remedies for oven cleaning that we have already presented.
Practical, helpful, easy to use – the trick of cleaning the oven with steam has everything that makes a good life hack.
NEWSLETTER
Never miss any more tips, tricks and life hacks – with the free Geniale Tricks newsletter
Wash your comforter? Let alone wash the good down comforter? Many people shy away from this for fear of spoiling their beds. However, anyone can easily clean their beds at home if they follow these 10 tips.
Despite covers, comforters and pillows also get dirty over time. Mites, bacteria or bed bugs can also be a problem. Find out here how to wash your comforter correctly and avoid clumping.
Why comforters need to be washed
Every night, the body loses almost two liters of moisture, which penetrates the comforter cover as well as the comforter and pillow. The warm and moist environment causes microorganisms to spread inside the bedding, which can weaken your immune system. In addition to moisture, people also lose skin flakes, which are the food source for house dust mites. These lay their droppings in pillows and blankets and can trigger allergies in sensitive people.
How often should you wash your comforter?
You should wash your comforters once or twice a year. Since, of course, in the headpillow often accumulate even more moisture and dirt, you should wash them a little more often. So put them in the washing machine at least twice a year.
Follow these tips
Washing pillows or comforters is usually very easy. To avoid bad odors or clumping, you should pay attention to a few things when washing:
Study the washing label
Before washing, you should always take a look at the information on the label. They will tell you how you can wash your comforter. If the label on older comforters is yellowed and illegible, simply follow the rules in the points below. Then nothing should go wrong.
Do not use fabric softener
You should definitely avoid using fabric softener on comforters filled with down or feathers. This is because it forms a wafer-thin layer between the individual feathers and leads to clumping. Fabric softener can also cause lumps in blankets made from other materials. Therefore, always leave it out.
Use a low spin speed
Too high a spin speed can cause down and feathers to break more quickly. It is best to spin your down comforters at 400 to 800 revolutions per minute to protect the filling. Blankets made of synthetic fibers are less sensitive and can withstand higher spin speeds.
Better to double rinse
Due to the dense filling and the large volume in the washing machine, comforters may be more difficult to rinse. It is therefore best to play it safe and rinse your comforters and pillows twice after washing. This way, no detergent residue is left behind, which can cause clumping when drying.
Dry blankets in the dryer
There are several advantages to drying comforters in the dryer. Firstly, this minimizes clumping and secondly, the blankets dry much faster. If you leave the blankets to dry indoors, they will take a very long time and new germs can form, causing bad odors. Alternatively, you can also dry the blankets outside in the fresh air. However, pollen allergy sufferers should pay attention to the pollen season.
Attention: Avoid too high temperatures when drying in the dryer, otherwise the feathers in down comforters can become brittle.
Use the right detergent
It is best to use liquid detergent as it leaves fewer detergent stains and clumps. If you have down comforters, you should use a mild or special down detergent.
Here you will find external content from Pinterest that is recommended by our editorial team. It complements the article and can be displayed and hidden again with one click.
I agree to this external content being displayed to me. Personal data may be transmitted to the provider of the content and third-party services.
Wash blankets at 60 °C
If possible, comforters should be washed at 60 °C to kill mites and bacteria. However, not all materials can withstand such high temperatures. You can find an overview here:
Down comforters: up to 60 °C
Feather comforters: up to 60 °C
Cotton comforters with synthetic fiber filling: up to 90 °C
Microfiber comforters: up to 60 °C
Silk comforters: to the dry cleaner; up to a maximum of 30 °C
Camel hair comforters: dry clean; up to a maximum of 40 °C
Cashmere comforters: dry clean; up to a maximum of 30 °C
Which washing program is the right one?
Gentle wash programs are suitable for comforters and pillows. The programs for delicates and wool can also be used.
Use tennis balls or washing balls
To avoid lumps in the comforter, use wash balls or tennis balls. Put them in the dryer to fluff up the filling.
Do not overload the washing machine
When washing comforters, always wash them individually, even if there is still room in the machine. The more free space there is, the better the detergent can spread and the comforter can be rinsed.
Do not overload the washing machine! Credit: FUNKE Digital
Washing very large comforters
If your comforter is too big for the machine, the only option is often to take it to the dry cleaners. Or you can try a launderette. They often have larger washing machines that can also accommodate large items of laundry. Alternatively, you can also wash comforters in the bathtub. Pay attention to the soaking time of the detergent and rinse the comforter thoroughly afterwards.
How to care for your bedding properly
Even if you can’t avoid hair, dander and moisture ending up in your comforter when you sleep, you can prolong the feeling of freshness with a few tips:
Shake vigorously – Blankets and pillows should be shaken and fluffed regularly to remove trapped moisture.
Regular airing out – open your blanket and pillow after getting up and hang them outside to air out.
Change bed linen regularly – Bed linen should be changed every two weeks.
Brush off dirt – Stains and dirt should always be brushed off immediately.
If you wash your bed linen, comforter and pillows regularly, your bed will remain clean and inviting for a long time. As a rule of thumb, comforters and pillows should be washed once or twice a year and replaced every six to eight years.
NEWSLETTER
Never miss any more tips, tricks and life hacks – with the free Geniale Tricks newsletter