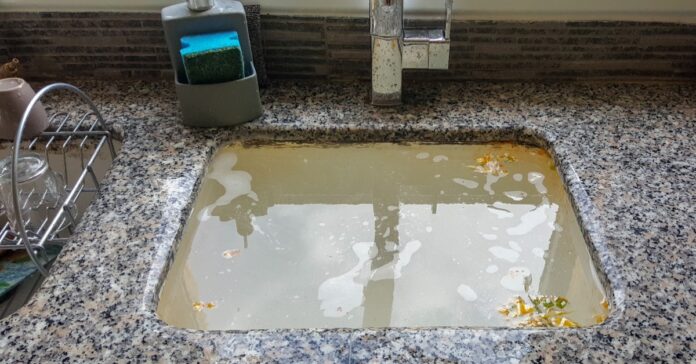
The kitchen sink should really only be used for washing dishes, draining pasta water or washing vegetables. However, things usually end up in the sink that don’t belong there, such as leftover food, dust or hair. It is inevitable that the sink will become blocked at some point and the water can no longer drain properly. Before you resort to chemicals, here’s how you can clean your drainpipe with a simple household remedy.
Cleaning a blocked drainpipe with vinegar
To remove hair, food residue, soap and grease from the kitchen sink, you need vinegar essence. You probably already have this popular household remedy at home. This is because the vinegar reacts chemically with baking soda. The resulting foam dissolves dirt. A simple and thorough way to clean this part of the kitchen. This is the best way to do it:
To clean the drain, add about four tablespoons of baking soda 🛒 into the drain and then pour with about half a cup of vinegar essence 🛒 to.
Leave it to work for about 10 minutes so that the baking soda and vinegar mixture can work its “magic”.
Then rinse with warm water and enjoy a clean drain. If you feel that the drain is still not completely clear, repeat the process.
Tip: You can also mix the vinegar with water and heat it up a little before pouring the mixture down the drain.
Cleaning the kitchen also includes cleaning the drain pipe. Photo: Igal – stock.adobe.com
This trick is as simple as it is ingenious, isn’t it? Instead of using chemicals, you can clean your drainpipe naturally! This not only saves you money, but is also environmentally friendly!
The links marked with the shopping cart 🛒 are affiliate links. The products are researched to the best of our authors’ knowledge and some are recommended based on personal experience. If you click on such an affiliate link and buy something through it, our editorial team will receive a small commission from the online store in question. For you as a user, the price does not change and there are no additional costs. The income helps us to offer you high-quality, entertaining journalism free of charge.
Making the beds ranks somewhere between clearing out the cellar and cleaning the windows on the popularity scale of household chores. But all the moaning is useless: regular bed-making is not only hygienic, it also ensures a better night’s sleep. And with tricks such as the clever corner or the roll mop trick, making up fitted sheets, comforters and the like is quick and easy. But before the actual bedding is made, there is usually the chaotic search for the right bedding on the agenda. To save you the hassle of rummaging through the linen drawer, we’ll show you an ingenious trick for folding your bed linen in future.
Put an end to the laundry chaos
There must be a pillowcase here somewhere …! And where is the matching sheet for the new bedding? I hear there are people for whom even the bed linen drawer is meticulously tidy. They iron the covers and sheets straight after washing or drying and then store them neatly in pairs in the wardrobe.
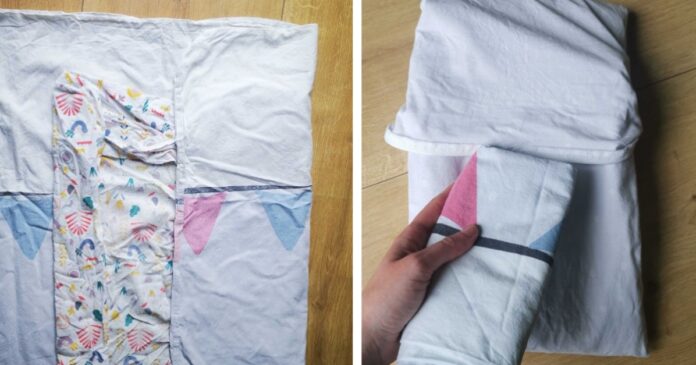
With this ingenious folding method, you’ll never have to search for matching bed linen again! Photo: FUNKE Digital
And then there’s everyone else who squeezes the clean bed linen into a gap in the bed base or a drawer somewhere. It’s no wonder that the next time you make your bed, valuable time is lost looking for the individual components. Once you’ve finally found what you’re looking for, the comforter, sheets and pillowcase may be together, but they’re also pretty crumpled. Find out here how to avoid this chaos with a simple trick!
Clever bed linen folding made easy
Admittedly, you will have to invest some time in this method after washing, because from now on, randomly stuffing things into the cupboards is prohibited! Grab the comforter cover and pillow and also the matching sheet. First, spread the comforter out on the floor; you can also lay two comforters on top of each other if you have a set.
You may also be interested in these articles:
Now place the sheet, folded once or twice in the middle depending on the size, on the two blankets. Smooth everything out so that you can now start folding the bed linen. Fold the long sides of the comforter once to the middle and then fold both long sides over each other. Then fold the end with the button placket or zipper over once by about 30 cm.
Now you just need to fold the bed linen over from the opposite side until this end protrudes a little over the foot end of the comforter. Then tuck this end between the button placket or zipper. Finally, fold the pillows together so that you can also tuck them under the foot end of the comforter. That’s it!
No more Tetris in the linen drawer
This simple folding trick turns your chaotic pile of bed linen into a neat, compact package that you can easily store in your wardrobe, bed base or drawer. In the future, bedding will almost make itself and tedious rummaging will be a thing of the past.
If you fold your bed linen in this way, you will never have to search for missing pillows again and, as a positive side effect, your linen will no longer crease so easily. It also creates more space in your wardrobe. Who would have thought that keeping things tidy could be so satisfying?
A down comforter is a wonderful investment for restful sleep – light, cozy, warm and breathable. But sooner or later the question arises: How do I get my down comforter clean again? Many people are reluctant to wash their high-quality comforter themselves for fear of it getting lumpy or damaged. However, with the right procedure, you can easily clean your down comforter at home and maintain its quality for years to come. Here you can find out what is important when washing down comforters.
When is cleaning necessary?
A down comforter does not need to be washed as often as bed linen, for example. As a rule of thumb, a thorough cleaning every two to three years is usually sufficient if you use a comforter cover. However, there are signs that make earlier cleaning necessary: Stains, unpleasant odors or if the comforter has lost significant fluffiness. People with house dust allergies benefit from more frequent washing as this reduces mites and allergens.
You may also be interested in these articles:
It is often sufficient to air the blanket regularly between washes. Hang it outside for a few hours on a dry, not too sunny day. This refreshes the down and allows moisture that has accumulated overnight to escape.
The right preparation and washing method
Before you get down to business, first check the care label of your down comforter. Most modern down comforters are machine washable, but there are differences in the recommended washing temperatures and care instructions.
For machine washing, you need a sufficiently large washing machine – for a single comforter at least 7 kg capacity, for a double comforter preferably 9 kg or more. If your machine is too small, the down comforter cannot be rinsed properly and may not get clean.
Choose a special down detergent that preserves the natural oils in the feathers. Do not use fabric softener, as this sticks the down together and impairs its insulating effect. Wash the comforter at a maximum of 40 degrees on a gentle cycle and add two to three clean tennis balls or special drying balls. These will prevent the filling from clumping together.
You should avoid this mistake when washing your down comforter. Photo: agencies – stock.adobe.com
The drying process: you should avoid this mistake
Drying is the most important step in caring for your down comforter. If dried incorrectly, even a perfectly washed comforter can become lumpy or moldy. You should only spin-dry the comforter briefly and at low speed so as not to damage the quills.
The best method is to tumble dry at a low temperature. Here too, tennis balls or drying balls help to loosen the down. The drying process takes considerably longer than for normal washing – allow two to three hours, or longer for thicker comforters. Interrupt the process several times to fluff up the comforter and distribute the down evenly.
Drying a down comforter without a dryer
If you don’t have a tumble dryer, lay the comforter flat on a washing rack and turn it regularly. Air drying can take several days. Important: Make sure that the blanket is completely dry before you use it again, as residual moisture can lead to mold growth.
With these tips, your down comforter will stay fresh and fluffy for a long time – for many more nights of restful sleep under your clean, cozy comforter.
Online shoppers are familiar with the small packaging chips that are used as filling material in parcels to protect sensitive goods during transportation. Whether glass vases, bottles or fragile goods – the small, colorful flips form a protective barrier between the product and the cardboard wall. But where and how should the packaging chips actually be disposed of once their role as transport protection has been fulfilled? Do they belong in the residual waste or in the yellow garbage can? Find out here!
Packaging chips: How to dispose of the filling material from the parcel correctly
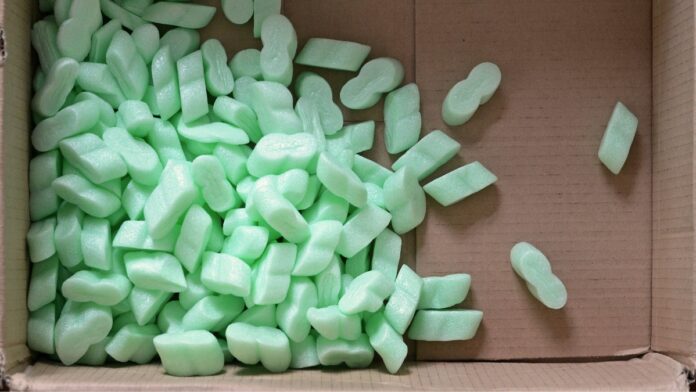
Not all packaging chips are the same: The popular filling material can be made of different materials. Recycled polystyrene is traditionally used as a filling material, as it is lightweight and offers good protection against impact. However, chips made from composted starch (from potatoes, corn or wheat) are also used in shipping parcels.
How are the colored packaging chips disposed of correctly? Photo: IMAGO / Shotshop
Due to the different materials, you may assume that the packaging chips must also end up in different garbage cans, but this is not the case. Both organic and recycled packaging chips belong in the yellow garbage can or the yellow bag.
And there is a simple reason for this: if you mistakenly dispose of the packaging chips in the residual waste, they cannot be reused and valuable resources are lost. Packaging material – regardless of its type – is recyclable and should be returned to the material cycle.
How you can reduce packaging waste
Of course, it is best to avoid (packaging) waste in advance. So think carefully about whether you would be better off buying certain products from local retailers instead of receiving them in the post. Some companies also use ecological filling material made from 100% renewable raw materials.
Alternatively, you can also keep the packaging chips to use as padding for your next parcel. And the cornstarch packaging chips are particularly popular with young children. They can make all kinds of fun figures out of the colorful flips. All you have to do is moisten the packaging chips with a little water and they will stick together.
When you receive your next package, you will now know how to properly dispose of or reuse the packaging chips it contains.
Your orchid looks sad? No need to panic! You can save it with a simple kitchen helper: Cinnamon! Yes, you read that right – the popular spice works wonders for ailing orchids. It protects against fungi, disinfects roots and promotes healing. How to protect your Save orchids with cinnamon with an ingeniously simple tip that really works!
There are basically two types of rot in orchids: Heart rot and stem rot. Here you can find out how to recognize these diseases in orchids and in which cases there is still hope of saving the plants.
Orchid rot: heart rot
Heart rot in orchids is often caused by stagnant water between the leaves. From there, the water reaches the inside (the “heart”) of the plant, where fungi and bacteria multiply within a very short time. The orchid rots and in most cases can no longer be saved. Heart rot is often only recognized when it is already too late.
At first, apparently healthy leaves fall off all at once and other leaves detach from the plant at the slightest touch. The areas affected by heart rot first turn yellow, later they turn black or mushy.
Orchid rot: stem rot
Stem rot is also manifested by dark, rotten spots and falling leaves. With this disease, however, the leaves of the orchid do not rot from the inside outwards, but from the outer leaf tip inwards.
Stem rot, also known as root rot, can also be recognized by limp leaves. This is because the rotting root can no longer supply the leaves with sufficient nutrients. Rotting roots are predominantly dark brown to black, hollow and very soft. If the stem rot is very advanced, this also leads to the death of the plant.
Trick with cinnamon should save the orchid
Cinnamon has an antibacterial, antimicrobial and disinfectant effect and can therefore save rotting orchids – at least if you react early enough.
For heart rot:
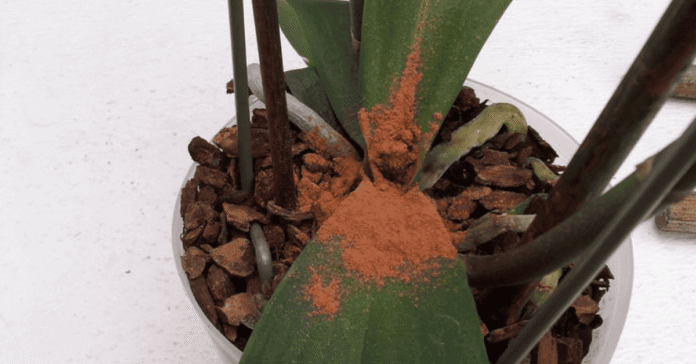
If only very few parts of your orchid are affected by heart rot, you should do the following: First remove all rotting parts of the plant generously. Then disinfect the cut areas with cinnamon powder. Then place the orchid in fresh, dry substrate.
Here you will find external content from Pinterest that is recommended by our editorial team. It complements the article and can be displayed and hidden again with one click.
I agree to this external content being displayed to me. Personal data may be transmitted to the provider of the content and third-party services.
For stem rot:
Stem rot that is not yet too far advanced can usually be treated quite successfully with cinnamon. Proceed as follows:
Take the plant out of the pot and remove the rotten roots and the old substrate. Sprinkle a little cinnamon over the cut areas.
Then place the plant on a glass filled with water so that only the lower tip of the stem and the healthy root remnants are moistened.
Now place the glass in a warm, bright place, out of direct sunlight.
The roots can now grow back – this can take a few months.
Tip: If the roots are not yet affected by stem rot, you can simply sprinkle the rotting areas with cinnamon powder and place the orchid in fresh, dry substrate.
You may also be interested in these articles:
To prevent your orchids from rotting, you should avoid waterlogging at all costs. In addition, too frequent watering, too high humidity and too little fresh air can lead to rotting in sensitive houseplants.
It is generally advisable to remove orchids from the pot once a week and immerse them in stale tap water for approx. 30 minutes. Then allow the orchid to drain well before putting it back in the pot.
Surely you know this spider, right? The house spider is one of the most common spiders you can find in your home. Many people are frightened when they encounter this large, fat but also fast spider. Some may even have asked themselves the question: Is the house angle spider actually poisonous? Here you can find out more about this spider and whether such worries might be justified.
No danger to humans
First of all, the reassuring news is that the house angle spider is basically harmless to humans. Even if it appears threatening at first glance due to its size and speed, it does not usually attack. It only bites if it feels seriously threatened and has no way of escaping. And even if a bite does occur, it is harmless for a healthy adult.
But you will definitely notice it: it feels a bit like a pinprick. You can feel it, but it is not comparable to the sting of a bee or wasp. And the venom? Fortunately, it is not strong enough to cause serious damage to your health.
Not dangerous, but useful
Although most people are disgusted by them and would therefore rather banish them from their own four walls yesterday than today, the house spider does fulfill some useful functions in the household. For example, it feeds on other insects such as flies, mosquitoes and smaller bugs that enter your home. In this way, it keeps your home virtually clean – and also protects you from many a mosquito bite at night.
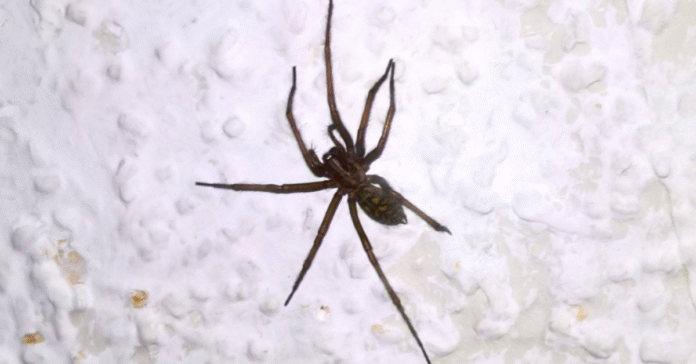
The house angle spider is creepy, but useful. Photo: IMAGO / Manfred Segerer
What should you do if you find a house spider?
Most house angle spiders look for a quiet, dark place and prefer nooks and crannies where they can spin their webs. You don’t need to take any special measures to control the spiders as they don’t usually appear in large numbers. If you discover a house spider and want to get rid of it, you can catch it with a jar and put it outside – but it probably won’t survive there. This is because house spiders are adapted to living in houses.
Experts therefore advise not to trap house spiders and simply leave them where they are. This may take some effort on the part of some people, but it is the more animal-friendly option. Even though many people are creeped out by them, house corner spiders pose no danger to us – and even help to get rid of other annoying insects. So if you can live with that, just leave them where they are.
Do you want fresh greenery in your home but don’t have green fingers? No problem! Modern, easy-care houseplants are the perfect solution for anyone who has little time but doesn’t want to do without stylish decoration. With the right plants, you can create a cozy, feel-good atmosphere in no time at all – without the stress of watering or complicated care.
Sansevieria
The Sansevieriaalso known as mother-in-law’s tongue, is one of the absolutely indestructible plants. You can even forget about it for two weeks – it will still look great. Its modern, upright growth fits perfectly into minimalist interiors.
Mickey Mouse Cactus
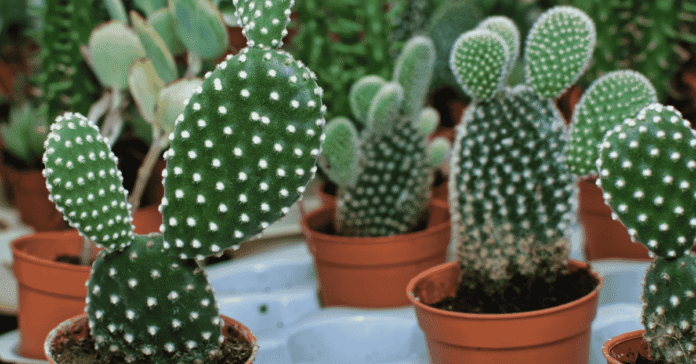
The spherical plant bodies are strongly reminiscent of the face and ears of the famous cartoon mouse. The Goldopuntia looks funny with its up to ten centimeter long limbs and can even produce yellow flowers in a pot. Give it a nutrient-rich substrate and an airy environment and, above all, don’t be too strict with watering.
Goldopuntia, also known as Mickey Mouse cactus, loves dry warmth. Photo: IMAGO / Depositphotos
Ferns
Ferns are real miracle plants because they do a lot for the indoor climate. Just give them a shady, preferably moist spot and they will thank you with bushy growth and beautiful greenery – a place in the bathroom would be ideal. Spray and water your fern regularly, but avoid waterlogging at all costs, otherwise there is a risk of mold.
Schefflera
The Schefflera is one of the Rays Aralia and is also known as the umbrella plant. It prefers a bright location without direct sunlight and mild to warm temperatures. Make sure that it never gets cooler than 10° Celsius in its location.
Zamioculcas
The Zamioculcas zamiifolia (short: lucky feather) shines with glossy, dark green leaves. It gets by with little light and only needs water every few weeks. Perfect for you if you are often on the move or don’t always have your plants in view.
You may also be interested in these articles:
Monstera
If you want a bit more of a statement, then get a Monstera. It grows quickly, is forgiving of care mistakes and really brings your home to life with its large leaves. Combined with a simple pot, it looks particularly modern.
Violin fig
The Ficus lyrata is right at the top of the popularity scale. Beautiful, large leaves are combined with absolute unpretentiousness. Give it a bright location, little water and occasionally remove dust from the leaves.
Pilea – the green trendsetter
The Pileaalso Ufoplant is a real eye-catcher. Its round leaves and compact growth make it a favorite on Instagram. It is also frugal and only needs a little water regularly.
Money tree
The money tree had a somewhat dusty image for a long time, but is right at the forefront when it comes to trendy plants. Undemanding to care for – water it as little as possible – it loves light and warm conditions without direct sunlight.
With modern, easy-care houseplants, you can bring a relaxed urban jungle feeling into your home. Not only do they look good, they are also forgiving of minor care mistakes. Whether you travel a lot, have little light or simply don’t feel like watering every day – you’re guaranteed to make the right choice with these plants.
In addition to care and attention, plants need plenty of water. There is a simple trick for forgetful and busy hobby gardeners: watering plants with a plastic bottle. It’s child’s play and the perfect solution when you’re on vacation and don’t have time to water your plants.
Water dispenser for plants made from a PET bottle
Immediately after planting, flowers, vegetable plants and kitchen herbs are particularly thirsty. To water the plants evenly without drowning them, the following trick with a plastic bottle has proven to be effective.
Material list for the water dispenser
Plastic bottle (1 or 1.5 liters)
Cutter knife
Screwdriver or ice pick
Lighter
How to build the water dispenser
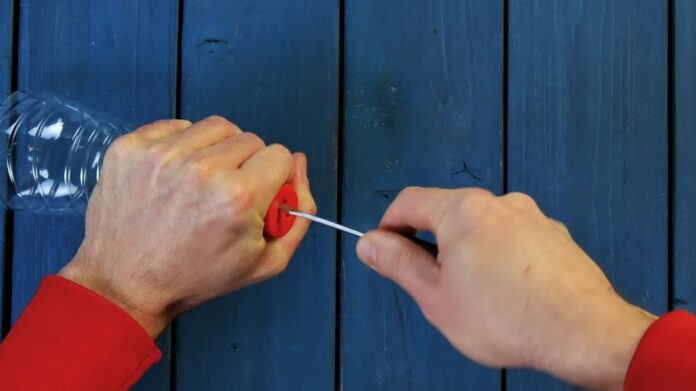
Watering plants with a plastic bottle: Some skill is required. Photo: FUNKE Digital
The choice of plastic bottle is not entirely unimportant: it’s best to use a PET bottle made of soft plastic – that way you can cut it to size more easily.
Cut off the bottom of the plastic bottle with the cutter knife. To avoid cutting yourself, you should warm the cut edge with a lighter afterwards.
Heat the tip of the screwdriver with a lighter and poke a few holes in the plastic lid. Alternatively, you can use an ice pick.
Screw the lid onto the bottle and place it upside down in the potting soil. Fill it with water – and you’re done!
The advantage of this trick is that the plant only draws as much water as it needs. This prevents drying out and overwatering. This trick is ideal for plants with a high water requirement such as tomatoes or zucchinis.
Hot tipEven if you want to water your lawn, a plastic bottle is a cheap alternative to expensive sprinklers. All you need is a PET bottle, some insulating tape and a garden hose.
Did you know that you can easily make old soil fertile again – without any chemicals? Instead of throwing it away, we’ll show you an ingenious trick for turning depleted soil back into nutrient-rich soil with home remedies and little effort. Whether for balconies, gardens or potted plants: These tips will save you money and do something good for the environment. How to make old soil fertile again and ready for new plant growth!
If you try the following trick and recycle old potting soil, there are two things you should bear in mind:
You should only reuse soil from healthy plants so that the new plants are not damaged.
Of course, the soil must not be moldy.
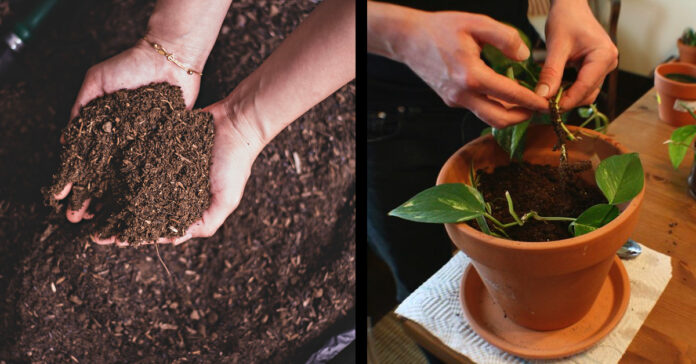
Photo: Cahya – stock.adobe.com
Reuse old potting soil with a trick
Preparation
Before you can get started, you need to loosen up the old soil and remove any root fragments. Then it’s time to tackle the main problem: used potting soil is depleted. To make it nutrient-rich again, the first thing you need is biochar as a nutrient reservoir.
Make your own biochar
You can make charcoal yourself by charring dry logs, branches, sticks and leaves, for example. A fire bowl, a fireproof barrel, a kiln (a type of funnel) or an earth con-tiki (a special pit) are suitable for this.
To get the fire going, first light a few small pieces of wood or branches. Then gradually add the material you want to char. Each time, wait until a white layer of ash has formed before adding new fuel. Finally, douse everything with water and leave to cool. If you want to save time, you can of course also buy ready-to-use charcoal.
Other ingredients: Parts of plants or compost
The biochar is an ideal nutrient store, but without nutrients it won’t do you any good. You therefore need another source of nutrients: Shredded plant parts or compost, for example, are suitable for this.
Sauerkraut juice to activate
The last important ingredient you need is sauerkraut juice. It contains microorganisms that decompose the plants or compost and convert them into nutrients.
Homemade fertilizer
Mix the three ingredients (biochar – plant residues or compost – sauerkraut juice) into the first third of the old soil. Finally, moisten your homemade fertilizer and spread it over the remaining two thirds of the old soil.
Here you will find external content from Flickr that is recommended by our editorial team. It complements the article and can be displayed and hidden again with one click.
I agree that this external content may be displayed to me. Personal data may be transmitted to the provider of the content and third-party services.
Another tip: To make the most of the potential of potting soil, you should use new potting soil primarily for high-yielding plants (e.g. potatoes and tomatoes), which extract a lot of nutrients from the soil. You can use old soil preferably for medium- and low-yielding plants (e.g. carrots, radishes, lettuce).
The parrot plant, also known as Asclepias syriacawith its eye-catching flowers not only looks attractive, but also has a reputation as a particularly robust garden plant. Nevertheless, it has been banned in Germany for some time. You can find out why this is the case and what you should know about it here.
What exactly is the parrot plant?
The parrot plant is originally from North America and is often used as an ornamental plant due to its eye-catching, colorful flowers. It is undemanding and hardy, which makes it popular with amateur gardeners.
You may also be interested in these articles:
The ban on the parrot plant in Germany is due to its highly invasive nature. It spreads rapidly and displaces native plant species. This endangers the natural ecological balance. Due to its extreme resilience, it is difficult to combat.
A threat to biodiversity
The parrot plant grows extremely quickly and forms dense stands. This prevents other plants from getting enough light, nutrients and water, which leads to a decline in biodiversity. Native plant species, insects and animals that depend on these plants suffer from the spread of the parrot plant.
That’s why the parrot plant is banned. Photo: IMAGO / Karina Hessland
Consequences of disregarding the ban
Anyone who cultivates or distributes parrot plants in Germany must expect severe penalties. The fines vary depending on the federal state, but can be up to 50,000 euros in serious cases. It is therefore essential that you find out about the applicable regional regulations.
Alternatives to the parrot plant
If you are looking for beautiful and ecologically harmless plants for your garden, there are many attractive alternatives. Native plant species such as yarrow, lupins or coneflowers also provide a variety of colors and support native wildlife.
What to do if you already have parrot plants?
If you already have parrot plants in your garden, you should remove them as quickly as possible and dispose of them properly. It is important that all parts of the plant are carefully removed, as even small remnants can lead to them spreading again.
The parrot plant is rightly banned in Germany due to its invasive properties. By consciously choosing native alternatives, you can still enjoy a colorful and diverse garden that also supports native flora and fauna.