Home Blog Page 2290

Pests: Fighting moths with insect eggs – how to get rid of them

0

If you’ve ever been surprised by a moth infestation, you’ll know how difficult it is to fight moths. But even if it’s difficult to get rid of the little beasts, our tricks can help you get rid of the pests again soon! Read on to find out which tips really help with pest control and what you should look out for.

Where do moths actually come from?

Moths enter your home through open windows or old carpets, blankets or used upholstered furniture. But they can also be brought into your home when you go shopping, as food such as flour is often already contaminated with moths.

How do I recognize moths?

The most common types of moths in the home are clothes moths and food moths. The term food moth refers to a whole range of species. For example, the dried fruit moth, the flour moth or the flour moth.

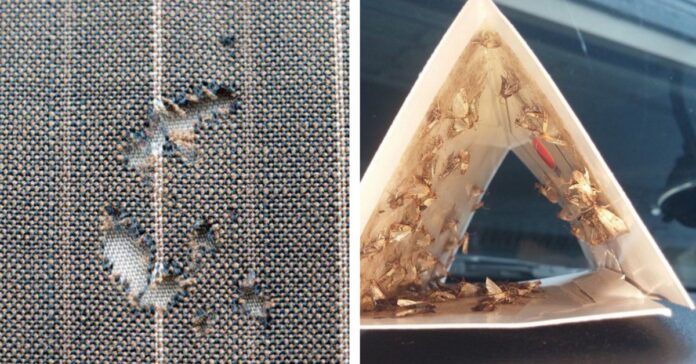
Clothes moths can be recognized by their light yellow to dark brown wings and indirectly, of course, by damage to clothing. The larvae of the moth cause the damage because they feed on keratin, which is found in animal products such as wool, fur, feathers, down and leather. Check your clothes, as well as curtains, carpets and upholstery, for small, irregular holes or bald patches.

Here you will find external content from Pinterest that is recommended by our editorial team. It complements the article and can be displayed and hidden again with one click.

I agree to this external content being displayed to me. Personal data may be transmitted to the provider of the content and third-party services.

Depending on the species, food moths are usually rather grey and often difficult to recognize, as the pests are small and inconspicuous. They prefer dry foods such as flour, rice, pasta, cornflakes, baking powder, cocoa, nuts and animal feed and contaminate them with their excrement and saliva. However, they do not pose a health risk and do not transmit diseases.

Fighting moths

Female moths usually lay between 250 and 300 eggs which, once hatched, eat their way through the contents of your wardrobe, leave droppings behind and continue to reproduce. If you do nothing to prevent this, you will have a moth infestation within a very short time, which will take a lot of effort to get under control.

Therefore, proceed as follows if you have discovered the pests in your home and want to combat the moths:

Wash textiles

If you are dealing with clothes moths, you should machine wash all infested items of clothing at a temperature of at least 50 °C. The insects usually do not survive the high temperatures.

Heat or cold

Delicate items of clothing that cannot be washed in the washing machine should be wrapped in a plastic bag and placed in the freezer for a week. This is because cold can also successfully combat moths.

Large textiles such as curtains, carpets or upholstered furniture fit neither in the washing machine nor in the freezer. In summer, place them in the blazing sun for several hours or blow-dry them on the highest setting to catch all the pests.

Be careful with leather sofas: They do not tolerate heat and can warp when blow-dried.

Remove food

If you are dealing with food moths, you should throw away all infested and adjacent food, as the small pests can easily eat through cardboard, paper, natural fibers and even plastic film.

Clean the cupboard

After you have removed all nests and affected textiles or food from the cupboard, you should first vacuum it out and then clean it thoroughly with vinegar cleaner. Finally, wipe it out again with warm soapy water.


You may also be interested in these articles:


Clean the entire room

Finally, the room in which the moths have been located should also be cleaned. This includes skirting boards, cracks and crevices between cupboards, cavities, radiators and all areas that are covered by furniture. If not all areas can be reached easily, use a hairdryer again and blow-dry hard-to-reach areas at the highest setting to destroy all moth eggs and larvae.

Prevent further infestation

In order to protect yourself from another moth infestation, there are a few things you should bear in mind:

  • Fit windows with fly screens
  • Vacuum regularly
  • Store unused clothing in plastic bags
  • Clean out, rearrange, clean and air wardrobes several times a year
  • only hang freshly washed clothes in the wardrobe (the smell of sweat, skin and hair dandruff attract animals)
  • Wash curtains, carpets and cushions regularly at 60 °C
  • Store flour, rice, pasta and muesli in glass or plastic containers
  • Line your closet with scented sachets made from lavender, laurel, cloves or cedar wood

Moth traps

Here you will find external content from Pinterest that is recommended by our editorial team. It complements the article and can be displayed and hidden again with one click.

I agree to this external content being displayed to me. Personal data may be transmitted to the provider of the content and third-party services.

Moth traps can be used for the early detection and monitoring of moth infestations. These are so-called pheromone traps, which attract male moths with their attractants. These then stick to a layer of glue. This makes it easy to determine whether the pantry or closet is infested with moths.

However, the moth traps are not a method of combating moths, but rather a way of observing how severe the infestation already is. If more than 10 moths per week stick to the trap, steps should be taken quickly to combat them.

Ichneumon wasps

Ichneumon wasps are a simple remedy for moths. You can get them easily from DIY stores or online retailers. These are small insects that target the eggs of moths. They lay their eggs in those of the moths and feed on them at the same time. As soon as all the moth eggs have been eaten, the ichneumon wasps also die.

Make your own lavender sachets

You can buy lavender sachets relatively cheaply in shops, but they are also very easy to make yourself. All you need are dried lavender flowers, a cotton cloth, a cord and a pair of scissors. If you have lavender flowers in your garden, pick them between June and August and leave them to dry upside down for about a week. The dried flowers are then stuffed into the cloth and closed with the cord. They can then be placed in the closet where they will remain fragrant for up to two years.

If moths have taken up residence in your home, this is usually very unpleasant, as it involves a lot of work to get rid of them. Because they reproduce quickly, moths can quickly become a plague and cause considerable damage to various materials. Timely action and careful moth control are therefore necessary to get rid of the pests permanently.

Sources: moth-away, schöner-wohnen, otto
Thumbnails: ©pinterest/bobvila ©pinterest/top inspired
Cleaning: Add this spice to the mop water – the floor shines!

0

You’ve probably heard of this special household trick: cinnamon in mop water is said to work wonders. But what’s really behind this household remedy? Is it just an old superstition or does this aromatic additive actually have practical benefits for your household?

The benefits of cinnamon in mop water

It is common knowledge that cinnamon can keep bugs away. In fact, there are scientific explanations for the effect of cinnamon as a household helper. The spice has an antibacterial effect, which means that bacteria and viruses are killed when wiping and their growth can also be suppressed.

How to use cinnamon for cleaning:

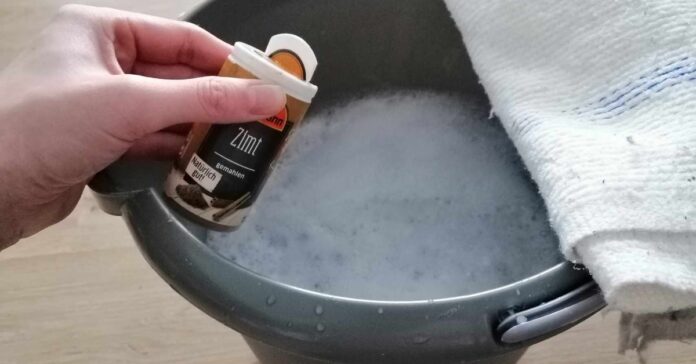
If you want to try the cleaning trick, add a drop of washing-up liquid in 5 liters mop water. Then add half to a whole teaspoon of cinnamon to the mixture. Alternatively, you can also add two drops of cinnamon oil into the mop water or boil several cinnamon sticks in water and use this – when it has cooled down – to clean the floor.

Cinnamon in mop water has an antibacterial effect. Credit: Foto-Ruhrgebiet – stock.adobe.com

The disadvantages of cinnamon in mop water

As is so often the case, this internet trend also has some disadvantages. For cinnamon to have a truly antibacterial effect, you need a comparatively large amount into the mop water. As the spice is quite expensive, this cleaning trick will also cost you a little more money. Finally, when you add cinnamon to the mop water, you automatically spread the powder on your floor. Depending on the amount of cinnamon powder, this could make the floor slightly crumbly and brownish appear brownish. This does not necessarily make a good impression.

What’s more, if you walk around your home in socks or slippers, you’ll spread the cinnamon powder everywhere, soiling not only your socks but also carpets, sofas or even the bed. Of course, you could avoid this by using cinnamon oil is used. However, you run the risk of unsightly stains forming after wiping. streaks on the floor. Furthermore, the smell of cinnamon could also attract pests that feed on organic or inorganic materials.

Alternative household remedies for mopping water

In summary, despite its pleasant smell, cinnamon does not necessarily belong in the mop water. You can also achieve an antibacterial effect by adding lemon peel to the mop water, for example. Alternatively, you can hang apple, orange or mandarin orange slices to dry in your home for a Christmassy smell. What do you think of cinnamon in the mop water – have you ever tried this cleaning trick?

Source: t-online

Garden: Never kill snails! Rather use the board trick

0

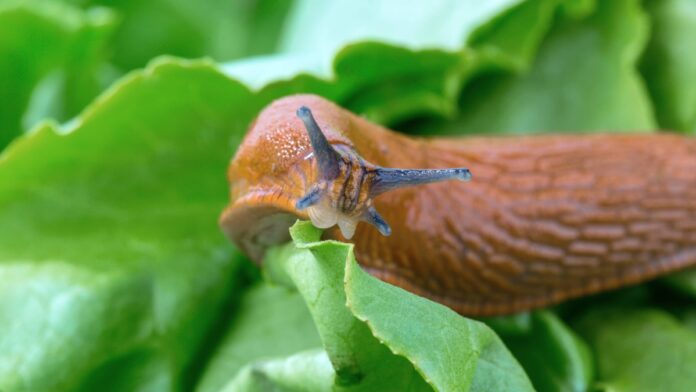
They are everywhere: there is hardly a garden that is free of slugs this summer. The slimy molluscs have become a real nuisance. If you go to the trouble of collecting the uninvited guests from your plants, you will inevitably ask yourself the question: What is the best way to dispose of the collected slugs?

Collecting slugs with a trick

Before thinking about what to do with the pests, you first need to collect them. You will have the greatest success for a rich “slug harvest” after a Rain shower or early in the morning. If you are disgusted by touching the slimy snails, it is best to pick them up with a glove or a small scoop.

You can also use a wooden board in your garden and wait for the snails to gather underneath. As they like it damp and cool, they will be there in large numbers. A lettuce trap is also a great snail magnet: Simply place lettuce leaves in a sheltered spot and wait until the next day. You can then easily collect the slugs.

This is how you should dispose of the collected slugs

Opinions differ widely on how to deal with collected slugs. You often hear about killing them with scissors, beer, salt or boiling water. But even though slugs are among the animals for which little or no sympathy is shown, it is now known that even these so-called lower creatures are sensitive to pain.

Incidentally, killing slugs can also be counterproductive. Slugs are cannibalsso that they are attracted by the smell of dead conspecifics. If the slimy animals decompose in the bushes, more of them will come.

So how can you dispose of the snails you collect? The best way is to take them as far away from your garden as possible. Throwing them in the neighbor’s garden is not the best choice here. You should also avoid taking your collected snails to other natural areas. Instead, take them to Dog meadowswhere the crawling molluscs can scavenge the dog’s droppings. This kills two birds with one stone: the slugs have disappeared from your garden and they keep the dog meadows tidy by removing the dog excrement.

How to keep slugs out of your garden in the long term

To avoid having to dispose of slugs again and again, you should make your garden unattractive to slugs. Credit: stock.adobe.com – Michal

Now, getting rid of slugs is only a short-term solution. Even if you have removed 50 slugs from your garden today, there could be just as many slimy visitors tomorrow. To avoid having to head to the nearest dog run with a bucket full of slugs every day, you should make your garden as slug-free as possible. unattractive for slugs.

Effective protection against the pests is provided by planting snail resistant plants. These include bearded carnation, marigold, foxglove, tomatoes, rosemary and potatoes. If you grow vegetables, choose a raised bed – this offers a certain amount of protection from snails. A slug fence can also keep the pesky visitors away from your vegetable plants.

Establishing predators can also put a stop to the annoying snail plague. If you make your garden attractive to hedgehogs, shrews, blackbirds, starlings, magpies, toads and slow worms, the snail problem will soon take care of itself.

By the way: There are snails that are protected in Germany. These include the spotted snail and the common snail. If you kill one of these protected snails, you could face a fine of up to 65,000 euros!

Source: utopia.de, bussgeldkatalog.org

Mosquitoes: experts warn of plague summer 2025

0

With the start of the warm season, the first mosquitoes are already on the move. The blood-sucking pests that can really spoil your evening in summer or buzz around your head at night and rob you of your sleep have probably not been missed by anyone. All the worse that a NABU expert is now warning of a mosquito plague in summer 2025. Read here what’s behind this prediction.

Is there a threat of a mosquito plague this summer?

The south and southwest of Germany in particular are currently enjoying ideal breeding conditions for mosquitoes – after weeks of rain, it is now warm and summery. “All the rain has created pools or puddles that are ideal for laying eggs,” NABU expert Julian Heiermann told t-online. According to the expert, it could be a very mosquito-filled summer – a mosquito plague is imminent!

Is there a threat of a mosquito plague this summer? Credit: IMAGO / ITAR-TASS

The short, mild winter was also favorable to the pests. In spring, it was initially dry in many places and the animals hardly laid any eggs. However, the insect expert knows that the mosquitoes will be able to catch up by now at the latest. The pools of water that have formed as a result of the rain do not dry out immediately, even at higher temperatures. This means that the brood has a good chance of surviving in these places.

The blood-sucking pests that make life difficult for humans and animals in summer are exclusively female mosquitoes. They need the protein contained in blood to form and lay eggs after fertilization. This means that mosquitoes cannot reproduce without blood. But wouldn’t that be a real relief in summer?

Mosquitoes are important for the ecosystem

As annoying as the biting pests are, NABU also informs us that mosquitoes make a crucial contribution to our ecosystem. Mosquitoes and their larvae are important prey for other animals, such as fish, amphibians, dragonflies and birds. If mosquitoes were to disappear from the ecosystem, this would also have far-reaching consequences for other animals.

Did you know that mosquitoes also make an important contribution to the pollination of plants? Mosquito expert Doreen Werner told t-online: “Everyone always talks about bees and bumblebees. But the large mass of mosquitoes and flies do about the same amount of pollination.” According to the expert, midge larvae living in the soil also help with the decomposition of leaves and contribute to the formation of humus.


You may also be interested in these articles:


Nature created mosquitoes for a reason – you should always keep this in mind, even if you are threatened by a mosquito plague this summer. Maybe you’ll be lucky and the biting pests will leave you in peace for the most part. Otherwise, here are 6 preventative home remedies to ward off mosquitoes.

Source: t-online

Cleaning: Watering can becomes a germ trap – how to prevent it

0

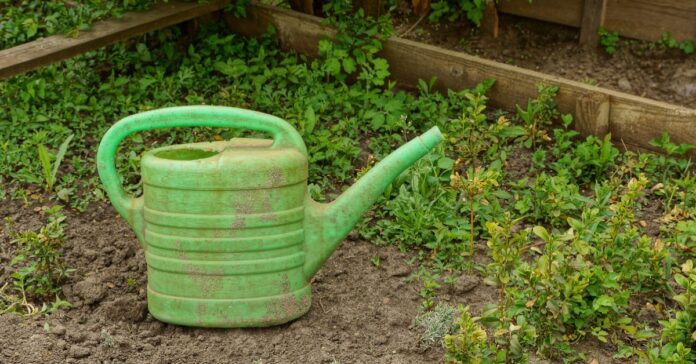
Even if the gardening season hasn’t really started yet, you can already check whether your gardening tools are in good condition. In addition to rakes, gloves and planting trowels, you should also take a closer look at your watering can. This is because deposits and mold can build up inside over time. And these should be removed. Read this article to find out the best way to clean your watering can.

It’s not just garden owners who know about the need for a good watering can. Whether you are watering plants in a flower bed or providing your houseplants with sufficient water – the watering can is a useful everyday helper. The watering can for the garden is usually made of single-colored plastic, functional and without a lot of frills. In some gardens, you can still find old tin watering cans that have been doing their job reliably for many decades.

Cleaning the inside of watering cans is somewhat difficult. Credit: stock.adobe.com – butus

Indoor specimens are a little fancier to look at and are less likely to have a spray attachment. Indoor plants generally require less water than their outdoor relatives. A small opening for the irrigation water is sufficient for this. But regardless of whether it is for indoors or outdoors, the longer water “stands” in the watering cans, the more likely it is that mold, limescale and other things will settle. However, there are household remedies that can quickly make these deposits history.

How to clean your watering can properly

As with many other things, the same applies to cleaning watering cans: The sooner you reach for the brush, the easier it is to remove mold, limescale, etc. If you remove deposits in the early stages, you can prevent major soiling from occurring in the first place. The following tips will get your watering can clean again:

Remove limescale

If hard water comes out of your tap, limescale can build up quickly. Watering cans for indoor use are particularly susceptible to limescale deposits. If you don’t have the option of using rainwater for watering, vinegar can help. To do this, mix vinegar and water in equal parts and either soak the watering can in it or fill the mixture into the inside of the can. Loose parts, such as the spray attachment, should be removed beforehand and cleaned separately. Then scrub the jug clean as best you can with a brush and rinse it thoroughly before the next use.

Removing algae

Watering cans for the garden can usually be recognized by a dark green, slimy coating on the inside of the can, which indicates algae. Sand or gravel have proven effective in removing this coating. Pour some of this into the watering can, add a little water and shake the watering can vigorously. The deposits should dissolve. Baking soda can also help: Pour hot water with two tablespoons of baking soda into the jug and leave it to stand for 24 hours before pouring out the mixture and rinsing thoroughly.

Don’t forget to scrub

Admittedly, cleaning a watering can with a brush is not that easy. It’s best not to use a normal root brush for this, but a bottle or toilet brush instead – new and clean, of course! With these special brushes, you can even get into the nooks and crannies of the watering can.

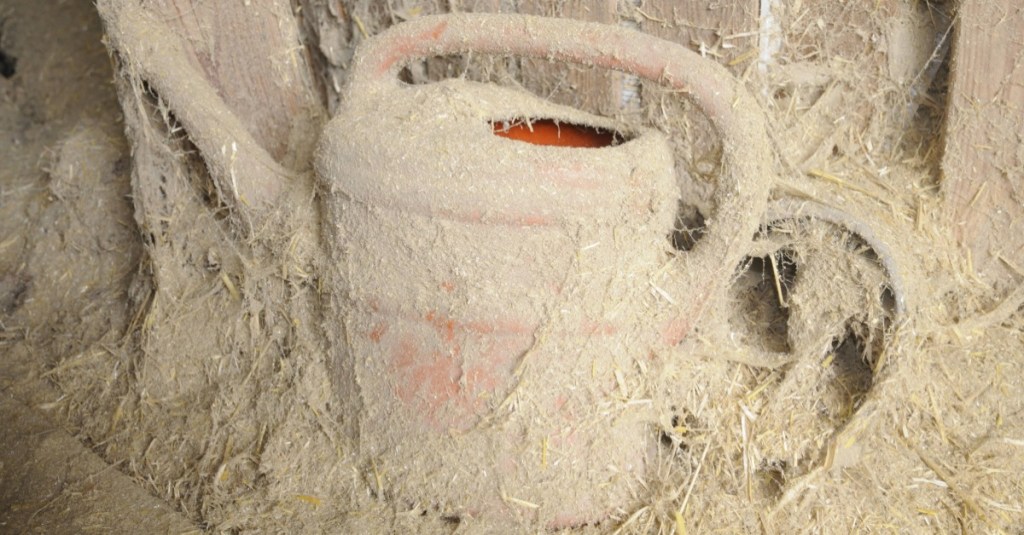
Dirty watering can with cobwebs in a shed.
Perhaps you should dispose of such a dirty watering can or clean it thoroughly. Credit: IMAGO / Zoonar

You better make short work of mold

Even if mold rarely forms in watering cans, it is better to dispose of the affected model if it is made of plastic. If you are very attached to your watering can, try drying it in the sun for a day or two. Perhaps the dry mold can then be removed. If not, it’s better to invest in a new model.

These household remedies do not belong in the watering can

Occasionally you read tips that you can clean watering cans with dishwashing tabs, denture cleaner or detergent. The watering can itself will certainly be clean with these products, but you will not be able to remove the residue from the can without leaving a residue or it will take so much time that you can resort to more harmless household products instead.

If you make sure that you empty your watering can completely after each use, leave it to dry in the sun in summer and store it scrubbed and cleaned for the winter, you will be able to enjoy it for a long time. Incidentally, garden plants do not usually have any major problems with limescale or algae deposits, but this is not the case with sensitive houseplants.

Source: 24garten.de

Cleaning: Spraying WD-40 on stains – Does it really work?

0

It can happen quickly: Not paying attention when eating or cooking and a grease stain spreads across your clothes. Grease stains on blouses, trousers etc. are not only unsightly, but unfortunately also quite stubborn. But don’t panic! With WD-40 penetrating oil, you can remove greasy stains in no time! We’ll tell you how to do it.

WD-40 is not only a lubricant, but also an excellent cleaning agent that can be used in many different ways around the home. The penetrating oil also helps to remove grease stains from almost all textiles.

To remove stains with WD-40, you need:

  • WD-40 spray (penetrating oil)
  • Baking powder
  • Washing-up liquid
  • a piece of cardboard
  • cotton buds
  • Brush or sponge (e.g. an old toothbrush)

How to remove the stains:

Place the cardboard between the front and back of the garment. After all, you don’t want the other side to be stained as well. Spray the WD-40 onto the grease stain and carefully rub it into the fabric with the cotton buds. Now sprinkle baking soda generously over the affected areas. Don’t be too sparing, as the powder must be able to absorb all the oil.

The powder is then rubbed into the clothing with a brush until lumps form.

Credit: youtube.com/ homesteady

Now it’s the turn of the washing-up liquid. Put a few drops on the baking soda and rub it in well again.

Remove the residue from the household detergent and the cardboard before washing the garment in the washing machine as usual. After washing, the grease stain is history and your garment will look as if nothing ever happened. And all with the help of WD-40 penetrating oil, which you can also use to remove coffee stains and stains on the table.


You may also be interested in these articles:


The next time you have a grease stain, it’s high time you tried this trick. Do you know any other home remedies for removing grease stains?

Source: YouTube/homesteady
Thumbnail images: ©FSTOPLIGHT via gettyimages
©YouTube/homesteady

Cleaning: Toilet foam in the test – Does active foam dissolve all dirt?

0

Whether it’s limescale deposits or urine scale – the toilet needs to be cleaned regularly and, depending on how stubborn the dirt is, this can take quite a long time. If you can’t get any further with conventional household remedies or simply don’t feel like scrubbing, there is another solution: toilet foam! This is supposed to clean the toilet as if by itself. Find out here whether it really is a cleaning trick or whether the chemical mace is not as effective.

Cleaning the toilet with toilet foam

Using toilet foam is very simple. You need the following:

  • hot or warm water
  • one bag of active foam 🛒

First pour a liter of hot or warm water into the toilet. The cleaning foam reacts even better with warm water than with cold water. However, be very careful when doing this. There is a risk of damaging the toilet by adding water that is too hot. If the ceramic is already slightly damaged or cracked, you should make sure that the water you pour into the toilet is only lukewarm.

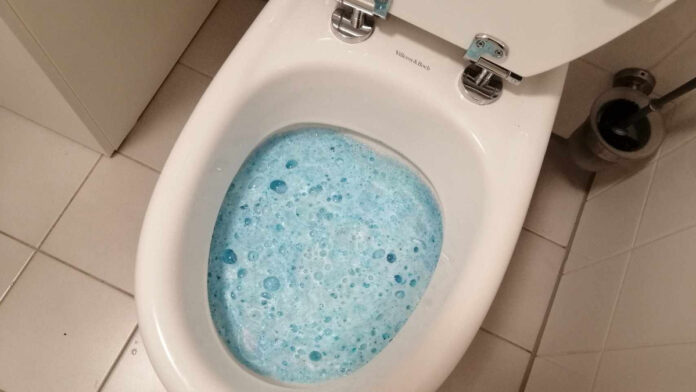
Then pour the contents of a bag of toilet foam quickly and all at once into the still warm water. Blue foam will now form and rise up to below the rim of the toilet. Leave this to work for at least five minutes. When the toilet foam slowly collapses, flush once – done!

If necessary, you can spread the foam with the toilet brush and finish it off by hand. Credit: FUNKE Digital

For particularly stubborn soiling, it is recommended to spread the foam with a toilet brush after it has risen and to work it over to loosen deposits. When used regularly, the foam should also prevent the build-up of new soiling and limescale. This method is also suitable for toilets, bidets and urinals. So much for the theory – how does the product perform in the practical test?

How well does cleaning with the active foam work in practice?

We have tested cleaning with the toilet foam for you. The toilet really is sparkling clean after cleaning with the active foam – and with very little effort. On closer inspection, however, it is noticeable that the foam was not able to completely remove the more stubborn deposits under the rim of the toilet – despite reworking with the toilet brush.

Reading tip: Read here how to remove the deposits under the rim of the toilet instead.

The disadvantages of active foam

Apart from that, the product is quite expensive – 5 bags cost around 8 euros at the DIY store. You can save a lot of money here with a conventional cleaning agent or tried-and-tested household remedies. Home remedies are also much less harmful to the environment than the active foam. Nevertheless, toilet foam can be a great and, above all, quick alternative for basic toilet cleaning from time to time. It is easy to use, but very effective.

Cleaning: Mossy patio? Combine these 2 home remedies

0

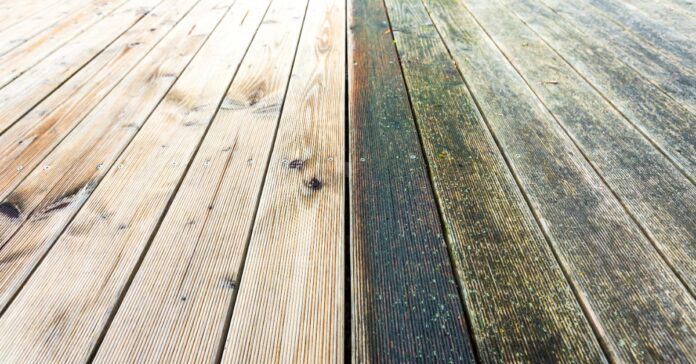
Even if spring is still a little way off, the occasional afternoon sunshine invites you to sit outside in the winter. Snuggled up in a thick blanket, coffee and cake taste twice as good when the winter sun tickles your nose. Unfortunately, however, patios and planters don’t exactly present themselves in the best light after the seasonal weather. Deposits of algae and moss are particularly hard on your wooden patio. But don’t worry! We’ll tell you how you can easily clean your wooden decking using simple household remedies.

Mossy wooden decking: easy cleaning with soda and cornflour

It is quite normal for moss and algae to build up on your wooden patio over the fall and winter. And even plant pots, for example made of terracotta, are not immune to unsightly green deposits. You only need a few household remedies from your kitchen to make your wooden patio fit for spring and remove the green deposits.

To clean your wooden decking, you can make your own cleaning agent from just a few ingredients. Credit: ferkelraggae – stock.adobe.com

Before you make your own product to clean your wooden decking, you need to remove any stubborn dirt from the surface. Sweep thoroughly over your decking to remove all the dirt. Now it’s time for the stove!

You need:

  • 5.5 liters of water
  • 100-150 grams of washing soda
  • 2-3 tablespoons cornstarch

Heat 5 liters of water in a large pot. At the same time, heat about 500 ml of water and dissolve the cornstarch and washing soda in it with a whisk. Make sure that the mixture does not burn on the stove. When everything is as viscous as wallpaper paste, pour the mixture into the large pot of water and bring everything to the boil again.

Then it’s off to the patio! To clean your wooden decking, apply the mixture from the pot to the boards with a large brush. It is best to use a clean paste brush for this. Proceed as if you were painting your decking. Your homemade cleaning agent should not be too thick, as this could make it unnecessarily difficult to apply. However, if you also want to remove verdigris from your terracotta plant pots, you can take some of your cleaning agent and thicken it with cornflour. The viscous mixture will then adhere better to your pots. Then leave everything to work for four hours.

Scrub thoroughly for clean results

After the soaking time, grab a scrubbing brush and a garden hose and scrub your wooden decking thoroughly. You will see from the discoloration of the water that algae and moss have been loosened from the wood. It’s quicker with a pressure washer. When using it, make sure that you work with little pressure so that the surface of the wood is not roughened too much.

You can also wipe the cleaning agent off your plant pots with water and a brush after the cleaning time and enjoy the clean result. Incidentally, the cleaning agent made from soda and cornstarch not only works on your wooden patio, but also on the wall of your house or in the greenhouse – simply anywhere where moss and algae get stuck. Try it out for yourself!

Source: ndr.de
Thumbnail images: ©Maren Winter – stock.adobe.com ©ferkelraggae – stock.adobe.com

Example Post for WordPress

0

This is a sample post created to test the basic formatting features of the WordPress CMS.

Subheading Level 2

You can use bold text, italic text, and combine both styles.

  1. Step one
  2. Step two
  3. Step three

This content is only for demonstration purposes. Feel free to edit or delete it.

Cleaning: Sprinkle coffee on the dirty grill – no more scrubbing!

0

We are currently in the middle of the best barbecue season. Whether it’s vegetables, meat or fish – our food often ends up on the hot grill and we enjoy our meals in the garden. But the more often the barbecue is used, the more likely it is to get sticky residue on it. After all, it’s inevitable that fat will splatter around when you’re sizzling. But don’t panic, you can easily clean your barbecue with our tips.

Cleaning the barbecue: Problem area grill grate

In addition to conventional cleaning agents, inexpensive household products can also be used for cleaning. They make it easy to remove even stubborn stains.

Cleaning the grill grate of the gas barbecue

Here you will find external content from Pinterest that is recommended by our editorial team. It complements the article and can be displayed and hidden again with one click.

I agree to this external content being displayed to me. Personal data may be transmitted to the provider of the content and third-party services.

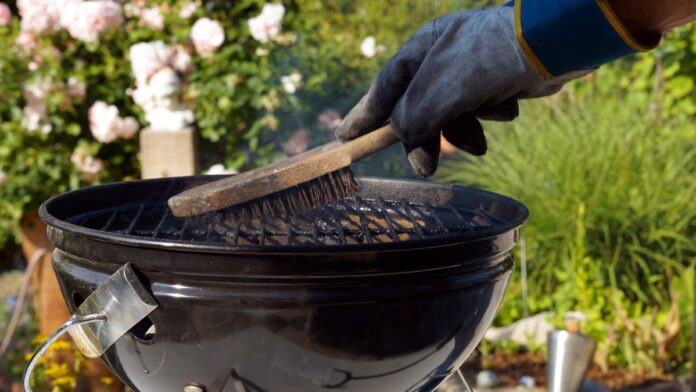
Getting the grill grate of a gas barbecue clean is pretty easy, as it practically cleans itself. Simply close the lid after grilling and set the appliance to the highest level. If the barbecue stops smoking, everything that was previously stuck to the grate is burnt. You can simply brush off the soot with a grill brush and then wipe it away with a damp cloth.

Tip: Most gas barbecues have a drip tray under the burners to collect the fat. This should also be cleaned regularly to prevent a grease fire.

Cleaning the grill grate of the electric barbecue

There are a few things to bear in mind when cleaning an electric barbecue. Always unplug the appliance before cleaning! You should also not clean the grill or the cable under running water, as there is a risk of electric shock. It is best to clean the grill with a grill brush and wipe off any remaining dirt with cleaning agents and a damp cloth. Finally, dry the grill grid well to prevent rust from forming.

Cleaning the charcoal barbecue grill grate

The grate of the charcoal barbecue is often particularly difficult to clean, as grease and meat residues burn in extremely firmly. Use a barbecue brush or spatula to remove the coarsest dirt. Then use washing-up liquid or special cleaning agents to wipe off the remaining dirt. Make sure that the grill has cooled down completely before you start cleaning.

If you don’t feel like cleaning the grill immediately, you can leave it in damp grass overnight to soften the burnt-on food residue. Alternatively, you can wrap the grill in damp newspaper and wash off the dirt with a sponge and detergent after a few hours. Many barbecue fans simply let the barbecue burn out and then remove the soot with a barbecue brush.

Using home remedies for cleaning

Chemical cleaners are not always the best choice – especially for surfaces on which food is prepared. Residues from the cleaner can cause harmful fumes. Protect your health and use home remedies to clean the grill grate:

Cleaning the grill grate with onions

Here you will find external content from Pinterest that is recommended by our editorial team. It complements the article and can be displayed and hidden again with one click.

I agree to this external content being displayed to me. Personal data may be transmitted to the provider of the content and third-party services.

Even if it sounds a little strange, you can use a raw onion to clean your barbecue grill. Cut it in half and rub it over the grill while it is still hot. The onion juice will clean it in no time and disinfect it at the same time. Incidentally, you can also use this principle to prevent your food from sticking to the grill.

Cleaning the grill grate with coffee grounds

Coffee grounds also make the grill grate shine again. Put on gloves, rub the grill grate with the coffee grounds and then rinse it clean with clear water. Burnt-on food residues will come off by themselves and the grill will look like new again.

Cleaning the grill grate with baking soda

Another insider tip is cleaning with baking soda. Mix it with water and pour the solution into a spray bottle. Spray it onto the grate and leave it to work for at least an hour. You can then simply wipe off any dirt with a kitchen towel. For the baking soda solution, you need 60 g baking soda and 1 liter of warm water.

Cleaning the grill grate with ash

If you use a charcoal barbecue, you can simply use the cold ash to clean the grill grate after grilling. To do this, dip a damp cloth in the ash and rub the grill with it. The ash removes dirt and acts like a kind of soap. Then simply rinse the grill with water.

Tip: You can also use the leftover ash as fertilizer in the garden.

Cleaning the inside of the barbecue

Soot and splashes of fat do not only build up on the grill grate, but also on the inside of the grill. Therefore, soiling should also be removed there regularly with a spatula or barbecue brush and wiped off with a cloth.

The burners of a gas barbecue can usually be easily removed for cleaning. Care should be taken with the heating coils of an electric barbecue, as they should never be immersed in water. Wipe them with a damp cloth and then burn off any dirt and food residue.

Cleaning the outside of the barbecue

To ensure that the barbecue lasts a long time and looks good, the outside should also be cleaned regularly. Make sure you use the right cleaning utensils. Stainless steel barbecue surfaces, for example, should not be cleaned with metal sponges. Enameled surfaces, on the other hand, are less sensitive. Clean covers and frames with soap and water or glass cleaner and then wipe all parts dry thoroughly. As a rule, it is sufficient to clean your barbecue properly once before the start of the barbecue season. However, if you barbecue more frequently, you should also clean the outside of the barbecue more often.

Store your barbecue properly

Rubbing the grill grate with oil or grease before grilling saves a lot of work when cleaning it, as less residue builds up on it. A barbecue mat also helps to protect the barbecue and grill from heavy soiling.

To get the charcoal container of charcoal barbecues clean more quickly, you can line it with aluminum foil. Because the foil reflects the heat, it also improves the heat build-up. However, make sure you poke a few holes in the foil to ensure air circulation.

A waterproof cover helps protect against dirt and moisture from outside. This prevents soiling from pollen or bird droppings, as well as damage and rust on the grill surface.

Old and encrusted barbecue residues are particularly difficult to remove and can quickly spoil the pleasure of a cozy barbecue evening. To ensure that the barbecue is always ready for use, the grill should be thoroughly cleaned after every use and the inside and outside of the barbecue should be cleaned every three months or so. Regular cleaning ensures that the old grill dirt does not affect the taste of the fresh grilled meat.

Sources: weber, t-online, lecker
Thumbnail images: ©pinterest/Art of Manliness

©pinterest/Cooking Light