Home Blog Page 425

Caring for the spit palm: The Madagascar jewel thrives with these tricks

0

The Spitting palm (Euphorbia leuconeura)also known as Madagascar Jewel is an exotic houseplant that impresses with its unusual appearance and easy-care properties. But beware: the plant is poisonous and requires special attention. Find out here how to plant, care for and propagate it properly.

1. planting the spit palm – the right substrate and the ideal location

As the spit palm comes from the tropics, it prefers warm, bright locations. If you organize a window location with plenty of light, it will thank you with rapid growth. If you want to keep it small and compact, choose a north-facing window!

Use a well-drained substrate to avoid waterlogging. A mixture of Cactus soil and sand is particularly suitable. The plant pot should have a drainage hole to drain off excess water.

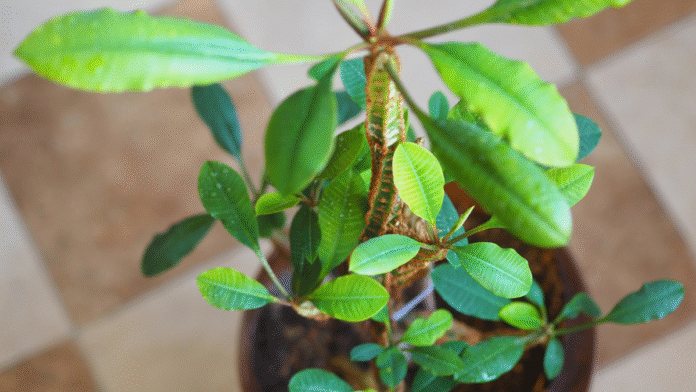
Perfect plant for beginners: spit palms are very frugal and easy to care for. Photo: Stephan_x86 – stock.adobe.com

2. care of the spit palm – water, fertilizer and overwintering

The spit palm needs very little water – if you water it, it’s fine, if you forget, it won’t give it to you because it stores the water in its fleshy trunk.
Moderate watering is sufficient in summer, while it should be kept almost dry in winter. Waterlogging should be avoided at all costs, otherwise the roots will rot.

During the growth phase from spring to fall, water your Madagascar jewel every two to four weeks with a cactus-specific fertilizer. It does not require fertilization in winter.

3. propagation of the spit palm – seeds or cuttings?

You’ve probably already wondered about the unusual name, which comes from the special way in which it propagates. The spit palm propagates mainly via the seeds it throws out. The seeds can germinate in slightly moist soil at temperatures of around 25 °C. High humidity is important, which can be improved with a plastic cover.

4. caution: the spit palm is poisonous!

All parts of the spurge plant contain a poisonous, whitish sap that can cause skin irritation. So if you have children or pets or even both, be careful – keep the plant out of reach!

The spit palm is an easy-care and decorative houseplant that loves warmth and thrives with minimal effort. With the right care, it can provide years of exotic flair in your own home. Those who cultivate it successfully will be rewarded with eye-catching flowers and a unique appearance.

Do you know someone for whom no houseplant survives? Then share this article with them now!

1080x1080 whatsapp

Source: myhomebook

Household tip: How easy it is to clean the oven with steam

0

Cleaning the oven – just the thought of it puts most people in a bad mood. So much so that many people spend a lot of money on self-cleaning ovens that burn off the dirt or work with steam. However, the latter method can also be carried out with any normal oven.

Cleaning the oven with steam

Cleaning the oven regularly is unavoidable. Because even if you are careful when cooking and baking, grease vapors settle in cracks and hard-to-reach places. Added to this are splashes of sauce, blobs of dough and other stubborn incrustations.

Scrubbing by hand, however, is laborious and often frustrating. Chemical oven cleaners are expensive and harmful to health. A trick with steam can help here: it makes cleaning the oven much easier and prevents stubborn stains from forming in the first place.

In self-cleaning ovens, this process is called hydrolysis. However, it is very easy to carry out yourself.

Photo: Media Partisans/FUNKE Digital

For this you need:

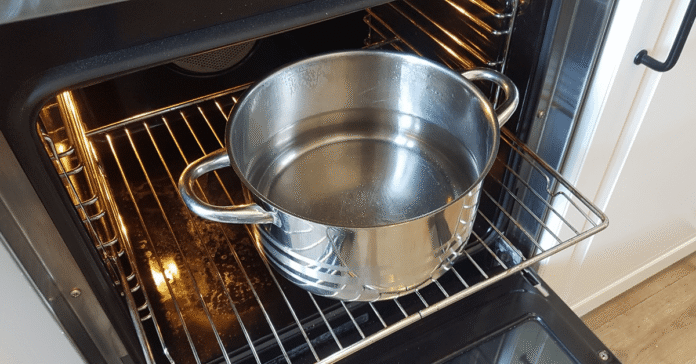
  • Pot (suitable for oven), casserole dish or deep baking tray
  • hot water
  • Vinegar (alternatively: washing-up liquid)

This is how it works:

  1. Preheat the oven to 230 °C. Even better: use the residual heat from the oven immediately after cooking and baking.
  2. Boil the water in the kettle. Fill the pan (or baking dish or baking tray) with the hot water.
  3. Add a little vinegar to the water. This prevents the steam from leaving behind limescale residue. It also increases the cleaning effect of the steam. Don’t worry: you will hardly smell the vinegar afterwards.
    Alternative: For heavier grease residues, add two squirts of washing-up liquid to the water. However, you should then air out the oven thoroughly.
  4. Place the pan on the lowest shelf of the oven. Let the steam do its work for 30 to 60 minutes. Do not open the oven door.
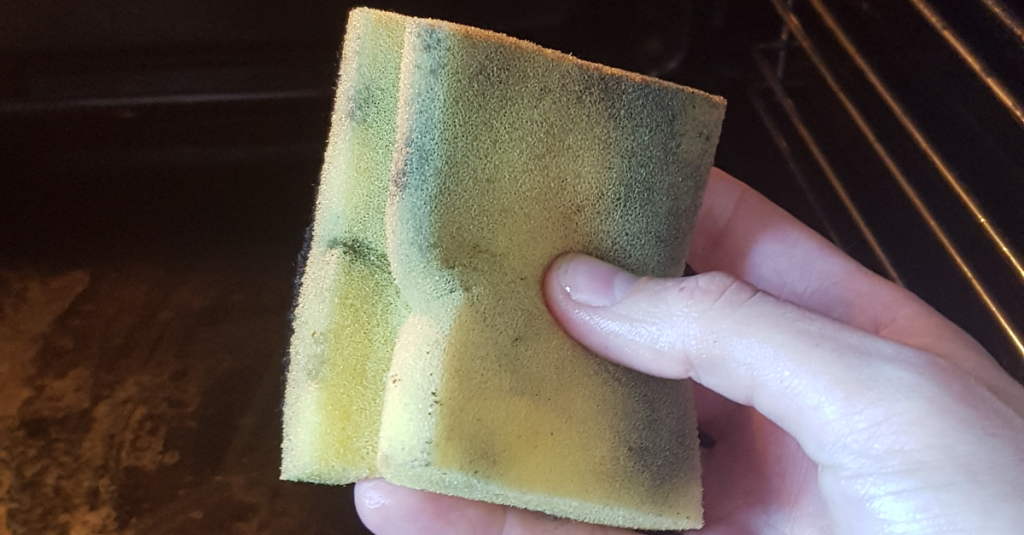
  5. Switch off the oven and let it cool down so that it is only lukewarm. Now you can wipe out the oven with a sponge or kitchen towel.
Cleaning the oven with a sponge.
Photo: Media Partisans/FUNKE Digital

Cleaning the oven with steam: advantages and disadvantages

The method of cleaning the oven with steam is particularly suitable for regular use and for minor soiling. The steam helps to loosen grease and dirt more easily or prevent them from sticking in the first place. This keeps the oven clean down to the last crevice. The best way to do this is to use the residual heat immediately after cooking or baking. This prevents vapors, splashes and stains from burning in and also saves energy.

The Advantages of the steam trick lie in its simple and cost-effective application. Wiping out the oven afterwards is much easier.

The DisadvantageEven with this method, you cannot completely do without wiping. In addition, steam reaches its limits with old and heavy encrustations. In this case, it is better to use one of the home remedies for oven cleaning that we have already presented.

Practical, helpful, easy to use – the trick of cleaning the oven with steam has everything that makes a good life hack.

1080x1080 whatsapp

Source: myhomebook
Preview image: ©MediaPartisans/FUNKE Digital

Great IKEA trick with Kallax shelf costs less than 10 euros

0

Surely you know the “Kallax” shelf 🛒 from IKEA (previously it was called “Expedit”). You have to see what this family did with it! On the blog “iron & twine” they have shown how to cleverly save space.

This is the corner of the living room in question. This space is just crying out for a shelf, isn’t it? That’s exactly what the family thought.

The perfect place for a new shelf. Photo: ironandtwine.blogspot.com

With a rough plan and a few measurements in the bag, we went to IKEA. The family opted for three individual Kallax shelves because they are inexpensive and can be used flexibly.

1080x1080 whatsapp
3 individual Kallax shelves next to each other.
The family has opted for three individual Kallax shelves. Photo: ironandtwine.blogspot.com

But as soon as everything was assembled and placed on the wall for testing, they noticed the mishap: they must have mismeasured. The three pieces next to each other are almost exactly 3 cm too wide and the shelf protrudes beyond the door frame. We can’t leave it like this, everyone agreed.

The shelf is too wide.
The shelf is too wide – a solution is needed. Photo: ironandtwine.blogspot.com

You can see how ingeniously the family solved the problem on the next page.

No more brown tips on green lilies: avoid these 5 mistakes

0

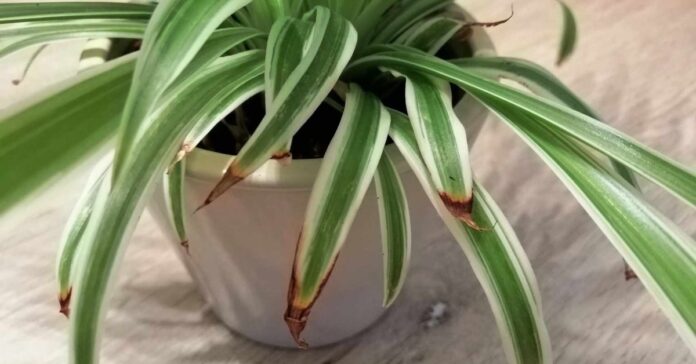
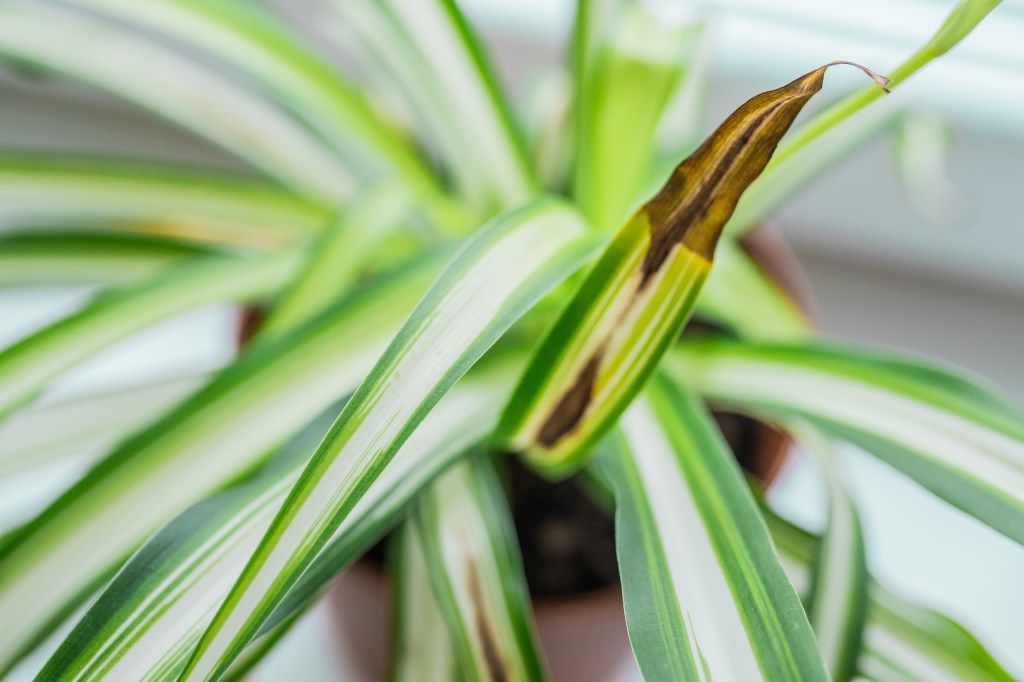
Green lilies are actually easy to care for – because the “Chlorophytum comosum” has few requirements and is therefore also suitable for beginners without green fingers. However, green lilies can occasionally develop brown tips. This detracts considerably from the appearance of this otherwise easy-care houseplant. You can find out what you can do about this and how to care for green lilies properly here.

If the leaf tips of your green lily have turned brown, you have probably done something wrong when caring for it. Here are 5 things to look out for:

The green lily is in the wrong location

Place the green lily in a bright spot near a window, but without direct sunlight. The sun could burn the leaves and cause brown tips.

The leaves of the plant do not hang freely

Make sure that the leaves can hang freely over the plant pot. If the leaves of the green lily hit the ground or the windowsill, this will also cause brown tips. Green lilies should either be grown in a hanging basket or on a shelf where their leaves can hang down freely.

Make sure that the leaves of the green lily can hang freely. Photo: bozhena_melnyk – stock.adobe.com

The temperature is too low

This frugal houseplant feels most at home at a room temperature of 20 °C. If the temperature in the home drops below 10 °C, the green lily will stop growing. During the warm season, the green lily can also be taken outside for a warm summer shower.

Watering mistakes

Make sure that you only water the plant when the top layer of soil is already slightly dry. Excessive watering quickly leads to waterlogging, which the green lily cannot tolerate. This could cause its roots to rot, resulting in the otherwise robust houseplant dying. As a rule of thumb, a sip of water twice a week is enough to prevent the green lily from drying out. It stores enough water in its fleshy roots to survive longer periods of drought.

Tip: If the soil in the flower pot is noticeably dry, this could also be a reason for the brown tips. In this case, give your green lily a lukewarm immersion bath. When no more air bubbles emerge from the root ball, remove the plant from the bath and allow it to drain well before placing it back in the planter.

Green lily with brown tips.
Errors in watering can lead to brown tips. Photo: Victoria – stock.adobe.com

The air is too dry

You have followed all the care instructions and your green lily still has brown tips? This could be due to the humidity. The brown tips of the shoots indicate that the air is too dry. You can easily solve this problem by spraying the green lily regularly with water.

Reading tip – The best tips for houseplants:
Curious pine cone trick saves your houseplants
These 7 houseplants survive even in dark rooms
These 3 houseplants protect your home from mold

1080x1080 whatsapp

Source: yourself
Preview image: ©FUNKE Digital

WD-40: You should never use the penetrating oil for these 5 things

0

WD-40 penetrating oil has a wide range of household uses and is part of the “standard equipment” in many hobby cellars and workshops. You can use the multifunctional product to remove burnt-on dirt, prevent rust or remove small scratches from car paintwork, for example. However, there are some things that you should never use WD-40 for.

What should you not use WD-40 penetrating oil for?

You always thought WD-40 was an absolute all-rounder? Not quite. You should avoid using the popular penetrating oil in the following areas.

What you should not use WD-40 for. Photo: Wikimedia/ajay_suresh/CC-BY-2.0 (edited)

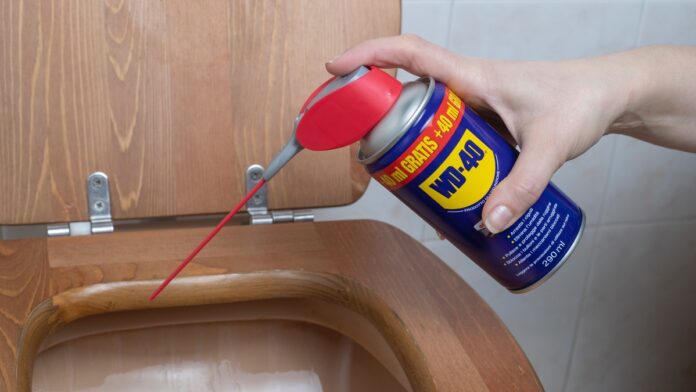
1. clean toilet or shower

Avoid cleaning your toilet or shower with WD-40 at all costs. The penetrating oil would enter the waste water via the drain and harm the environment. To clean the toilet, it is better to use classic cleaning agents or household products.

2. clean the rubber

The penetrating oil can dissolve or damage rubber. It should therefore not be sprayed onto tires, rubber mats or other rubber parts. Instead, use a special rubber care product.

3. do not use WD-40 as a lubricant

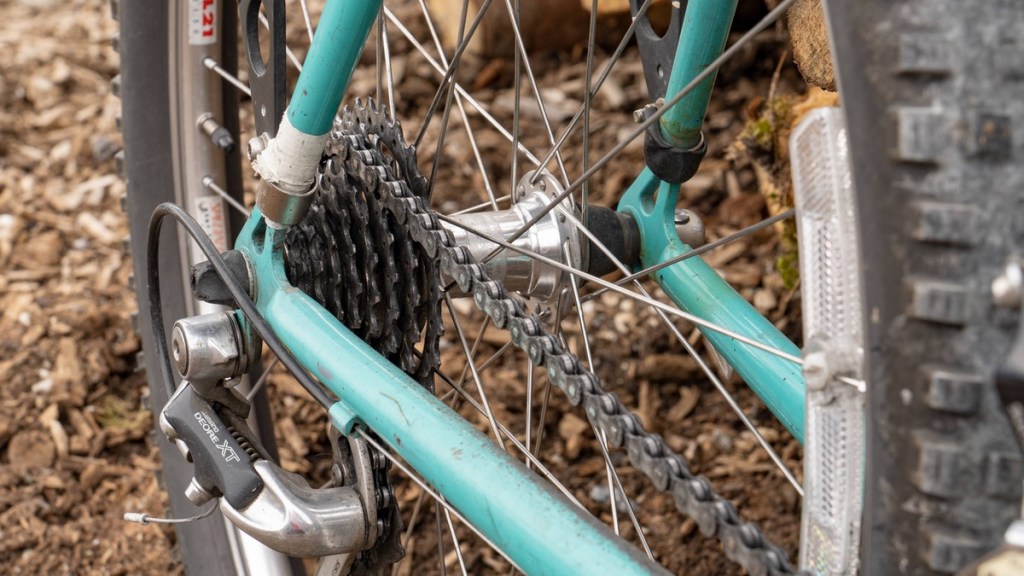
Many people use penetrating oil to make hooked locks, grinding hinges or bicycle chains work again. However, WD-40 is not a lubricant and should not be used for these purposes. You can clean such objects with the penetrating oil, but they still need to be greased afterwards.

Close-up of a bicycle chain.
It is better not to use penetrating oil as a lubricant for bicycle chains. Photo: IMAGO / Michael Kristen

4. do not use WD-40 on plastic

WD-40 removes the plasticizer from plastic surfaces or plastic parts. The material becomes porous through the use of penetrating oil and can break off. It is better to use a solvent-free silicone spray to lubricate and clean plastic. The same applies to wood – the penetrating oil can dry out and damage the wood.

5. cleaning textiles with penetrating oil

If you treat textiles with penetrating oil, e.g. to remove stains, discoloration may remain on the material. Therefore, check beforehand on an inconspicuous area how the material reacts on contact with the penetrating oil.

This otherwise versatile product is also not suitable for use on sports equipment (e.g. skis or snowboards), musical instruments or electronic devices. If you are unsure, you should do more research to find out whether the supposed miracle oil is suitable for your project. For these 11 household problems, however, you can use the penetrating oil without hesitation.

1080x1080 whatsapp

Source: t-online
Preview image: ©
Wikimedia/ajay_suresh/ CC-BY-2.0

If your peonies don’t open, this trick will ensure a magnificent bloom

0

Are you looking forward to the lush blooms of your peonies, but the buds just stay closed? Don’t worry – you’re not alone with this problem! When peonies don’t open, it’s often due to small mistakes in care or the wrong location. With a few simple tricks, you are guaranteed to get your flowers to bloom.

Pay attention to the right location

Peonies love the sun! If your peonies are not coming up, first check whether they are getting enough light. A semi-shady spot is often not enough. They need at least six hours of sun a day to develop their full strength. If necessary, you can transplant them in the fall – this will give them the best conditions for the next bloom.

Give them enough nutrients

Peonies that are lazy to flower sometimes suffer from a lack of nutrients. Provide them with a phosphorus-rich fertilizer in spring 🛒. Avoid too much nitrogen – this will make them grow but not flower. Compost or horn shavings also work wonders.

Remove sticky coatings on the buds

An ingenious trick: If the buds feel sticky, a sugar secretion is often blocking them from opening. Carefully wipe the buds with a damp cloth – this helps the flowers to open. Ants can also help to remove this sticky layer – you don’t have to chase them away.

Carefully remove the adhesions so that you can soon enjoy your peonies in all their glory. Photo: IMAGO / Shotshop

Too little water

Make sure that your plants get enough water. Prolonged dry periods in particular can mean that peonies cannot put enough energy into producing flowers.

Patience pays off

Peonies sometimes take a few years to get properly established. If you have recently planted them, give them some time. The important thing is not to cut them back too early and leave the foliage after flowering – that way they gather strength for the following year.

This helps with cut flowers

Have you brought peonies from the garden or the market and bought very closed stems so that you can enjoy them for a long time? If so, you may find that they are struggling to unfold their flowering splendor. Here are a few tips for peonies in a vase:

  • Loosen stickiness: Like the peonies in the garden, the cut flowers also have to contend with adhesions that prevent the flowers from opening. You can now spray the flower heads with water and massage them very gently or hold them upside down under the tap and carefully wash off the secretions. This should remove the sticky sap and open the peonies.
  • Remove the leaves: If there are too many leaves on the stem, they will rob the flower of its strength. Therefore, if possible, remove all greenery and place it separately in the vase if you want some leafy greenery between your peonies. The leaves should also not be left hanging in the flower water, as this leads to rotting.
  • Wrong time: Sometimes peonies are cut too early. Don’t cut or buy peonies until you can see the color of the petals.

You may also be interested in these articles:


If peonies don’t open, you can provide targeted help

You don’t have to be annoyed if your peonies don’t open. With sun, fertilizer, care and a little patience, you can make even the most hesitant bud shine. Give it a try – and look forward to a blooming garden paradise!


1080x1080 whatsapp

Source: Blumigo, Focus

Freeze coffee without ruining the taste: Here’s how

0

Do you have a stash of coffee beans or ground coffee that you can’t use up quickly enough? The question of whether to freeze coffee is one that concerns many coffee lovers. In some cases, freezing can actually help preserve the valuable aroma – but in other situations, it can do more harm than good to the taste. If freezing is not an option, the classic storage method remains: coffee lasts much longer when stored in an airtight, dark and dry place.

Freezing coffee: It all depends on the packaging

Freezing coffee is possible in principle, but requires a few precautions. The biggest advantage is that the low temperatures can Preserve flavors – but only under certain conditions. The chances of success are better with whole beans, as they offer less surface area for air and moisture to attack. Ground coffee, on the other hand, is more sensitive to temperature fluctuations.

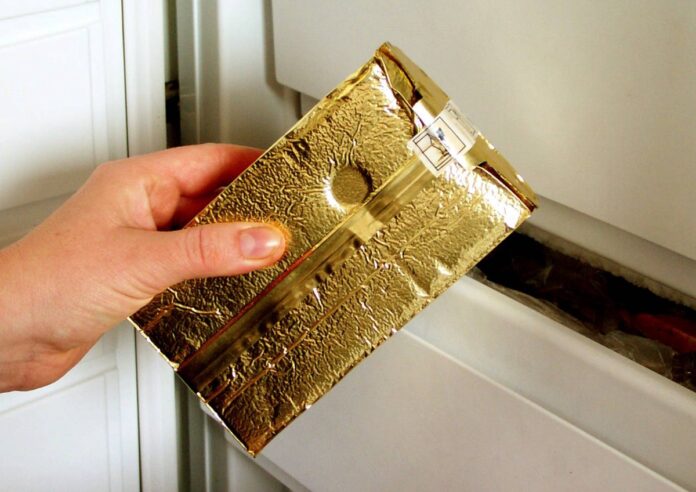
Should you freeze coffee? Photo: genialetricks.de via Midjourney

The decisive factor is the airtight packaging in small portions. If coffee comes into contact with too much oxygen or draws moisture from the freezer, its taste suffers considerably. This would be particularly annoying with expensive specialty coffees. When defrosting, you should only ever remove the amount that you will use immediately and never refreeze it – otherwise there is a risk of condensation and further loss of flavor.

Tips for the perfect freshness kick

There are effective methods for keeping coffee fresh for longer, even without freezing. Whole beans generally retain their aroma longer than ground powder. One high-quality coffee grinder is therefore a sensible investment if you only want to grind the amount you need freshly. Always store your beans in tightly sealed glass or metal containers that do not allow oxygen to pass through.

If you don’t have space in the freezer or don’t want to freeze anything, buying smaller quantities on a regular basis can be the best solution. This avoids loss of quality due to prolonged storage. Also a dark, cool storage location away from sunlight and heat sources will help to preserve the full flavor of your favorite coffee.


You may also be interested in these articles:


What happens to the ingredients when freezing?

When food is frozen, valuable ingredients are largely preserved. Although coffee is not primarily a source of nutrients, it is mainly used for its characteristic aroma and the caffeine are valued, these properties can be well preserved with correct deep-freeze storage.

The same applies to other products such as dairy products or herbs, which can retain their flavor through proper freezing. quality for months. The golden rule is: the faster and more airtight the packaging is frozen, the better the taste and properties are preserved – whether it’s coffee, fresh herbs or fruit.

Checklist: Freezing coffee in 5 simple steps

  • Only fresh Freeze fresh coffee (ideally beans).
  • In airtight Containers without residual air.
  • In small portions fill for one-time removal.
  • Labeling with date and variety.
  • After defrosting consume immediatelydo not refreeze.

This article was created in part with machine support and carefully checked by the editorial team before publication.


Leftover cucumber water: how to use it in the home and kitchen

0

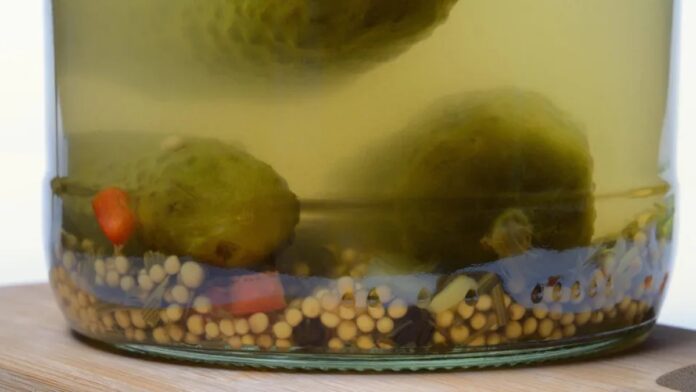
Cucumber water: Most people pour it down the sink, some like to drink the infusion, while others pour it down the toilet. The latter is not so bad, by the way, because it cleans the toilet. There are also many other ways to use cucumber water.

In addition to classic things like salad dressing or as a home remedy for heartburn, this article also gives you tips on how to use cucumber water that you probably didn’t know about.

13 tips for using up leftover cucumber water

Leftover cucumber water can be used in a variety of ways. Photo: IMAGO / imagebroker

1. soothe sunburn

Pickle juice can provide relief if you have fallen asleep in the sun again. Soak a cotton ball in the juice and dab it on the sunburn. The vinegar in the liquid helps to soothe the burning sensation.

2. as a cocktail ingredient

Party guests will squirm in anticipation if you serve a cucumber cocktail. But this simple recipe has won over many a skeptic: Take a shaker filled with a little ice and mix 6 cl of vodka with 9 cl of cucumber water. Shake well and then pour into a martini glass. You can add a small cucumber to the glass “for the eye”.

Cucumber in a cocktail.
Cocktails can be refined with cucumber water. Photo: alpaksoy via Getty Images

3. soothe a hangover

After a party where a lot of alcohol was involved, your body is dehydrated, so the next morning the painful hangover comes knocking. Before you crawl back into bed, you should take a few sips of cucumber juice. It not only supplies the body with fluids, but also with the necessary minerals that it has lost through the consumption of alcohol.

4. prevent cramps

Fitness trainers recommend drinking around 60 ml of cucumber juice in addition to water after every sporting activity. This not only hydrates the body, but also has a cooling effect. Regularly drinking the vinegary juice is also said to prevent (night-time) cramps.


You may also be interested in these articles:


5. salad dressing

You can also use cucumber water in your salad dressing as a substitute for vinegar. Mixed with yoghurt, it also makes a creamy salad dressing for pasta or potato salad, in which cucumbers are usually used anyway.

6. against colds and sore throats

If you notice that a cold is coming on or you already have a sore throat, you can counteract it with cucumber water. You can do this by drinking a tablespoon of cucumber juice several times a day. The vinegar is just as effective as cough syrup, only much more natural.

7. prevent heartburn

Gherkins are often pickled in a mixture of vinegar and honey. Both ingredients are particularly good for the stomach. A small sip of this acidic mixture before eating can help prevent stomach cramps.

You can find 6 more tips on how to use cucumber water on the next page.

Freeze tomatoes: What makes the difference

0

Tomato season is in full swing: your harvest basket or market stock is overflowing. Before the fruits become overripe or even end up in the bin, it’s worth taking a look at sensible ways to preserve them. Freezing tomatoes is a particularly simple and effective method. Alternatively, you can boil them down or dry them – depending on how you want to use them later.

Freeze tomatoes: An airtight solution

Tomatoes contain around 95 percent waterwhich is why they lose their firm structure after freezing. This is exactly what makes them ideal for sauces, soups or stews – wherever consistency is not the main focus, but flavor is.

Before freezing tomatoes, wash them thoroughly and remove the seeds. stalk. You can freeze them whole or cut them into small pieces. If you don’t want the skin to bother you later, it’s worth blanching them first: Heat briefly in boiling water, then rinse in cold water and peel off the skin. Then simply put them in freezer bags or tins and and seal airtight. Tomatoes will keep in the freezer for about six to nine months.


You might also be interested in these articles:


Making the most of frozen tomatoes

Frozen tomatoes are best used straight away. further processin a sauce or stew, for example. This preserves the flavors better than if you defrost them slowly. If the skin is still on, you can simply peel it off under hot water – even when frozen.

For a better dosage, it is advisable to peel tomatoes before freezing. dice or quarter. This means you can always take exactly the amount you need. Alternatively, you can also boil or dry tomatoes to preserve them for longer and save space.

Preserve nutrients when freezing

Freezing changes some heat-labile nutrients such as vitamin C, which is partially broken down. However, the lycopene content – a natural colorant with an antioxidant effect – remains stable and can even become more available through heating.

Other vegetables such as broccoli, carrots or spinach retain most of their nutrients when frozen correctly. With the right preparation, you can ensure fresh ingredients all year round and reduce food waste.

Checklist: Freezing tomatoes made easy

  • Preparation: Wash the tomatoes and remove the stalk – leave whole or cut as required.
  • Blanch: Optional for easier peeling – heat briefly in boiling water and quench.
  • Portioning: Fill with whole tomatoes, chunks or cubes depending on the intended use.
  • Pack airtight: Seal well in freezer bags or tins to avoid freezer burn.
  • Label: Note the freezing date – shelf life approx. 6 to 9 months
  • Use: Ideal for sauces, soups, stews – use straight from the freezer.

This article was partly created with the help of a machine and carefully checked by the editorial team before publication.


One step makes all the difference when freezing strawberries

0

It’s high season for strawberries – and you’ve collected more hulls from the weekly market or a trip to the strawberry field than you can eat in the next few days? Then you should process the fruit quickly, because strawberries spoil quickly. A simple solution: freeze the strawberries. This allows you to preserve their fruity taste for months – ideal for smoothies, desserts or baking.

If your freezer doesn’t have enough space, you can also boil or dry the berries. And if they are already too soft or moldy, they belong in the organic waste garbage can – not in the compost, as they can quickly go moldy there.

Freezing strawberries – how to do it right

If you want to freeze strawberries, the correct preparation is crucial. First, the berries are washed thoroughly and dried well. Residual moisture encourages the formation of ice crystals, which can affect the texture after thawing.

Then remove the green leaves and the stalk. Whether you freeze the strawberries whole or halved, depends on the intended use. Pre-freezing has proven to be a good method: Place the berries individually next to each other on a tray and freeze them for two to three hours. You can then transfer them to freezer bags or tins – this way they don’t stick together.


You might also be interested in these articles:


Tips for storage and use

To preserve the quality of frozen strawberries, airtight packaging is particularly important. High-quality freezer bags or stackable tins prevent freezer burn and help to preserve the frozen strawberries. protect the aroma. Label the packaging with the freezing date – strawberries can be kept in the freezer for up to eight months.

You can use the frozen berries straight away – for smoothies, yogurt or fruit ice cream, for example. For cakes or muesli, we recommend a slow defrosting in the fridgeto preserve the taste and consistency as much as possible. Thaw best only thaw as much as you need.

If freezing is not possible after all, you can use strawberries as an alternative to jam, puree or fruit sauces ideal for a tasty stock even out of season.

How do cold and storage affect nutrients?

Freezing strawberries is one of the most gentle preservation methods. The delicate berries retain most of their valuable ingredients, especially vitamin C. It is important that they are frozen as fresh as possible – preferably immediately after purchase or harvest.

Compared to other preservation methods, such as preserving with sugar, frozen strawberries often perform better: they do not require any additional sweeteners or preservatives and retain their natural taste. Other foods such as spinach, herbs or broccoli also benefit from freezing – provided that they are properly prepared.

Checklist: Freezing strawberries made easy

  • Wash and dry: Clean berries thoroughly and dry completely to avoid ice crystals
  • Remove the stalk: Cut off green leaves and stems – freeze berries whole or halved
  • Pre-freeze: Freeze strawberries individually on a tray to prevent them from sticking together
  • Airtight packaging: Use freezer bags or tins, seal as airtight as possible
  • Label: Note the freezing date – strawberries keep for up to 8 months
  • Use: Frozen ideal for smoothies, defrosted perfect for cakes or muesli

This article was partly produced with machine assistance and carefully checked by the editorial team before publication.