Home Blog Page 426

Ingenious trick: clean the dishwasher with vinegar

0

In many households, the dishwasher is in use several times a week. But contrary to popular belief, the machine does not clean itself during the wash cycle. Although it may seem obvious that the combination of warm water and dishwasher detergent cleans the inside of the appliance, this is (unfortunately) not the case. If your dishwasher smells after the wash cycle and the dishes are no longer really clean, you should clean your dishwasher – preferably with vinegar!

Simple household remedy ensures cleanliness

Cleaning household appliances is a rather unpopular task. Or when was the last time you cleaned your vacuum cleaner? And the dishwasher should also be thoroughly rinsed at regular intervals – at best every 4 to 8 weeks. There are special products on the market that promise hygienic cleanliness. The best cleaning agent is already in your cupboard!

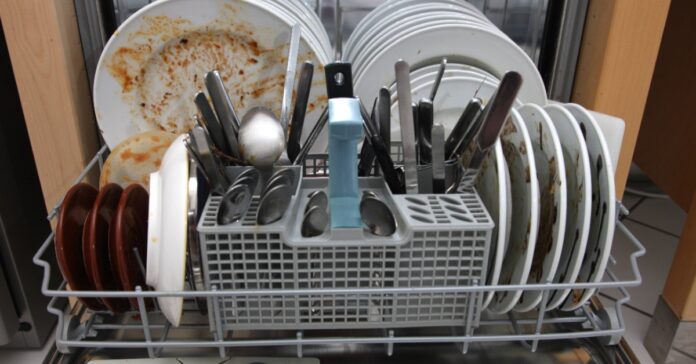
If your dishwasher is smelly, a simple household remedy will help! Photo: IMAGO / Jochen Tack

All you need to clean your dishwasher is a little vinegar. It is best to use table vinegar, as the acid concentration of table vinegar is quite low at 5% – and it is also diluted by the rinsing water! This prevents damage to the rubber seals of your machine. You can simply pour the vinegar into the detergent compartment.


You may also be interested in these articles:


Cleaning the dishwasher with vinegar: How this popular household remedy works

Vinegar has always been known as a powerful limescale remover. And so it also ensures that limescale deposits inside the dishwasher are gently removed. Select a program with high temperatures for the wash cycle, the dishwasher should be empty. You should avoid pre-rinsing.

To enhance the effect of the vinegar, you can sprinkle two tablespoons of baking soda on the bottom of your empty dishwasher. You’ll be surprised how clean and shiny your dishwasher will be after the vinegar wash cycle! Now nothing stands in the way of clean dishes.

FAQ

Can I clean the dishwasher with a tab while it is idle?

Yes, you can clean the dishwasher with a tab while it is idling. This helps to remove deposits or odors. It is important to run the cleaner at a high temperature to achieve optimum results.

Can you clean the dishwasher with citric acid?

Yes, you can use citric acid to clean the dishwasher. Citric acid helps to dissolve limescale and grease. Simply add some citric acid powder or solution to the detergent compartment and start a hot cleaning cycle on empty. However, be careful not to use too much, as the acidic environment could damage sensitive parts.

Is vinegar harmful to the dishwasher?

Vinegar can damage the seals and rubber parts of the dishwasher if used frequently. Although it is an effective cleaning agent against limescale and grease, its acidity could cause material wear in the long term. For occasional cleaning, it is usually harmless in moderate quantities. If you want to use vinegar, it is best to choose the diluted version and make sure that it does not get directly onto sensitive parts.

Source: merkur.de

1080x1080 whatsapp

Almost everyone makes these mistakes when disposing of used glass

0

On weekdays, you are not allowed to throw used glass into the bottle bank after 8 pm. This rule is widely known. But did you know that there are other pitfalls when disposing of used glass that you should avoid at all costs? For example, are broken drinking glasses allowed in the bottle bank and do the lids have to be removed from screw-top jars? And what color does blue glass belong to? Glass recycling is a good thing, but it can also be confusing. Here are the five most common mistakes when disposing of used glass.

This is how important used glass recycling is: 5 common mistakes

Used glass recycling makes an important contribution to environmental protection and sustainability. It is an easy step that everyone can take to conserve resources and protect the environment. However, you should avoid the following five mistakes at all costs:

1st mistake: Disposing of used glass with a lid

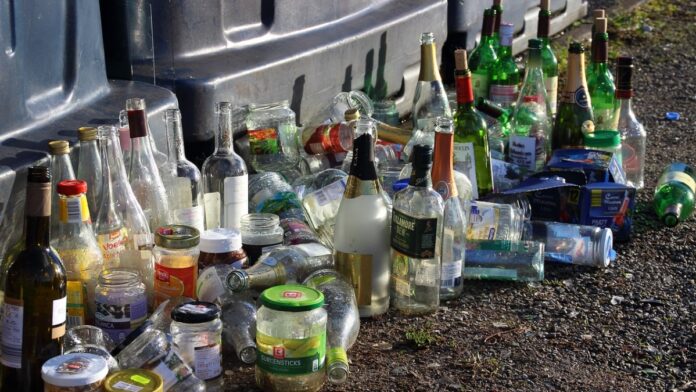
Some mistakes can be made when disposing of used glass. Photo: pixabay.com/ myesterampe

Screw caps, crown caps and other lids have no place in the bottle bank. They are themselves recyclable materials that can be recycled and therefore belong in the yellow bag.

It is true that modern systems can filter out most closures and then recycle them. However, this is not entirely loss-free and also increases the energy consumption of the system.

Depending on the location of the glass container, however, you may even be asked to dispose of your used glass with a lid. Some local authorities take this measure to prevent wasp infestations or to prevent lids from accumulating around the glass container.

2nd mistake: Disposing of drinking glasses

Not all glass is the same. To recycle used glass, it is melted down. For this to work properly, the collected glass must have the same melting point.

This is the case with old pickle jars, beer bottles or cosmetic jars. Not with normal drinking glasses, windows or light bulbs. This glass has a higher melting point.

Therefore, only used glass that was previously used as packaging for food, drinks or cosmetics should be disposed of in the glass container. Dispose of the rest in the residual waste.


You may also be interested in these articles:


3rd mistake: Rinse used glass before disposing of it

Under no circumstances should you dispose of full jars and bottles. This would make a terrible mess in the bottle bank.

On the other hand, it is also not a good idea to rinse used glass before disposing of it. After all, recycling is about conserving resources. The used glass is cleaned in the recycling plant anyway. Rinsing it at home is a double waste of energy and water.

Tip: If you want to avoid mold, you can rinse your old glass with used water: for example, with leftover pasta or mop water.

4th mistake: Do not rinse honey jars

With honey from the supermarket, however, you should definitely rinse out the jar before disposing of it in the glass container. And do it thoroughly! The reason for this is American foulbrood, which can destroy entire bee colonies. In this article you can find out more about why honey jars should be rinsed out.

Tip: Rinse the honey jar with hot milk, so you have something tasty to drink right away!

5th mistake: Ignore the color

Old glass should be turned into new glass. To do this, it is important to separate the old glass by color. Therefore, make sure that only white glass is thrown in with the white glass and brown glass with the brown glass.

But what about used glass whose color cannot be clearly assigned? For example, blue glass? Blue waste glass or waste glass of indeterminate color belongs to green glass. This is because green glass is the least likely to show whether incorrect colors have been smuggled in.

If you dispose of your used glass correctly, you are making an important contribution to environmental protection. And now you also know which mistakes you should avoid in the future.

Sources: utopia, bvse

1080x1080 whatsapp

Create an ingenious cleaning plan for more order in the household

0

Doing the laundry, wiping out the fridge, cleaning the windows or making the beds – cleaning and keeping the household tidy are among our least favorite everyday tasks. We would rather fill our free time with nice things – but we don’t want to live in filth either. The compromise is usually a jam-packed weekend doing all the housework that was left undone during the working week. But it can be really easy to keep your own four walls tidy! With a well-thought-out cleaning plan and a bit of a system, the chaos can be quickly tamed. Find out here how you can create your own personal cleaning plan to finally gain more (free) time for the finer things in life.

Why a cleaning plan makes sense

Ticking off completed tasks from a to-do list gives most people a good feeling. The joy of having completed a section of a larger whole motivates us to take the next step. Creating a cleaning plan can also motivate you to declare war on the chaos in your home.

Household chores should be done at different times. Photo: IMAGO / Steinach

Creating a cleaning plan has many advantages:

  • It creates structure and an overview.
  • Cleaning becomes a routine instead of a tedious major project at the weekend.
  • Housework is spread over several days.
  • You save time and nerves in the long term.
  • Your home stays constantly clean.

How to structure your cleaning schedule

An effective cleaning schedule takes into account different time intervals, as there are household tasks that need to be done more regularly than others. The appropriate time intervals are defined by your personal sense of cleanliness. If fresh bed linen is important to you, you should change it weekly instead of just once a month. For small households, on the other hand, it may be sufficient to only take out the garbage once a week. The following overview can be a rough guide if you want to create your own personal cleaning schedule:

Tasks that should be completed daily (basic order)

You can keep the chaos in your home in check with just a few simple steps. You should do this every day:

  • air and make your bed
  • wash the dishes or load and unload the dishwasher
  • wipe down the surfaces in the kitchen and bathroom

Tasks that should be done twice a week

This time interval is more of a rough guide. Depending on how many people live in your household, it may be necessary to vacuum more frequently, for example. You should vacuum every three days:

  • clean the toilet
  • vacuum the apartment
  • take out the garbage
  • do the laundry
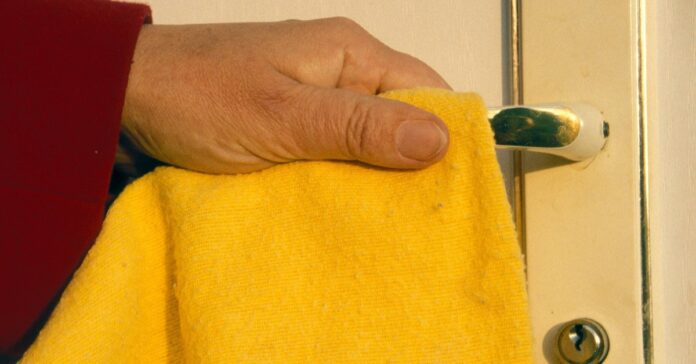
  • Wipe down all door handles (often forgotten, but they are a germ trap!)

Create a cleaning plan: Weekly tasks

These weekly tasks should also be included in your cleaning plan. You should do them once a week:

  • Dust thoroughly
  • mop the floors
  • change the towels in the bathroom and kitchen
  • clean the bathroom thoroughly
  • clean the mirrors in the apartment

Tasks that should be done monthly

For basic hygiene, you should do this once a month:

  • change your bed linen
  • knock out the carpets
  • vacuum the upholstered furniture
  • clean the refrigerator

Quarterly household tasks

These household tasks are more time-consuming and are therefore often put on the back burner. However, they should not be missing from your cleaning schedule. Every three months you should:

  • clean all windows
  • clean the washing machine
  • clean the oven
  • Wipe down all doors
  • Descale your kitchen appliances
  • wipe out the kitchen cupboards

You may also be interested in these articles:


Spring cleaning is due once a year

The term “spring cleaning” covers tasks that only need to be done once a year. These include

  • washing curtains and drapes
  • cleaning comforters, pillows and mattresses
  • sorting out your clothes
  • polishing your wooden furniture
  • cleaning the extractor hood
  • defrosting your fridge and freezer
  • Thoroughly cleaning the carpets

Tips for a successful cleaning plan

Admittedly, that’s quite a long list! But instead of being demotivated by it, you’ll soon realize that the regular tasks will come easily to you. If you integrate them into your daily routine, they will no longer feel like housework. The following tips can help you implement your cleaning plan:

  • Be realisticThink about how much time you can and want to spend cleaning.
  • Consider your life situationHouseholds with children or pets usually need more intensive cleaning routines – but also plan enough family time!
  • Divide the tasks intoIn multi-person households, it is worth dividing up the duties.
  • Use technologySmart cleaning robots and cleaning schedule apps can help you stay on top of things.
  • Have the right cleaning products ready: Everything goes faster with the right equipment.
  • Schedule fixed cleaning times: Set specific days or times of day when you do the respective tasks. For example, you can wipe over the bathroom shelves and the wash basin tap while brushing your teeth.
  • Reward yourselfAfter the work is done, you can be proud of yourself and do something good for yourself!

Creating a cleaning plan made easy

When creating a cleaning schedule, it is important that you pay attention to your individual needs and design it according to your personal taste. Whether you keep it digitally or prefer to hang a printed schedule on the fridge – the important thing is that it suits you and your everyday life.

With a well-thought-out cleaning plan, annoying house cleaning becomes a manageable routine. You’ll be amazed at how much time and stress you’ll save if you do small tasks regularly instead of putting everything off. So, get to work on your cleaning plan – your future, more relaxed self will thank you for it!

Source: wohnglueck.de

1080x1080 whatsapp

This is the reason why you should not leave the remaining water in the kettle

0

If you want to make yourself a cup of tea or a quick soup in between meals, the kettle is the first choice. However, you often don’t use up all the water you’ve just boiled and some is left over. Can you leave the water in the kettle and boil it again the next day, or should you throw it away? According to a survey by the SGS Institut Fresenius, 53% of respondents throw away the water from the previous day, while 47% continue to use it. But is that a good idea?

Why do we throw away water?

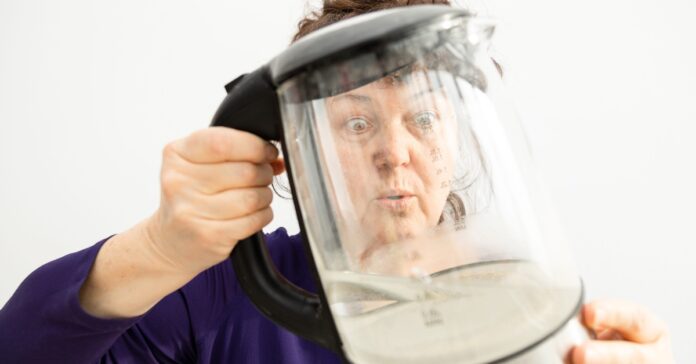
Can you still use the leftover water in the kettle? Photo: ТатьнаВолкова – stock.adobe.com

Limescale deposits quickly build up in the kettle, making the water less appetizing. In addition, many people are concerned that bacteria will spread if the water is left in the kettle for a long time.

Many also fear that harmful substances could be released into the water from the appliance itself. Microplastics or nickel cause many people great concern when using the kettle. But is this concern justified or is tipping it away simply a waste of water?

Boil water again? What the experts say

The Fresenius Institute sees no problem in boiling water again. Concerns about nickel and bisphenol A being released from the appliance are unfounded. However, it is important that the appliances bear the GS seal. Household appliances that are tested for this seal only rarely show any questionable levels of contamination. In addition to the electronics, many kitchen appliances are also tested to ensure that the materials used are safe. You are always on the safe side with a glass stove.

The institute is also reassuring when it comes to the fear of bacteria: Although there are germs from the environment that could multiply in kettles over long periods of time, these are usually killed by boiling the water again. So for your normal use, you can leave the water in the kettle and boil it twice: That’s no problem!

A question of taste

What may worry you is the chalky taste. This is because the limescale only dissolves when the water is heated and then settles in the appliance. When the water is boiled a second time, the taste may therefore be different – but this is not harmful. If you don’t like your tea like this, you can of course simply use new water.


You may also be interested in these articles:


These people should not leave the water in the kettle

The Bavarian Consumer Center also shares the view that reboiling stale water is generally harmless. Nevertheless, some people are advised to use fresh water instead. This could be people with a very weak immune system, pregnant women and babies.

For most people, the water from the previous day is therefore perfectly adequate and does not pose a health risk. And if you prefer to use fresh water: You should never just tip the leftover water away. It’s great for pouring or ideal for ironing, because: Boiling the water beforehand makes it a little softer. Are you more of a dumping or reusing team?

Source: t-online, sueddeutsche

1080x1080 whatsapp

Cleaning garden upholstery: 3 effective methods against mildew stains

0

There’s nothing better than freshening up your garden furniture after a long, cold winter to create a second outdoor living room. But what is it? There are unsightly mildew stains on your seat covers! Your once shiny cushions are stained and yellowed. To avoid having to buy new cushions, find out how to clean your garden cushions here. With a few simple tricks, you can get them back into shape.

Basic cleaning: The first step to success

If you want to make yourself comfortable in your garden, you can’t do without garden cushions, as they turn your garden furniture into a real oasis of well-being. But even if you store your seat cushions in a suitable box during the winter, wind and weather can damage your cushions. This can result in mildew stains and, in the worst case, even mold. The reason for this is the moisture that settles on the upholstery during the cold season and can lead to unsightly discoloration due to insufficient ventilation.

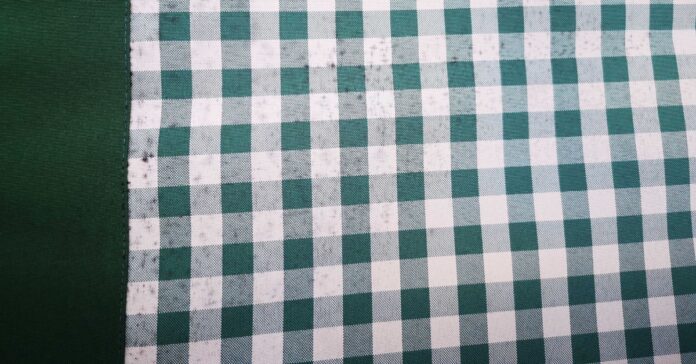
Do your garden cushions look like this after winter? You can remove mildew stains with simple household remedies! Photo: FUNKE Digital

Before you tackle stubborn dirt, you should start with a deep clean. Shake the upholstery vigorously to remove loose dirt. For heavier soiling, you can use a soft brush or your vacuum cleaner with an upholstery nozzle.

Cleaning garden upholstery in the washing machine

If your covers are removable and machine washable, you can simply clean the garden cushions in the washing machine. Make sure you select a washing program with low temperatures so as not to damage your covers. A look at the washing label will show you the maximum temperature at which the seat cushions can be put in the washing machine. After the wash cycle, you should allow the cushions to air dry – ideally in the shade to avoid color changes.

To remove mold spores using a wash cycle, you would have to clean your garden cushions at 50°, some stubborn types of mold even need 70° to completely disappear from the cushions. These temperatures are usually too high for the seat cushions.


You may also be interested in these articles:


Home remedies for mildew stains and mold

If you want to remove mold and mildew stains from your garden upholstery, the following home remedies will help you:

Vinegar and water bath: Fill your bathtub with water and add plenty of vinegar essence. Now place your garden cushions in the bath and leave them to soak for at least twelve hours. Then rinse the covers thoroughly with water or, if possible, put them in the washing machine.

For spot stain removal, mix one part vinegar with three parts water and spray this solution directly onto the stain. After a few minutes, carefully brush off the mold.

Baking soda paste: Baking soda can also help you remove stains. Make a paste from three tablespoons of baking soda and two tablespoons of water. Apply this to the stains, leave it to work and then brush it off.

Sodium hypochlorite: This active ingredient from the pharmacy can help with particularly stubborn mildew stains. Apply it carefully and observe closely, as it can bleach out fabrics. As soon as the stain disappears, rinse thoroughly with clean water.

Tip: Sometimes a “bath” in the sun is enough to remove stains from garden upholstery. The UV rays act like a natural bleaching agent.

Correct storage: prevent mold

Even the best cleaning is of little use if your garden cushions are not stored correctly. To prevent mildew stains and mold, you should follow a few rules:

  • Store in a dry place: Make sure your cushions are completely dry before you store them. Moisture is the main reason for mold growth!
  • Ventilated storage space: Store the pads in a well-ventilated, dry room. Special garden chests with ventilation slots or a dry garden shed are ideal.
  • Do not pack airtight: Avoid airtight plastic bags, which can form condensation. Breathable storage bags are more suitable.
  • Ventilate regularly: Take out your stored cushions from time to time and let them air out, especially if the storage room could be damp.
  • Waterproofing: Before storing, it is worth impregnating with a special spray that forms a dirt and water-repellent protective film.

With these tips and tricks, you can not only clean your garden cushions effortlessly, they will also stay beautiful for longer. So you can enjoy your garden season carefree – on fresh, inviting cushions that invite you to linger. And if a stain doesn’t come out: Think of it as an opportunity to give your outdoor area a fresh look with new cushions!

Source: stilartmoebel.de

1080x1080 whatsapp

Cleaning the ceramic hob: Ingenious tips to remove annoying stains

0

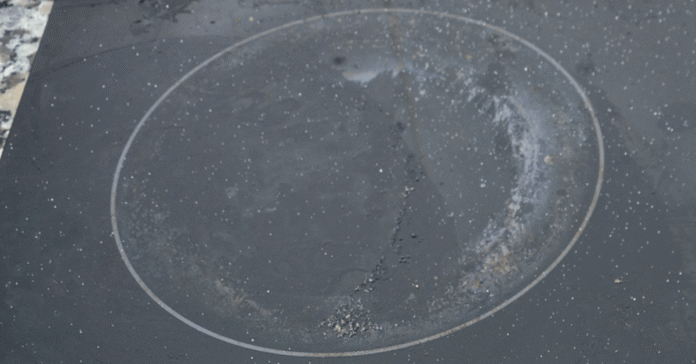
Most kitchens have ceramic hobs on the stove. Compared to conventional cast iron hobs, they have the advantage that they can be operated in a more controlled manner, which makes them much more energy-efficient. Ceramic hobs are also very easy to clean – provided you always clean them immediately after cooking. However, even if you use a cleaning cloth immediately after cooking, strange metallic stains can still form on the surface over time. The question is: where do they come from and how do you get rid of them?

Cleaning the ceramic hob: Helpful tips to remove annoying stains

Unfortunately, simple scrubbing is not enough here, other means are required. However, these do not always have to be expensive – on the contrary simple household remedies are often sufficient.

To remove metallic stains on your ceramic hob, you can use effective household remedies. Photo: IMAGO / Jürgen Eis

But first we would like to answer the question of where these iridescent stains actually come from. The answer is quite simple: pans and pots are often to blame for the annoying stains. The reason for this is the copper and aluminum-containing alloys in our cooking utensils, which fuse wonderfully with the ceramic surface through friction. Even if it seems that the stains have formed underneath the glass surface and are therefore impossible to remove, we can reassure you – this is rarely the case!

As a rule, it is always important to clean the hotplates, whether ceramic or cast iron, immediately after use. This can be easily done with conventional cleaning agents and a sponge or cloth. However, the hob should have cooled down sufficiently by this time, otherwise there is a risk of burns!

If, for whatever reason, you didn’t get around to cleaning the hob in time, we have listed a few household remedies here that can help you clean your ceramic hob.

Lemon juice

For light stains, such as water or limescale stains, simple lemon juice is sufficient. To do this, drip a little of the juice onto a cloth and wipe over the stains as usual. Leave the juice to soak in for about 10 minutes, wipe with a little fresh water and then dry with a dry cloth. If you don’t have any lemon juice to hand, glass cleaner is also ideal for the whole procedure.

Baking powder

Baking soda is an excellent cleaning agent for more stubborn stains, such as burnt-on food. All you need for cleaning is half a packet of baking soda and a tablespoon of water. Rub the mixture onto the dirty areas and leave to soak for around 60-90 minutes. You can now simply wipe off the dried, dirty stains with a dry cloth. Finally, wipe over again with a damp cloth and rub everything dry.


You may also be interested in these articles:


Cleaning the ceramic hob with toothpaste

If scratches have already formed on the ceramic surface, toothpaste can be helpful. The microparticles in the toothpaste smooth the edges of the scratches and make them disappear. All you need to do is rub a small amount of the cream onto the scratched areas with a cloth and then wipe the surface dry with the back of the cloth.

Cleaning stone and vinegar or soda

Now we come to the aforementioned metal streaks. These can be easily removed using a cleaning stone and vinegar or washing soda. The acid contained in the vinegar dissolves the metallic impurities after prolonged exposure, making it easier to remove the streaks. If you prefer to use washing soda instead, apply a small amount to the soiled areas and leave the soda to work for around 20 minutes. You can then wipe away the remaining dirt with a simple cloth. You should use so-called cleaning stones with care, as their use can lead to scratches. Suitable cleaning stones are mainly available in drugstores.

Effective prevention of stains

If all household remedies fail to clean your ceramic hob for some unknown reason, the only thing left to do is to reach for the chemical shelf. You can find suitable cleaning agents in any supermarket or drugstore. But before you get that far, here are a few helpful tips to prevent metallic streaks in advance:

  • Never slide pots and pans over the hob. This not only saves you from stains, but also protects against scratches!
  • Even if the temptation is too tempting – do not wash your pots and pans in the dishwasher! The dishwashing process encourages abrasion of the pots’ alloy, making it easier for it to get onto the hob during cooking.
  • Avoid excessively hot, prolonged cooking temperatures. Instead, turn the temperature up once and then continue cooking at a lower temperature. Excessively high temperatures also promote the abrasion of the metallic alloys of the cooking utensils.

With these helpful tips, you now know how to clean your ceramic hob and remove unsightly metallic stains on the hob!

Source: ruhr24.de

1080x1080 whatsapp

Dispose of coated pan: then it is necessary

0

Coated pans are a must in every kitchen. Thanks to their non-stick coating, nothing sticks when frying and cleaning is child’s play. You also need less fat, which is particularly beneficial for health-conscious amateur cooks. In most cases, the non-stick coating is so robust that it can withstand occasional handling with sharp knives and pointed forks. But what happens if the coating peels off over time? Find out here when you should dispose of your coated pan.

You should dispose of a coated pan if you notice these signs

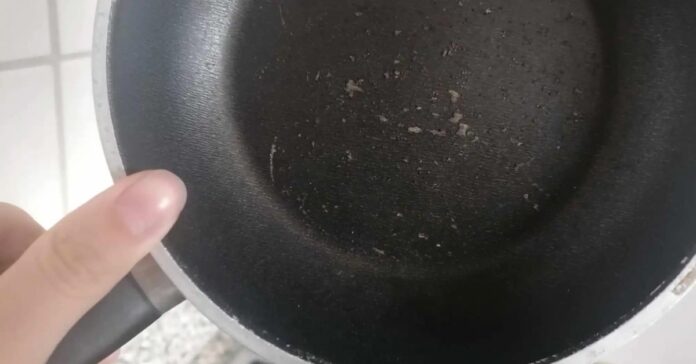
If your coated pan looks like this, you should throw it away. Photo: FUNKE Digital/Media Partisans

In principle, there is no exact time limit for how long you can use coated pans. According to experts, it is much more important to look after them properly. Despite good care, many pans show more and deeper scratches with increasing age. The scratches are harmless to health, but reduce the non-stick properties of the pan.

If there are too many scratches, the food could stick to the base of the pan – definitely a reason to dispose of the pan. However, Daniela Krehl from the Bavarian consumer advice center recommends disposing of the pan at the latest when the coating in the pan comes off. But where is the sustainability if you have to buy a new frying pan every few years?

Have the pan recoated

When you dispose of a pan, do not put it in the residual waste, but always at a recycling center. However, there is another alternative: some manufacturers offer to recoat pans. It is best to ask a specialist retailer or research suitable offers on the internet. Prices are usually between 15 and 50 euros.

Health problems caused by coated pans?

If small pieces do come off the coating and you accidentally swallow them while eating, you can rest assured. The particles of the inert substance “polytetrafluoroethylene” are not digested and are ultimately excreted unchanged. The so-called polymer only decomposes at a temperature of 360 °C. This leads to toxic vapors that can trigger flu-like symptoms.

So make sure that you do not heat coated pans too much – especially if they are already slightly damaged. Consumer advocates advise not to leave pans on the hot hob for longer than three minutes without any food in them – and no longer than one minute on induction hobs. The coating of the pan discolors above 230 °C and could even peel off. However, as long as the frying pan is filled with food, overheating is extremely unlikely. Water or food containing water usually does not cause the temperature to rise significantly above 100 °C, i.e. the boiling point of water.


You may also be interested in these articles:


Extending the life of the pan

To prolong the life of your coated pan, you should avoid extreme temperature changes. When you remove the hot pan from the heat after frying, you should therefore allow it to cool down before rinsing it with cold water or soaking it. Also, only use wooden or plastic cooking spoons and always clean the pan with a soft cloth or sponge. It is often sufficient to wipe out the coated pan with a kitchen towel after use.

If you follow these tips and take good care of your frying pans, you are sure to enjoy them for a long time to come. Unfortunately, signs of use, such as small scratches, cannot be avoided over time. In the event of major damage, it is therefore advisable to buy a new pan or at least replace the coating.

Source: t-online

1080x1080 whatsapp

Robot vacuum cleaner currently available at Aldi at a bargain price

0

First come, first served: The online store of discount giant Aldi is currently offering a robot vacuum cleaner at an absolute bargain price: The AEG AR71HW1DG robot vacuum is available for under 300 euros – that’s a whopping saving of 180 euros compared to the RRP! Find out what buyers can look forward to with the robot vacuum from Aldi here.

Robot vacuum cleaner: Small powerhouse from the discounter

Aldi is no longer just a discount store where you can buy cheap food. In recent years, Aldi has also made a name for itself in the non-food sector and every week, customers storm the stores to get a great bargain on garden furniture, solar lights or decorative items.

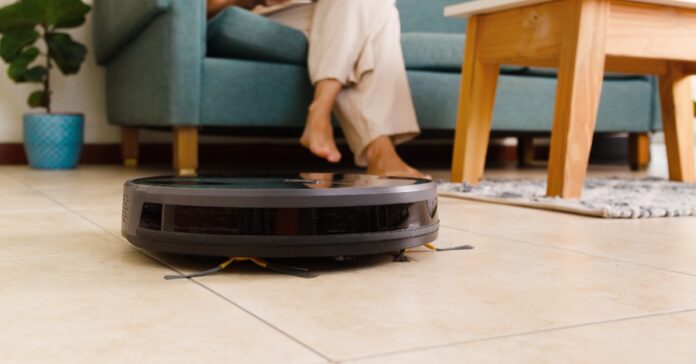
A robot vacuum cleaner makes housework easier – and Aldi currently offers such a little helper at a bargain price! Photo: Cecilia Di Dio – stock.adobe.com

The discounter even goes one step further in its online store: not only does it offer its successful own brands, but you can also find products from well-known companies online. This is also the case with the current robot vacuum cleaner from AEG, which is available in the Aldi online store. It is advertised as offering savings of almost 200 euros. But what can this little powerhouse really do and is it worth the investment?

AEG Robot Vacuum Cleaner AR71HW1DG

The robot vacuum cleaner from AEG, which Aldi is currently offering at the lowest price, impresses with a powerful suction force of 4,000 Pascal. The smart helper cleans areas of up to 140 square meters with a maximum battery life of 175 minutes. The best thing is that the AEG robot vacuum not only picks up dirt and dust, but also has an integrated mopping function. This means your floors are hygienically clean at the touch of a button.

By the way: This little powerhouse can overcome heights of up to 2 cm – so it can easily negotiate even higher door thresholds.

You can easily control the AEG robot vacuum from the Aldi online store via an app on your smartphone. The scope of delivery includes the AEG AR71HW1DG robot vacuum, a charging station, three brushes and operating instructions.

It pays to be quick: Aldi vacuum robots only available for a limited time

As with many other beautiful and inexpensive things, the same applies to the AEG robot vacuum from the Aldi online store: only while stocks last! If the model is sold out at a bargain price, it will probably no longer be available in this form. So if you’re looking for a robot vacuum and mop for your home for under 300 euros, you should strike quickly!

Source: aldi-onlineshop.de

1080x1080 whatsapp

Caring for the banana plant: how to keep it healthy and strong as a houseplant

0

Do you want a real jungle feeling in your living room or would you like to bring the vacation feeling of the Palmerian banana plantations into your home? Then the banana plant (Musa) is just the thing for you! Not only does it look exotic, it also brings life to your home. To keep your banana plant happy for a long time, it’s important to look after it properly.

The perfect location for your banana plant

The banana plant loves light – the more, the better. A spot right by the window – preferably facing south – is ideal, and it will also love a spot with morning sun. Do you have a conservatory with lots of light and high humidity? Great! It will reward you with lush growth.

However, avoid blazing midday sun in summer, otherwise the leaves may burn or gradually get them used to more light, then you can put them outside in summer. Attention: The banana plant doesn’t like draughts – it’s a real warm shower! That’s why the temperature should not drop below ten degrees Celsius in winter!

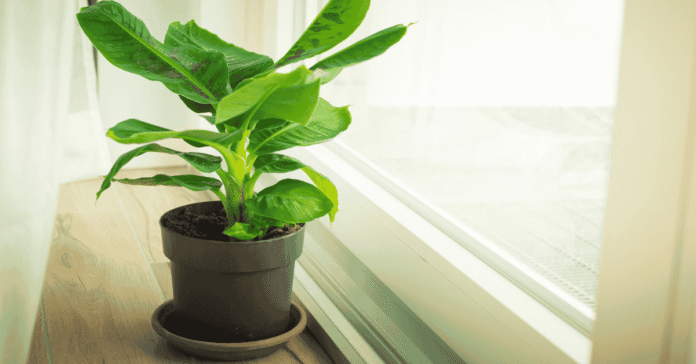
The location should be as bright as possible, but without direct midday sun. Photo: silvia – stock.adobe.com

How to water correctly – avoid waterlogging

Your banana plant needs water regularly, but it hates wet feet. So water it as soon as the top layer of soil is dry, but make sure that excess water can drain away easily. A pot with a drainage hole and a drainage layer of expanded clay will help.

Fertilize for strong growth

Between spring and autumn, your banana plant will be happy to receive liquid fertilizer every two weeks. This promotes its rapid growth and ensures strong, lush green leaves. In winter, once a month is enough – or you can give it a little break.

Repotting and pruning – this is also part of care

If your banana plant grows vigorously, it will need a larger pot every two years at the latest. Cut off damaged or brown leaves regularly – this allows the plant to put its energy into new growth.

Suitable species for the home

  • Dwarf banana ‘Dwarf Cavendish’ (Musa acuminata)
  • Pink dwarf banana (Musa velutina)
  • Darjeeling banana (Musa sikkimensis)
  • Ornamental bananas (Musa tropicana)
  • Ornamental or magnificent banana (Musa ornata)

You might also be interested in these articles:


Caring for banana plants as houseplants is easier than you think

With the right location, regular care and a little attention, your banana plant will become the tropical queen of your home. Banana plant care is child’s play if you know its needs – and water it with love!

1080x1080 whatsapp

Source: Plantura

No more wilted monocots! These care tricks ensure lush leaves

0

The monocot – also known as Spathiphyllum is one of the most popular houseplants of all. It looks elegant, purifies the air and is super easy to care for. Nevertheless, it needs some attention if you want to enjoy it for a long time. With these Tricks for monocot care you can do this very easily.

The perfect location for healthy growth

First of all, you should give your Spathiphyllum the right spot. Your Spathiphyllum likes light, but does not tolerate direct sunlight. That’s why it’s best to place it in a spot with indirect light. A north-facing window or a few meters away from an east or west-facing window is ideal. Your monocot also loves high humidity, which is why the bathroom is often a perfect location.

Water tips for successful monocot care

Watering plays a crucial role in caring for monocots! Your Spathiphyllum likes moist, but never wet soil. Therefore, use your finger to check whether the top layer of soil is already dry before watering again. In winter, reduce the amount of water significantly. An important trick: Always use lukewarm, limescale-free water. Tap water is therefore best left to stand overnight so that the limescale settles or you can use rainwater straight away.

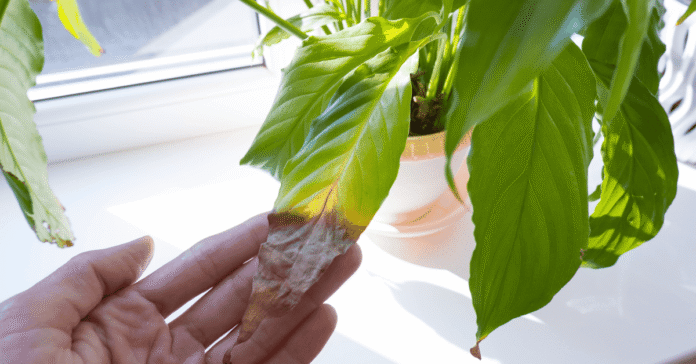
Leaf care is the be-all and end-all for healthy plant growth. Photo: Tasha Sinchuk – stock.adobe.com

Regular cleaning for healthy leaves

The shiny leaves of your monocot easily collect dust, which hinders photosynthesis. Therefore, regularly wipe the leaves with a damp cloth or give your plant a shower with lukewarm water from time to time. This not only promotes leaf health, but also keeps pests away.

Nutrients – the secret bloom booster

You need the right fertilizer for your monocots to bloom beautifully. Add a special green plant fertilizer to the water every two weeks from April to September. Pay attention to the correct dosage, because too much fertilizer does more harm than good. A special trick: add a little coffee grounds to the soil in spring – this provides important minerals and promotes flower formation!


You may also be interested in these articles:


Single leaf care summarized

With these simple tricks, caring for monocots is child’s play! Place your Spathiphyllum in a bright spot out of direct sunlight, water regularly but not too much, fertilize during the growth phase and keep the leaves clean. You will soon be rewarded with beautiful white flowers that will brighten up your home and keep the air fresh in your bedroom. Good luck with your flowering monocot!

1080x1080 whatsapp

Source: Crazy Plant Boy