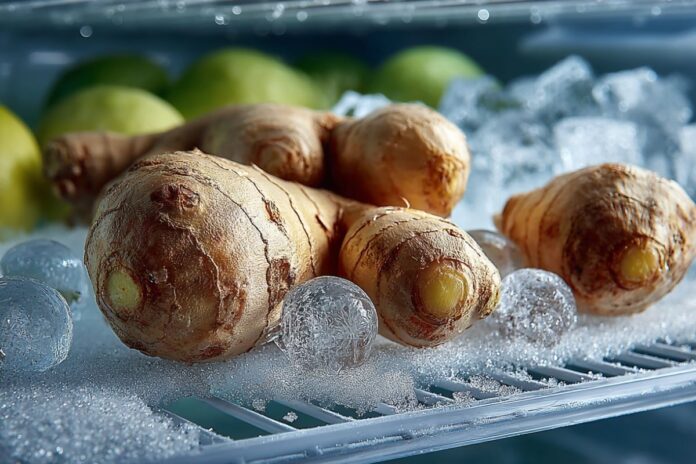
Did you buy a generous amount when cooking and now you have a good bit left over? No problem: freezing ginger is an easy way to preserve the aromatic rhizome. Even without a freezer, fresh ginger can be kept for several weeks in a dry, cool place.
Freeze ginger: How to keep the tuber fresh
You have various options when freezing ginger. After the thorough cleaning you can freeze the tuber with or without the skin – it is edible and provides additional protection.
Cut the ginger into slices, cubes or grate it finely, depending on what you need later. Packed airtight in freezer bags or tins, it will keep in the freezer for up to six months shelf life. Particularly practical: frozen ginger can be grated directly without defrosting first.
Alternatives and storage tips
If you don’t have space in the freezer, you can store ginger on a dry, dark place for several weeks. Pickling in honey or vinegar is also a creative method that not only preserves the food, but also opens up new taste experiences.
A clever idea: freeze portions of grated ginger in ice cube molds. This way you have small quantities to hand when needed – ideal for teas, curries or smoothies.
What happens to nutrients when you freeze them?
The valuable ingredients such as Gingerol and essential oils are largely preserved during freezing. Slight loss of aroma can occur during very long storage, but is usually hardly noticeable.
Many other foods also benefit from freezing: Herbs such as parsley, diced pumpkin or grated cheese remain aromatic and handy for spontaneous kitchen ideas. With the right preparation, you can ensure you have a healthy and versatile supply.
Checklist: Freezing ginger made easy
Prepare: Clean ginger thoroughly, optionally peel and cut or grate
Portioning: Form slices, cubes or puree, alternatively use whole pieces
Pack airtight: Freeze airtight in freezer bags or tins
Label: Note the freezing date – shelf life up to 6 months
Use: Grate directly frozen or use in portions for teas, curries and smoothies
This article was partly created with the help of a machine and carefully checked by the editorial team before publication.
A washing machine is an indispensable appliance in the household, that much is clear. However, it also requires regular maintenance to keep it hygienically clean and in good working order. Residue from detergent, limescale and dirt can build up and put a strain on the machine. In a few simple steps, you can clean your washing machine and ensure a longer service life – and hygienically clean laundry.
Why it’s important to clean your washing machine
Let’s start with a common misconception: even though your washing machine uses water, that doesn’t mean it cleans itself. (The same goes for your electric toothbrush, by the way.) Residues of detergent, fabric softener and dirt build up on the drum, hoses and seal. These can impair the performance of the machine and cause unpleasant odors. Germs and mold accumulate, especially in the door seal and detergent compartment, if they are not cleaned regularly.
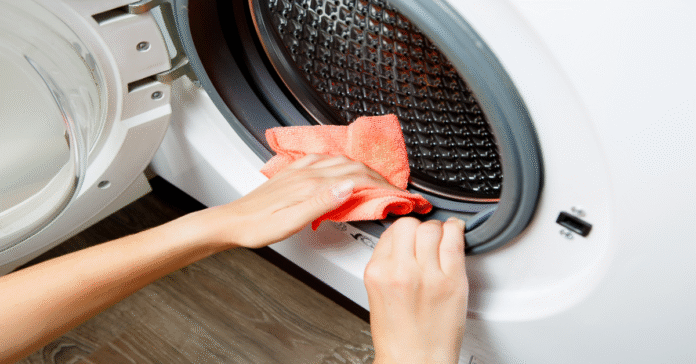
Never forget the rubber seals when cleaning! Photo: Sergey – stock.adobe.com
Removing odors: Why regular washing machine care is essential
You may be familiar with this: freshly washed clothes smell musty, even though you’ve actually done everything right. The problem often lies in the machine itself. With every wash cycle, detergent residue, dander, hair or even grease collects in narrow areas. Added to this are heat and moisture, which encourage the growth of bacteria and fungi. The result: a musty, sometimes even foul odor.
Cleaning your washing machine regularly is therefore a must if you want to remove unpleasant odors. Pay attention to the following points to keep your machine clean and odor-free:
Choose high temperatures from time to time: A 60 or 90 degree idle program kills bacteria and mould spores.
Leave the door and detergent compartment open: If the machine does not dry out properly, germs collect particularly quickly.
Make sure you use the right amount of detergent: Less is often more. Overdosing leads to deposits and odors.
By integrating these routines into your daily routine, you not only prevent bad odors, but also get better washing performance and protect your appliance. The drum stays intact for longer and you avoid costly repairs to the heating element or valves, which can become clogged with limescale and dirt.
Environmentally friendly cleaning: Natural home remedies for a fresh drum
Many commercially available cleaners promise quick results, but can damage seals and components. In addition, aggressive chemicals pollute waste water and the environment. Fortunately, there are some home remedies that are effective and gentle on your machine:
Vinegar or citric acid: Both dissolve limescale deposits and fight bacteria and fungi. If the water hardness is medium, it is sufficient to carry out a wash cycle with vinegar or citric acid (without washing) every two to three months. However, pay attention to the manufacturer’s recommendation – some machines react sensitively to vinegar as it can attack seals.
Baking soda or baking powder: Baking soda is a true all-rounder in the household. It neutralizes odours, dissolves light grease deposits and has a gentle scrubbing effect without damaging the drum. For example, put two to three spoonfuls of baking soda in the drum and select a long program at a minimum of 60 degrees. Alternatively, you can use baking soda in the empty detergent compartment to soften deposits.
Prepare a cleaning solution: Combine vinegar with baking soda or citric acid with baking soda (be careful, foam!) and apply the paste directly to seals, rubber edges or the detergent compartment. Leave everything to work for a short time and then wipe thoroughly. This way, you can remove even stubborn residues that have built up over time.
However, to avoid overloading the materials, you should not use these household products every time you wash. Regular use – depending on the water hardness and frequency of use – is completely sufficient. If you have very hard water, an additional descaler may be useful. It is best to follow the water quality in your region and the instructions of your washing machine manufacturer.
Removing the lint filter and mold: step by step to a well-maintained appliance
It is not enough to just clean the drum. Various components can also become dirty and lead to odors. Thorough cleaning therefore includes the following steps:
Step 1: Clean the fluff filter
In most cases, the lint filter is located at the bottom front of the machine. Open the small flap or cover. Make sure you have an old towel or a flat dish ready beforehand, as residual water often leaks out. Carefully unscrew the sieve and remove all lint, hair and foreign objects. Then rinse under running water and remove any debris from the opening itself. Replace the strainer correctly so that there are no leaks.
Step 2: Clean the detergent compartment
The detergent and fabric softener compartments tend to accumulate residues and slime, which provide the ideal breeding ground for mold. Pull out the compartment, soak it in warm soapy water and remove any residue with an old toothbrush. Be sure to check the nozzles and holes through which the water flows into the compartment. Limescale or small foreign bodies can also get stuck there. Rinse everything thoroughly and allow it to dry completely before putting it back in.
Step 3: Remove mold
Mold often forms on rubber seals in particular. This can be seen on dark spots or discolored areas. Spray on a mild mold remover or use a household remedy made from vinegar water and baking soda. Leave the solution to work briefly and then wipe it off with a microfiber cloth. Remaining stains may indicate deeper discoloration. It is worth being patient here and making several attempts. However, if the mold is very severe or the entire seal is cracked and porous, it is advisable to replace the affected parts.
Step 4: Heating up against bacteria
Finally, run your machine through again at 60 or 90 degrees without washing. Add an environmentally friendly detergent if desired. This will remove any remaining residue and germs that would survive at cooler temperatures. Many modern detergents work well at 30 or 40 degrees – but an occasional hot wash cycle is still useful for disinfection.
If these steps are followed regularly, you will enjoy an odor-free, efficient washing machine for a long time. And your laundry will also benefit: it will come out of the drum cleaner and fresher, as soap residue and dirt particles can no longer collect.
FAQ
How often should I clean my washing machine? A thorough clean every two to three months is usually sufficient. You can also check the lint filter, detergent compartment and seals more often if necessary – especially if you have a lot of wash cycles or notice persistent bad odors.
Is vinegar safe to use? Vinegar is an effective descaler, but some manufacturers advise against it because acetic acid can attack the rubber seals. Therefore, read the care instructions for your appliance beforehand. Alternatively, citric acid or special machine cleaners are gentler.
What can I do about stubborn mold? Spray the affected areas – usually rubber seals or the detergent compartment – with a mold remover or a mixture of vinegar water and baking soda. Leave everything to work in and wipe thoroughly. In the case of deep-seated mold, repeated cleaning or replacing the seal is often the only remedy.
Can I keep the machine clean with home remedies alone? Yes, as long as there are no serious deposits or defects. Home remedies such as vinegar, baking soda or citric acid are good alternatives to aggressive chemicals. They dissolve limescale and remove bacteria and odors. However, ensure the correct dosage and sufficient exposure time to avoid damaging the material.
If you have ever been surprised by a moth infestation, you will know how difficult it is to combat moths. But even if it’s difficult to get rid of the little beasts, our tricks can help you get rid of the pests again soon! Read on to find out which tips really help with pest control and what you should look out for.
Where do moths actually come from?
Moths enter your home through open windows or old carpets, blankets or used upholstered furniture. But they can also be brought into your home when you go shopping, as food such as flour is often already contaminated with moths.
How do I recognize moths?
The most common types of moths in the home are clothes moths and food moths. The term food moth refers to a whole range of species. For example, the dried fruit moth, the flour moth or the flour moth.
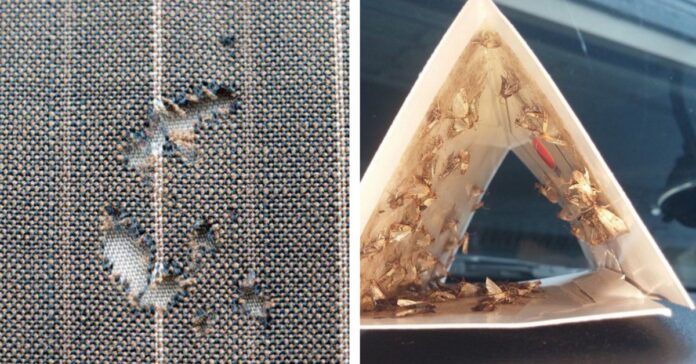
Clothes moths can be recognized by their light yellow to dark brown wings and indirectly, of course, by damage to clothing. The larvae of the moth cause the damage because they feed on keratin, which is found in animal products such as wool, fur, feathers, down and leather. Check your clothes, as well as curtains, carpets and upholstery, for small, irregular holes or bald patches.
Here you will find external content from Pinterest that is recommended by our editorial team. It complements the article and can be displayed and hidden again with one click.
I agree to this external content being displayed to me. Personal data may be transmitted to the provider of the content and third-party services.
Depending on the species, food moths are usually rather grey and often difficult to recognize, as the pests are small and inconspicuous. They prefer dry foods such as flour, rice, pasta, cornflakes, baking powder, cocoa, nuts and animal feed and contaminate them with their excrement and saliva. However, they do not pose a health risk and do not transmit diseases.
Fighting moths
Female moths usually lay between 250 and 300 eggs which, once hatched, eat their way through the contents of your wardrobe, leave droppings behind and continue to reproduce. If you do nothing to prevent this, you will have a moth infestation within a very short time, which will take a lot of effort to get under control.
Therefore, proceed as follows if you have discovered the pests in your home and want to combat the moths:
Wash textiles
If you are dealing with clothes moths, you should machine wash all infested items of clothing at a temperature of at least 50 °C. The insects usually do not survive the high temperatures.
Heat or cold
Delicate items of clothing that cannot be washed in the washing machine should be wrapped in a plastic bag and placed in the freezer for a week. This is because cold can also successfully combat moths.
Large textiles such as curtains, carpets or upholstered furniture fit neither in the washing machine nor in the freezer. In summer, place them in the blazing sun for several hours or blow-dry them on the highest setting to catch all the pests.
Be careful with leather sofas: They do not tolerate heat and can warp when blow-dried.
Remove food
If you are dealing with food moths, you should throw away all infested and adjacent food, as the small pests can easily eat through cardboard, paper, natural fibers and even plastic film.
Clean the cupboard
After you have removed all nests and affected textiles or food from the cupboard, you should first vacuum it out and then clean it thoroughly with vinegar cleaner. Finally, wipe it out again with warm soapy water.
You may also be interested in these articles:
Clean the entire room
Finally, the room in which the moths have been located should also be cleaned. This includes skirting boards, cracks and crevices between cupboards, cavities, radiators and all areas that are covered by furniture. If not all areas can be reached easily, use a hairdryer again and blow-dry hard-to-reach areas at the highest setting to destroy all moth eggs and larvae.
Prevent further infestation
In order to protect yourself from another moth infestation, there are a few things you should bear in mind:
Fit windows with fly screens
Vacuum regularly
Store unused clothing in plastic bags
Clean out, rearrange, clean and air wardrobes several times a year
only hang freshly washed clothes in the wardrobe (the smell of sweat, skin and hair dandruff attract animals)
Wash curtains, carpets and cushions regularly at 60 °C
Store flour, rice, pasta and muesli in glass or plastic containers
Line your closet with scented sachets made from lavender, laurel, cloves or cedar wood
Moth traps
Here you will find external content from Pinterest that is recommended by our editorial team. It complements the article and can be displayed and hidden again with one click.
I agree to this external content being displayed to me. Personal data may be transmitted to the provider of the content and third-party services.
Moth traps can be used for the early detection and monitoring of moth infestations. These are so-called pheromone traps, which attract male moths with their attractants. These then stick to a layer of glue. This makes it easy to determine whether the pantry or closet is infested with moths.
However, the moth traps are not a method of combating moths, but rather a way of observing how severe the infestation already is. If more than 10 moths per week stick to the trap, steps should be taken quickly to combat them.
Ichneumon wasps
Ichneumon wasps are a simple remedy for moths. You can get them easily from DIY stores or online retailers. These are small insects that target the eggs of moths. They lay their eggs in those of the moths and feed on them at the same time. As soon as all the moth eggs have been eaten, the ichneumon wasps also die.
Make your own lavender sachets
You can buy lavender sachets relatively cheaply in shops, but they are also very easy to make yourself. All you need are dried lavender flowers, a cotton cloth, a cord and a pair of scissors. If you have lavender flowers in your garden, pick them between June and August and leave them to dry upside down for about a week. The dried flowers are then stuffed into the cloth and closed with the cord. They can then be placed in the closet where they will remain fragrant for up to two years.
If moths have taken up residence in your home, this is usually very unpleasant, as it involves a lot of work to get rid of them. Because they reproduce quickly, moths can quickly become a plague and cause considerable damage to various materials. Timely action and careful moth control are therefore necessary to get rid of the pests permanently.
Fungus gnats are an annoying and well-known problem among hobby gardeners and flower lovers. The black, small flies in the potting soil can become a real nuisance within a very short time. A small infestation of flies hardly harms the plants, but if they multiply, the roots can die and start to rot, which often results in the death of the plant.
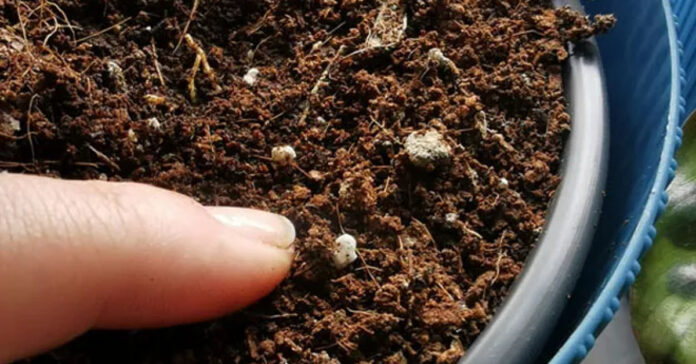
But where do the small flies in the potting soil come from? The eggs of the fungus gnat are often already contained in the potting soil you buy and you bring the pest into your home. Organic and humus substrates in particular are often infested, as they provide the perfect breeding ground for fungus gnats. Here you can find out how to combat the pests with home remedies.
Fungus gnats in the potting soil: These are the symptoms
In nature, fungus gnats help to decompose rotting plant matter on the forest floor. Because they are very successful at this and reproduce very quickly, they are dangerous for indoor and greenhouse plants. Infested plants are characterized by weak growth and hollow stems. In addition, many small midges fly around the plants and seedlings and seedlings in particular wither quickly.
Prevent fungus gnats
Fungus gnats like it damp. To prevent them, it is important to deprive them of the basis for laying their eggs. You should therefore water your plants a little more sparingly and avoid waterlogging. Only water them when the potting compost has dried out and only water particularly thirsty plants via the saucer. If there is water in the saucer, leave it there for 20 minutes and then pour it away. It can also be helpful to use substrates without soil or to switch your plants to hydroponics.
Because store-bought potting soil is often the cause of fungus gnat infestation, there are a few things to bear in mind when storing it. You should store the potting soil in a cool, dry place and keep the container closed. Also cover it with a tarpaulin to contain any infestation. To be on the safe side, you can sterilize the purchased soil before use.
You will need an oven to sterilize the potting soil. Preheat it to 85 °C, spread the soil out on a baking tray and place the tray in the oven for 30 minutes. The substrate can then be used without hesitation. As an alternative to the oven, the soil can also be heated in the microwave for 30 seconds.
You may also be interested in these articles:
Home remedies against small flies in potting soil
There are numerous methods that are supposed to help against the small insects, but only very few are really effective in combating them. Insecticides are not always the best choice, as they can also cause damage to human and animal health. There are a few home remedies you can try before resorting to chemicals:
Bird sand
An effective way to combat fungus gnats is to sprinkle the soil with a layer of bird sand. This should be at least one to two centimeters thick and kept dry. The sand draws moisture from the soil and prevents egg laying, as the surface is closed but breathable.
Tights for covering
Another way to prevent the little flies from laying their eggs in the potting soil is to cover it with tights. This prevents the fungus gnats from reproducing and they slowly die out.
Baking powder
Baking soda is a real all-rounder in the household and can also be used to control flies in potting soil. Sprinkle it on the potting soil and then spray it with a little water. The baking soda is now absorbed into the soil and is eaten by the larvae, which die due to the ingredients. Depending on the severity of the infestation, the treatment may take a little longer and must be repeated several times. However, it is gentle on the plant and very inexpensive.
Vinegar
Vinegar is also an effective household remedy against fungus gnats. Place a bowl of vinegar, water and washing-up liquid in a ratio of 1:1:1 next to the plants infested with the small flies. The animals are attracted by the smell of the vinegar and eventually drown because the detergent releases the surface tension of the water.
Kitchen herbs
Kitchen herbs such as parsley and chives are good for getting rid of small flies in the potting soil. The essential oils they contain repel fungus gnats and thus prevent them from laying eggs in the soil. To do this, chop the parsley into small pieces and spread it over the potting soil or place pots of fresh chives between the infested plants. Because the parsley dries out at some point and loses its fragrance, it must be sprinkled again and again.
Sounds unusual? Kitchen herbs help to control fungus gnats. Photo: FUNKE Digital
Never oil
Niemöl 🛒 is obtained from the seeds of the niem tree and acts as a kind of natural poison on the larvae of the fungus gnat. The active ingredient azadirachtin influences the hormone balance of the larvae so that chitin formation is disrupted. Mix the oil with water in a ratio of 1:100 and add a little washing powder. Then moisten the soil of the infested plants with the mixture.
Beneficial insects
If your plants are suffering from a very heavy fly infestation, nematodes are usually the last biological solution. These are beneficial insects that eat the eggs of the fungus gnat. They are harmless to the plant as well as to humans and animals. Nematodes (Steinernema feltiae) or bacteria (Bacillus thuringienses) are particularly suitable because they reproduce immediately and provide good long-term protection for the potting soil. You can easily administer them via the irrigation water.
Less suitable household remedies are matches, garlic, cinnamon or coffee grounds, as their effect is often too weak or they even exacerbate the problem because they cause the potting soil to become compacted and start to mold. You should also stay away from tea tree oil, as it damages the roots of the plants and they have already suffered enough from the infestation.
If you can’t get the infestation under control despite home remedies, you can of course also use chemicals or the classic yellow boards 🛒. The small flies stick to them and eventually die. This means that flies can no longer lay eggs in the potting soil and your plants can recover. However, when using chemicals, make sure that the plants are not within reach of your pets and children to avoid damage to their health.
The links marked with the shopping cart 🛒 are affiliate links. The products are researched to the best of our authors’ knowledge and some are also recommended from personal experience. If you click on such an affiliate link and buy something through it, our editorial team will receive a small commission from the online store in question. For you as a user, the price does not change and there are no additional costs. The income helps us to offer you high-quality, entertaining journalism free of charge.
On weekdays, you are not allowed to throw used glass into the bottle bank after 8 pm. This rule is widely known. But did you know that there are other pitfalls when disposing of used glass that you should avoid at all costs? For example, are broken drinking glasses allowed in the bottle bank and do the lids have to be removed from screw-top jars? And what color does blue glass belong to? Glass recycling is a good thing, but it can also be confusing. Here are the five most common mistakes when disposing of used glass.
This is how important used glass recycling is: 5 common mistakes
Used glass recycling makes an important contribution to environmental protection and sustainability. It is an easy step that everyone can take to conserve resources and protect the environment. However, you should avoid the following five mistakes at all costs:
1st mistake: Disposing of used glass with a lid
Some mistakes can be made when disposing of used glass. Photo: pixabay.com/ myesterampe
Screw caps, crown caps and other lids have no place in the bottle bank. They are themselves recyclable materials that can be recycled and therefore belong in the yellow bag.
It is true that modern systems can filter out most closures and then recycle them. However, this is not entirely loss-free and also increases the energy consumption of the system.
Depending on the location of the glass container, however, you may even be asked to dispose of your used glass with a lid. Some local authorities take this measure to prevent wasp infestations or to prevent lids from accumulating around the glass container.
2nd mistake: Disposing of drinking glasses
Not all glass is the same. To recycle used glass, it is melted down. For this to work properly, the collected glass must have the same melting point.
This is the case with old pickle jars, beer bottles or cosmetic jars. Not with normal drinking glasses, windows or light bulbs. This glass has a higher melting point.
Therefore, only used glass that was previously used as packaging for food, drinks or cosmetics should be disposed of in the glass container. Dispose of the rest in the residual waste.
You may also be interested in these articles:
3rd mistake: Rinse used glass before disposing of it
Under no circumstances should you dispose of full jars and bottles. This would make a terrible mess in the bottle bank.
On the other hand, it is also not a good idea to rinse used glass before disposing of it. After all, recycling is about conserving resources. The used glass is cleaned in the recycling plant anyway. Rinsing it at home is a double waste of energy and water.
Tip: If you want to avoid mold, you can rinse your old glass with used water: for example, with leftover pasta or mop water.
4th mistake: Do not rinse honey jars
With honey from the supermarket, however, you should definitely rinse out the jar before disposing of it in the glass container. And do it thoroughly! The reason for this is American foulbrood, which can destroy entire bee colonies. In this article you can find out more about why honey jars should be rinsed out.
Tip: Rinse the honey jar with hot milk, so you have something tasty to drink right away!
5th mistake: Ignore the color
Old glass should be turned into new glass. To do this, it is important to separate the old glass by color. Therefore, make sure that only white glass is thrown in with the white glass and brown glass with the brown glass.
But what about used glass whose color cannot be clearly assigned? For example, blue glass? Blue waste glass or waste glass of indeterminate color belongs to green glass. This is because green glass is the least likely to show whether incorrect colors have been smuggled in.
If you dispose of your used glass correctly, you are making an important contribution to environmental protection. And now you also know which mistakes you should avoid in the future.
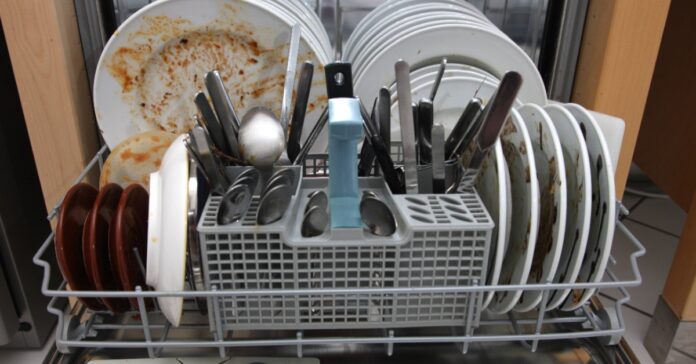
In many households, the dishwasher is in use several times a week. However, contrary to popular belief, the machine does not clean itself during the wash cycle. Although it may seem obvious that the combination of warm water and dishwasher detergent cleans the inside of the appliance, this is (unfortunately) not the case. If your dishwasher smells after the wash cycle and the dishes are no longer really clean, you should clean your dishwasher – preferably with vinegar!
Simple household remedy ensures cleanliness
Cleaning household appliances is a rather unpopular task. Or when was the last time you cleaned your vacuum cleaner? And the dishwasher should also be thoroughly rinsed at regular intervals – at best every 4 to 8 weeks. There are special products on the market that promise hygienic cleanliness. The best cleaning agent is already in your cupboard!
If your dishwasher is smelly, a simple household remedy will help! Photo: IMAGO / Jochen Tack
All you need to clean your dishwasher is a little vinegar. It is best to use table vinegar, as the acid concentration of table vinegar is quite low at 5% – and it is also diluted by the rinsing water! This prevents damage to the rubber seals of your machine. You can simply pour the vinegar into the detergent compartment.
You may also be interested in these articles:
Cleaning the dishwasher with vinegar: How this popular household remedy works
Vinegar has always been known as a powerful limescale remover. And so it also ensures that limescale deposits inside the dishwasher are gently removed. Select a program with high temperatures for the wash cycle, the dishwasher should be empty. You should avoid pre-rinsing.
To enhance the effect of the vinegar, you can sprinkle two tablespoons of baking soda on the bottom of your empty dishwasher. You’ll be surprised how clean and shiny your dishwasher will be after the vinegar wash cycle! Now nothing stands in the way of clean dishes.
FAQ
Can I clean the dishwasher with a tab while it is idle?
Yes, you can clean the dishwasher with a tab while it is idling. This helps to remove deposits or odors. It is important to run the cleaner at a high temperature to achieve optimum results.
Can you clean the dishwasher with citric acid?
Yes, you can use citric acid to clean the dishwasher. Citric acid helps to dissolve limescale and grease. Simply add some citric acid powder or solution to the detergent compartment and start a hot cleaning cycle on empty. However, be careful not to use too much, as the acidic environment could damage sensitive parts.
Is vinegar harmful to the dishwasher?
Vinegar can damage the seals and rubber parts of the dishwasher if used frequently. Although it is an effective cleaning agent against limescale and grease, its acidity could cause material wear in the long term. For occasional cleaning, it is usually harmless in moderate quantities. If you want to use vinegar, it is best to choose the diluted version and make sure that it does not get directly onto sensitive parts.
Tomatoes are one of the most versatile foods in the kitchen. Whether as a base for sauces, in salads or simply on their own – they are a real all-rounder. But how do you ensure that they retain their full flavor and nothing goes to waste? With a few simple tips, you can store and preserve your tomatoes in the best possible way.
It’s better not to store tomatoes in the fridge
Tomatoes like it neither too cold nor too warm. The Refrigerator is therefore not the best place for them. At temperatures below 10 °C they lose their aroma and their consistency changes. Instead of being crunchy and juicy, they quickly become mealy. It is better to store them in a cool, shady place, for example in the pantry or cellar.
Make sure that the tomatoes are not stacked on top of each other. This will prevent bruising, which can cause the fruit to spoil more quickly. You should also keep them away from other fruit and vegetables. Tomatoes release ethylene, a gas that accelerates the ripening process. As a result, apples, bananas and cucumbers ripen faster and spoil sooner. At the same time, tomatoes easily absorb foreign odors, which can affect their taste. If you store them correctly, tomatoes will stay fresh for up to a week.
How to preserve tomatoes for a long time
Sometimes tomatoes ripen faster than you can use them. In such cases, it is worth preserving them. One simple method is to Preserving. To do this, peel the tomatoes, put them in sterile jars and add a little salt and citric acid. This way you can preserve them for several months and always have a base for soups, sauces or stews to hand.
Also the Drying is a good option. Cut the tomatoes into halves, remove the seeds and dry them at a low temperature in the oven or dehydrator. You can then marinate the dried tomatoes in oil and season with herbs. This enhances the flavor and is particularly suitable for smaller varieties such as cherry tomatoes. If you’re in a hurry, you can puree the tomatoes and freeze them. This gives you a practical base for many dishes later on.
You may also be interested in these articles:
It’s all about the right storage
The way you store tomatoes not only affects their taste, but also their nutrient content. When stored optimally, the vitamin C content is largely preserved. Did you know that 100 g of tomatoes contain around 20 mg of vitamin C? This makes them a valuable addition to a balanced diet.
However, improper storage can cause the fruit to lose vitamins. This doesn’t just apply to tomatoes, by the way. Other sensitive foods such as peppers or avocados also benefit from the right conditions.
This article was partly produced with machine support and carefully checked by the editorial team before publication.
Sometimes chocolate stashes accumulate faster than you can enjoy them. Whether after holidays, birthdays or a special vacation – there are many reasons why you might want to keep chocolate for longer. But what is the best way to do this? Can you freeze chocolate without it losing its taste or quality? Here you can find out what you should look out for and what alternatives are available.
Freezing chocolate: Step by step
Chocolate is a very durable food by nature. If stored correctly, it often remains edible for months. Nevertheless, freezing can be useful, for example for delicate chocolates, large quantities of leftovers or special varieties that you want to save for later. To ensure that the chocolate does not Quality it depends on the right preparation.
Wrap the chocolate airtightbefore you put them in the freezer. Cling film or a freezer bag are particularly suitable for this. This protects them from moisture and air, which could otherwise change the surface. When chocolate is exposed to temperature fluctuations, it often forms a whitish coating, the so-called fat bloom.
Chocolate will keep for several months in the freezer. However, the consistency can change slightly after defrosting. Especially with milk or white chocolate, which is more Milk fats there is a risk that the taste will suffer slightly. Dark chocolate is more robust in this respect and usually retains its quality better.
White spots on chocolate: what’s behind them
You know those mysterious white spots that sometimes appear on your favorite chocolate bar? Don’t panic – it’s not mold! What you’re seeing is what experts call “fat bloom” or “sugar bloom”. This phenomenon occurs when your chocolate has been exposed to temperature fluctuations – including freezing. When warm, the cocoa butter components separate from the rest and migrate to the surface, where they crystallize on cooling and form the whitish coating. Something similar happens with sugar when stored in damp conditions. The good news is that the chocolate is still perfectly edible! The taste may suffer slightly, but it is definitely safe for health.
You may also be interested in these articles:
Storing chocolate properly: the alternative to freezing
In many cases, you don’t need to freeze chocolate to keep it fresh for a long time. A cool, dry and dark environment is often sufficient. Temperatures between 12 and 18 degrees Celsius are ideal. A storage cupboard or cellar are ideal for this. It is important that you protect the chocolate from direct light and heat, as these can also lead to changes in the surface.
If you want to store an opened chocolate bar, wrap it well and place it in a sealable tin. This will prevent it from absorbing foreign odors. You should consume particularly delicate chocolates or chocolates with creamy fillings more quickly, as they have a shorter shelf life than simple chocolate bars.
Are the nutrients preserved?
You don’t need to worry about the nutrients when freezing chocolate. Minerals such as magnesium or potassium, which are contained in cocoa, remain stable. Vitamins are also not destroyed by the cold. What can change slightly, however, is the consistency and – depending on the variety – the taste.
Incidentally, the principle of freezing also works for other foodsthat you want to preserve for longer. Butter, bread and cheese can also be frozen easily if you wrap them well. Fruit such as berries or bananas are best frozen raw to preserve flavor and vitamins.
Checklist: Freezing chocolate made easy
Wrap chocolate airtight in cling film or freezer bag
Freeze at a constant -18°C for an even temperature
Leave in original packaging if possible for additional protection
Dark chocolate is better suited for freezing than light varieties
Slow defrosting in the fridge for better texture retention
Allow to rest at room temperature for at least 1 hour before eating
Consume within a few days after defrosting
Do not refreeze frozen chocolate
Alternative: Cool storage at 12-18°C in a dark environment
Chocolate bars can generally be kept for several months without freezing
This article was partly produced with the help of a machine and carefully checked by the editorial team before publication.
Doing the laundry, wiping out the fridge, cleaning the windows or making the beds – cleaning and keeping the household tidy are among our least favorite everyday tasks. We would rather fill our free time with nice things – but we don’t want to live in filth either. The compromise is usually a jam-packed weekend doing all the housework that was left undone during the working week. But it can be really easy to keep your own four walls tidy! With a well-thought-out cleaning plan and a bit of a system, the chaos can be quickly tamed. Find out here how you can create your own personal cleaning plan to finally gain more (free) time for the finer things in life.
Why a cleaning plan makes sense
Ticking off completed tasks from a to-do list gives most people a good feeling. The joy of having completed a section of a larger whole motivates us to take the next step. And so creating a cleaning plan can also motivate you to declare war on the chaos in your home.
Household chores should be done at different times. Photo: IMAGO / Steinach
Creating a cleaning plan has many advantages:
It creates structure and an overview.
Cleaning becomes a routine instead of a tedious major project at the weekend.
Housework is spread over several days.
You save time and nerves in the long term.
Your home stays constantly clean.
How to structure your cleaning schedule
An effective cleaning schedule takes into account different time intervals, as there are household tasks that need to be done more regularly than others. The appropriate time intervals are defined by your personal sense of cleanliness. If fresh bed linen is important to you, you should change it weekly instead of just once a month. For small households, on the other hand, it may be sufficient to only take out the garbage once a week. The following overview can be a rough guide if you want to create your own personal cleaning schedule:
Tasks that should be completed daily (basic order)
You can keep the chaos in your home in check with just a few simple steps. You should do this every day:
air and make your bed
wash the dishes or load and unload the dishwasher
wipe down the surfaces in the kitchen and bathroom
Tasks that should be done twice a week
This time interval is more of a rough guide. Depending on how many people live in your household, it may be necessary to vacuum more frequently, for example. You should vacuum every three days:
clean the toilet
vacuum the apartment
take out the garbage
do the laundry
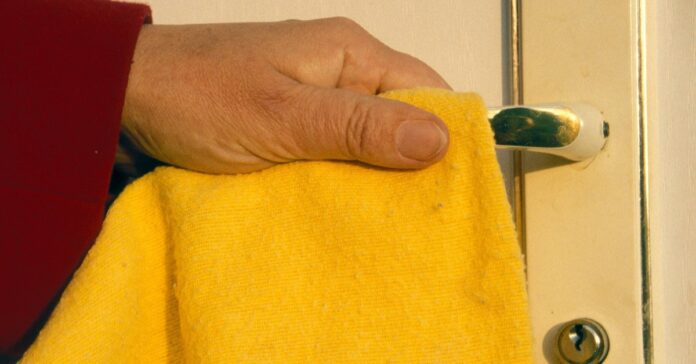
Wipe down all door handles (often forgotten, but they are a germ trap!)
Create a cleaning plan: Weekly tasks
These weekly tasks should also be included in your cleaning plan. You should do them once a week:
Dust thoroughly
mop the floors
change the towels in the bathroom and kitchen
clean the bathroom thoroughly
clean the mirrors in the apartment
Tasks that should be done monthly
For basic hygiene, you should do this once a month:
change your bed linen
knock out the carpets
vacuum the upholstered furniture
clean the refrigerator
Quarterly household tasks
These household tasks are more time-consuming and are therefore often put on the back burner. However, they should not be missing from your cleaning schedule. Every three months you should:
clean all windows
clean the washing machine
clean the oven
Wipe down all doors
Descale your kitchen appliances
wipe out the kitchen cupboards
You may also be interested in these articles:
Spring cleaning is due once a year
The term “spring cleaning” covers tasks that only need to be done once a year. These include
washing curtains and drapes
cleaning comforters, pillows and mattresses
sorting out your clothes
polishing your wooden furniture
cleaning the extractor hood
defrosting your fridge and freezer
Thoroughly cleaning the carpets
Tips for a successful cleaning plan
Admittedly, that’s quite a long list! But instead of being demotivated by it, you’ll soon realize that the regular tasks will come easily to you. If you integrate them into your daily routine, they will no longer feel like housework. The following tips can help you implement your cleaning plan:
Be realisticThink about how much time you can and want to spend cleaning.
Consider your life situationHouseholds with children or pets usually need more intensive cleaning routines – but also plan enough family time!
Divide the tasks intoIn multi-person households, it is worth dividing up the tasks.
Use technologySmart cleaning robots and cleaning schedule apps can help you stay on top of things.
Have the right cleaning products ready: Everything goes faster with the right equipment.
Schedule fixed cleaning times: Set specific days or times of day when you do the respective tasks. For example, you can wipe over the bathroom shelves and the wash basin tap while brushing your teeth.
Reward yourselfAfter the work is done, you can be proud of yourself and do something good for yourself!
Creating a cleaning plan made easy
When creating a cleaning schedule, it is important that you pay attention to your individual needs and design it according to your personal taste. Whether you keep it digitally or prefer to hang a printed schedule on the fridge – the important thing is that it suits you and your everyday life.
With a well-thought-out cleaning plan, annoying house cleaning becomes a manageable routine. You’ll be amazed at how much time and stress you’ll save if you do small tasks regularly instead of putting everything off. So, get to work on your cleaning plan – your future, more relaxed self will thank you!
With the start of the warm season, the first mosquitoes are already on the move. The blood-sucking pests, which can really spoil your evening in summer or buzz around your head at night and rob you of your sleep, have probably not been missed by anyone. All the worse that a NABU expert is now warning of a mosquito plague in summer 2025. Read here what’s behind this prediction.
Is there a threat of a mosquito plague this summer?
The south and southwest of Germany in particular are currently experiencing ideal breeding conditions for mosquitoes – after weeks of rain, it is now warm and summery. “All the rain has created pools or puddles that are ideal for laying eggs,” NABU expert Julian Heiermann told t-online. According to the expert, it could be a very mosquito-filled summer – a mosquito plague is imminent!
Is there a threat of a mosquito plague this summer? Photo: IMAGO / ITAR-TASS
The short, mild winter was also favorable to the pests. In spring, it was initially dry in many places and the animals hardly laid any eggs. However, the insect expert knows that the mosquitoes will be able to catch up by now at the latest. The pools of water that have formed as a result of the rain do not dry out immediately, even at higher temperatures. This means that the brood has a good chance of surviving in these places.
Incidentally, the blood-sucking pests that make life difficult for humans and animals in summer are exclusively female mosquitoes. They need the protein contained in blood to form and lay eggs after fertilization. This means that mosquitoes cannot reproduce without blood. But wouldn’t that be a real relief in summer?
Mosquitoes are important for the ecosystem
As annoying as the biting pests are, NABU also informs us that mosquitoes make a crucial contribution to our ecosystem. Mosquitoes and their larvae are important prey for other animals, such as fish, amphibians, dragonflies and birds. If mosquitoes were to disappear from the ecosystem, this would also have far-reaching consequences for other animals.
Did you know that mosquitoes also make an important contribution to the pollination of plants? Mosquito expert Doreen Werner told t-online: “Everyone always talks about bees and bumblebees. But the large mass of mosquitoes and flies do about the same amount of pollination.” According to the expert, midge larvae living in the soil also help with the decomposition of leaves and contribute to the formation of humus.
You may also be interested in these articles:
Nature created mosquitoes for a reason – you should always keep this in mind, even if you are threatened by a mosquito plague this summer. Maybe you’ll be lucky and the biting pests will leave you in peace for the most part. Otherwise, here are 6 preventative home remedies to ward off mosquitoes.